Documentation Tool Tutorial
The Documentation tool can be used to create form wizards and outputs a document when the user has reach the end of the wizard. The Documentation Tool is fully responsive and works great on smaller screens as well as on your desktop.
In this tutorial you will learn:
- When to use the Documentation Tool
- How to create form wizards using the Documentation Tool
Click the "Get started" button to explore all of the possible ways to use H5P!
Example
Below is the Documentation Tool which we are going to create in this tutorial:
When to use the Documentation Tool
The Documentation Tool content type aims to make it ease creating assessment wizards for goal-driven activities. It can also be used as a form wizard. While editing, the author can add multiple steps to the wizard. In each step, the author can define which content goes into that step. Content can be plain text, input fields, goals definition and goals assessment.
Once published, the user will be taken through the steps of the wizard. On the last step of the wizard, the user can generate a document with all the input that has been submitted. This document can be downloaded.
Step 1: Topic
In this tutorial, we are going to create the Documentation Tool mentioned in the above example
There are four different types of elements which document how you work on your project in a structured way, so we'll add these following elements in upcoming steps.
Step 2: Creating a Documentation Tool
Select the New content option and choose Documentation Tool from the list of Content types:
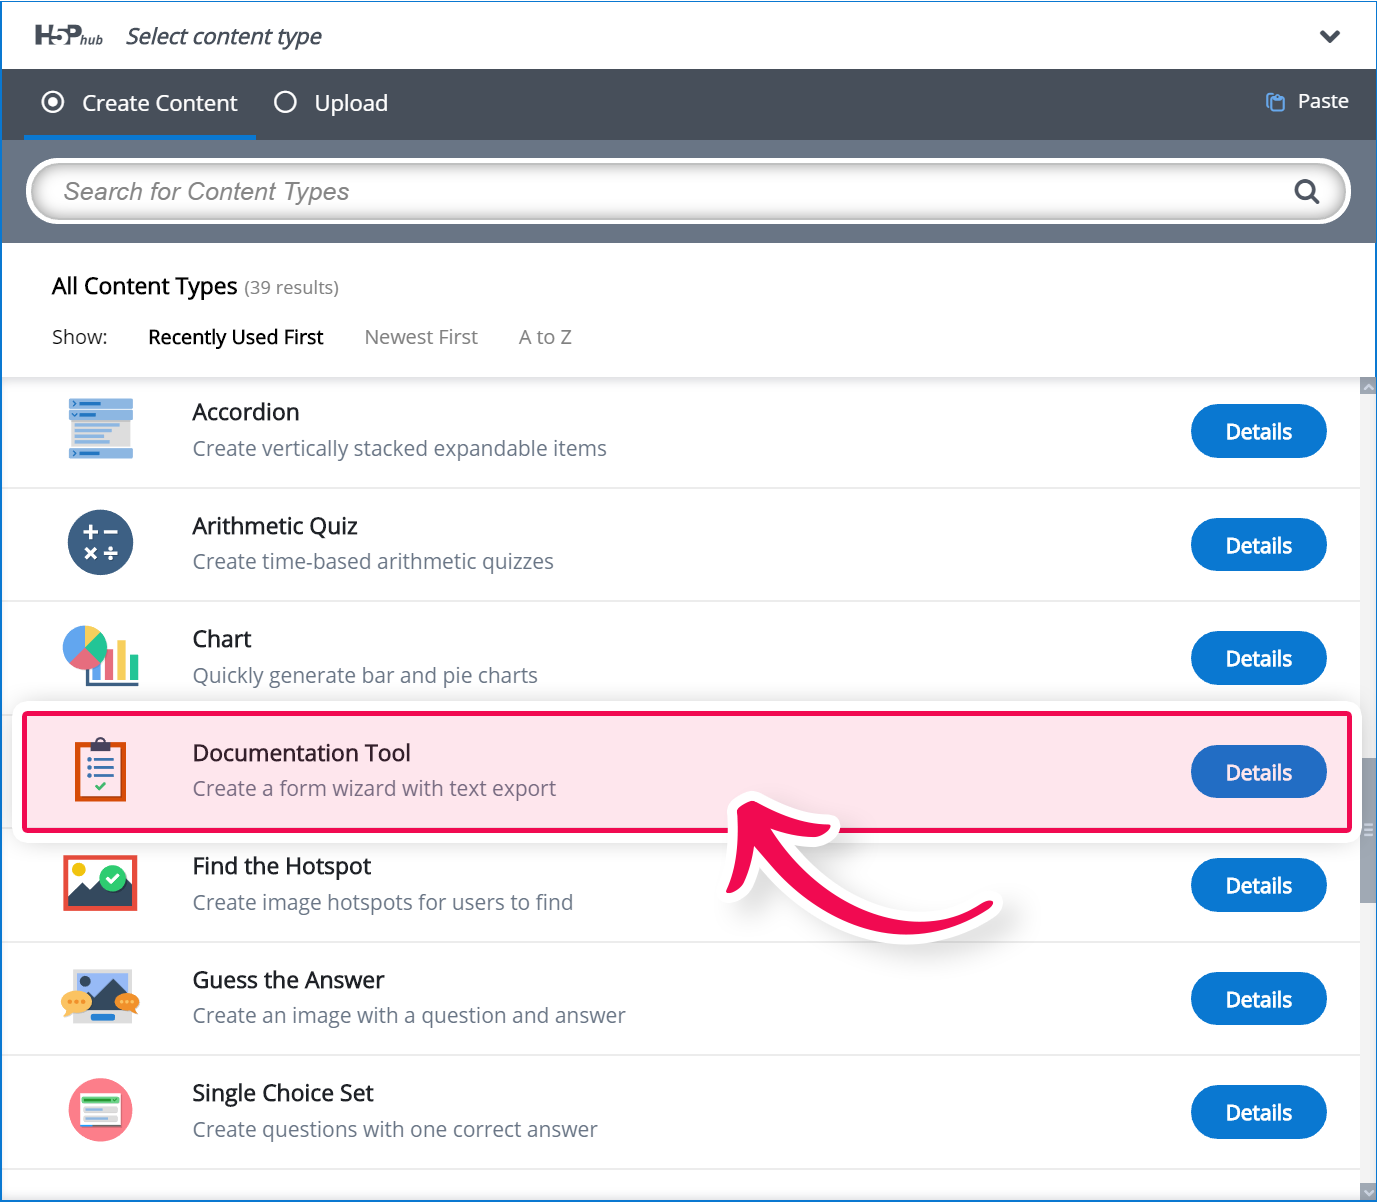
Step 3: Documentation Tool Editor
The Documentation Tool editor should now appear and it looks like this: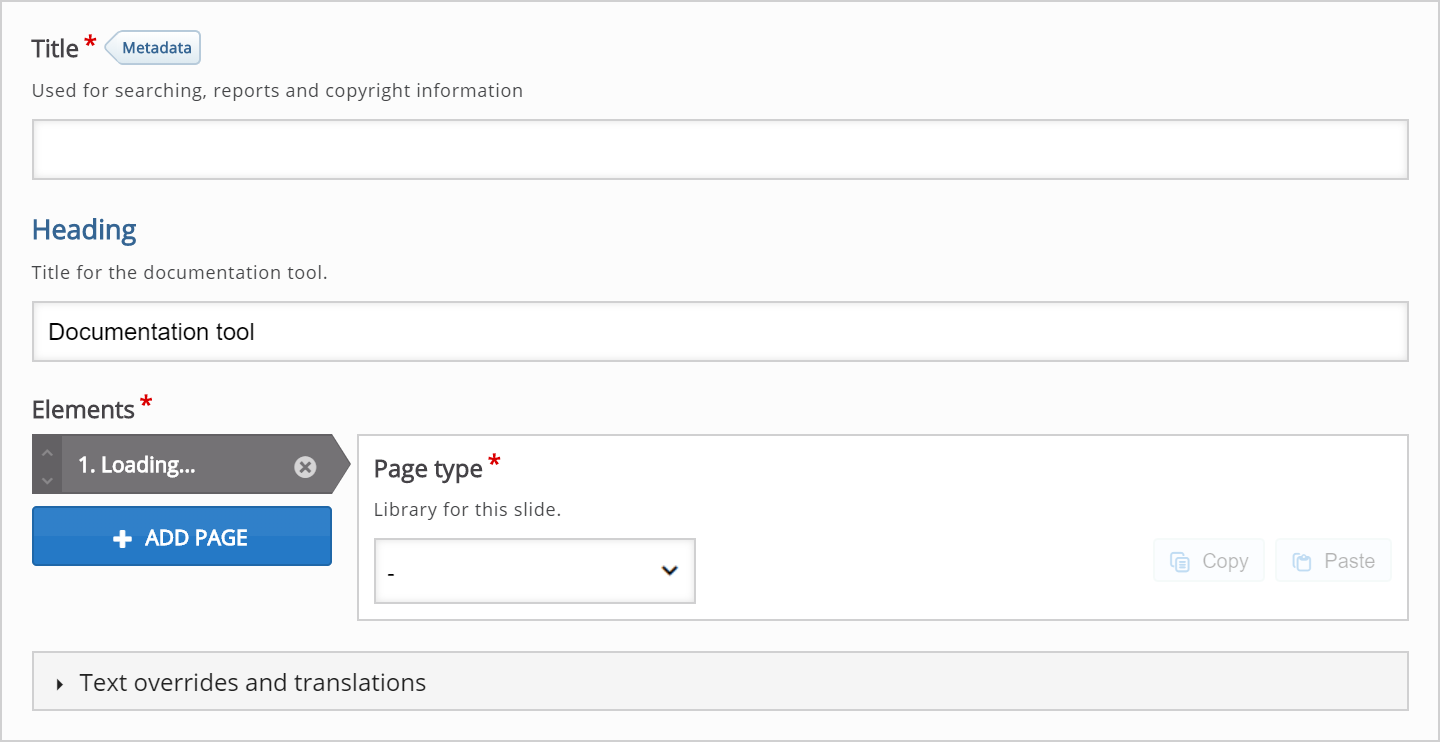
Step 4: Title and Heading
Type the following text in the Title field: "Documentation tool". The Heading will be displayed always throughout the tool even when you navigate to different pages. Type the following text in the Heading field: "Document your project"
Step 5: Elements
Here, we'll add the actual pages that the Documentation Tool consists of. In this tutorial, we'll add four types of pages:
- Standard Page
- Goals Page
- Goals Assessment Page
- Export Document Page
When the Documentation Tool editor is launched, only one undefined content type is displayed below the Elements header. You will have something like this: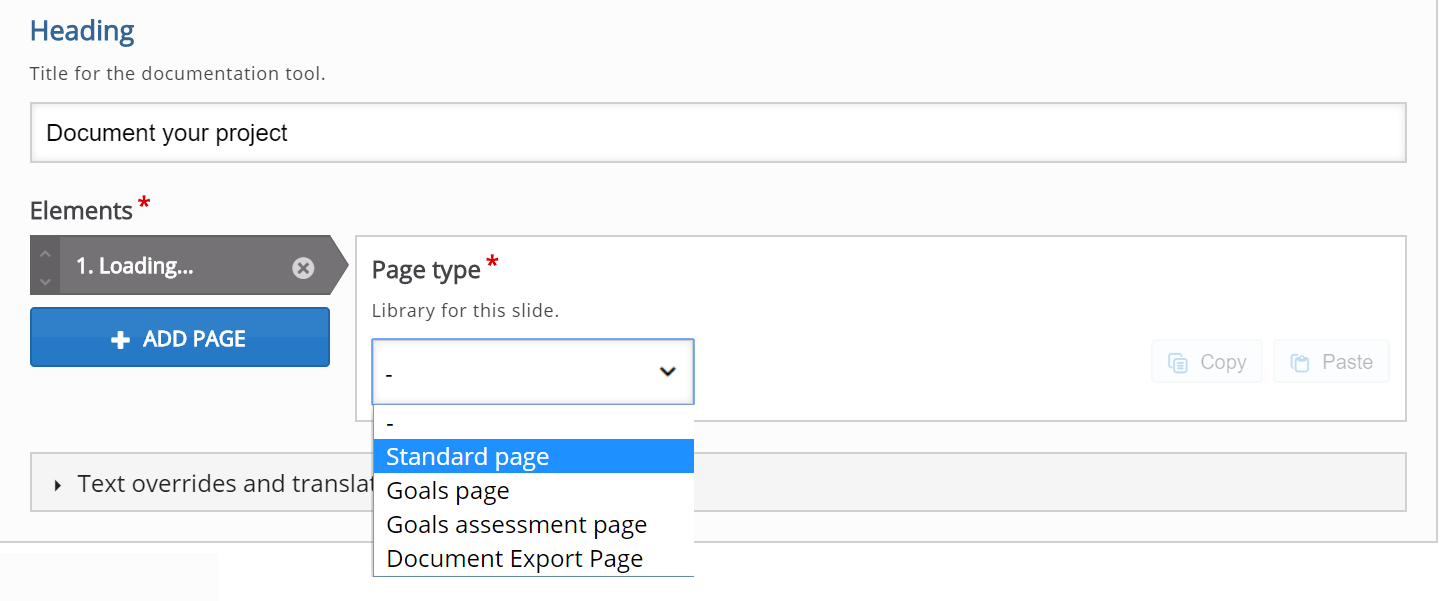
Step 6: Add Standard Page
In the Content type dropdown, select Standard page. This will load the Standard Page editor. We will add the exact same content as in the Documentation Tool mentioned in the above example. You should have now something like this: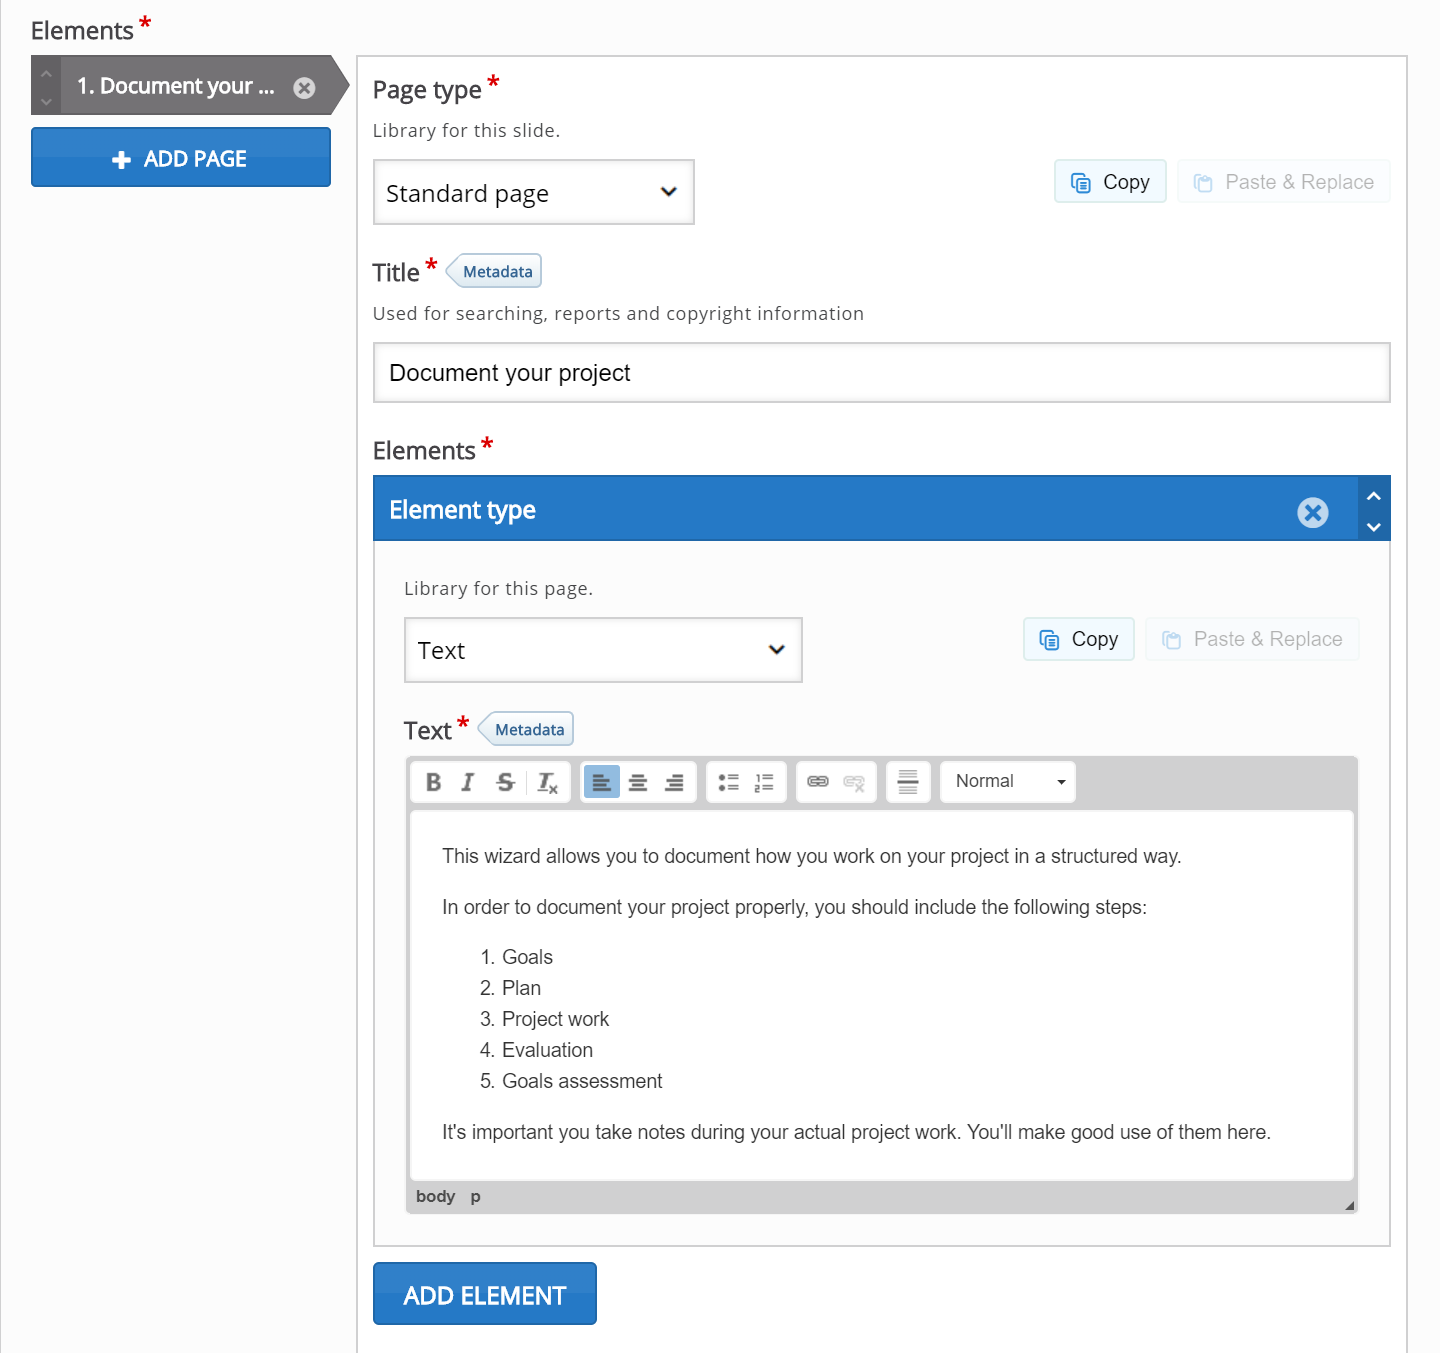
Press the Add element button to add another content type as ‘Text input field editor element’. You should have something like this now: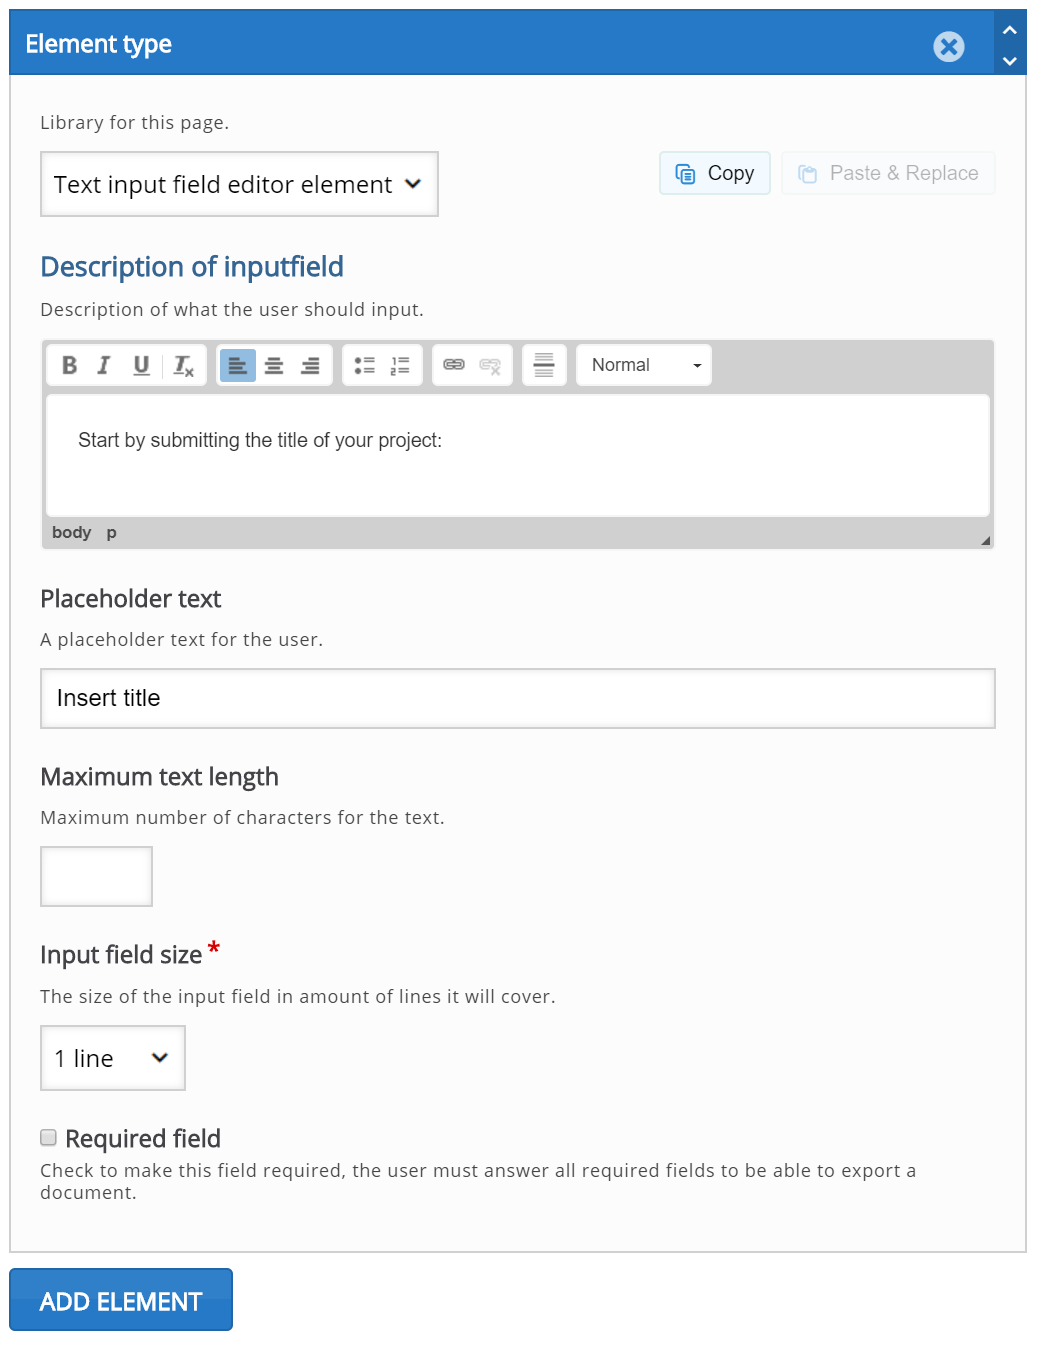
Press the Add element button to add two more content type as ‘Text input field editor element’. You should have something like this now: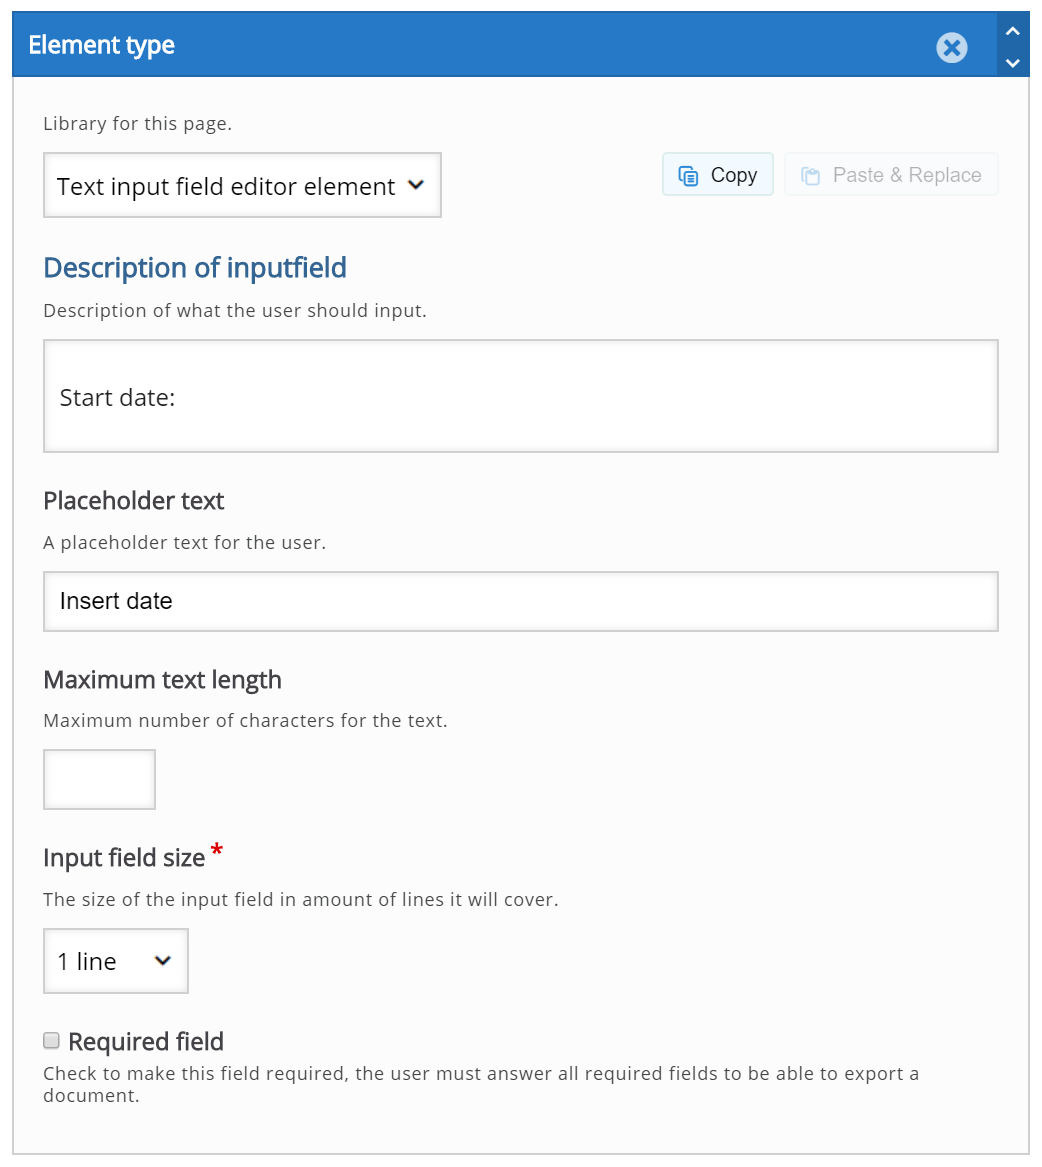
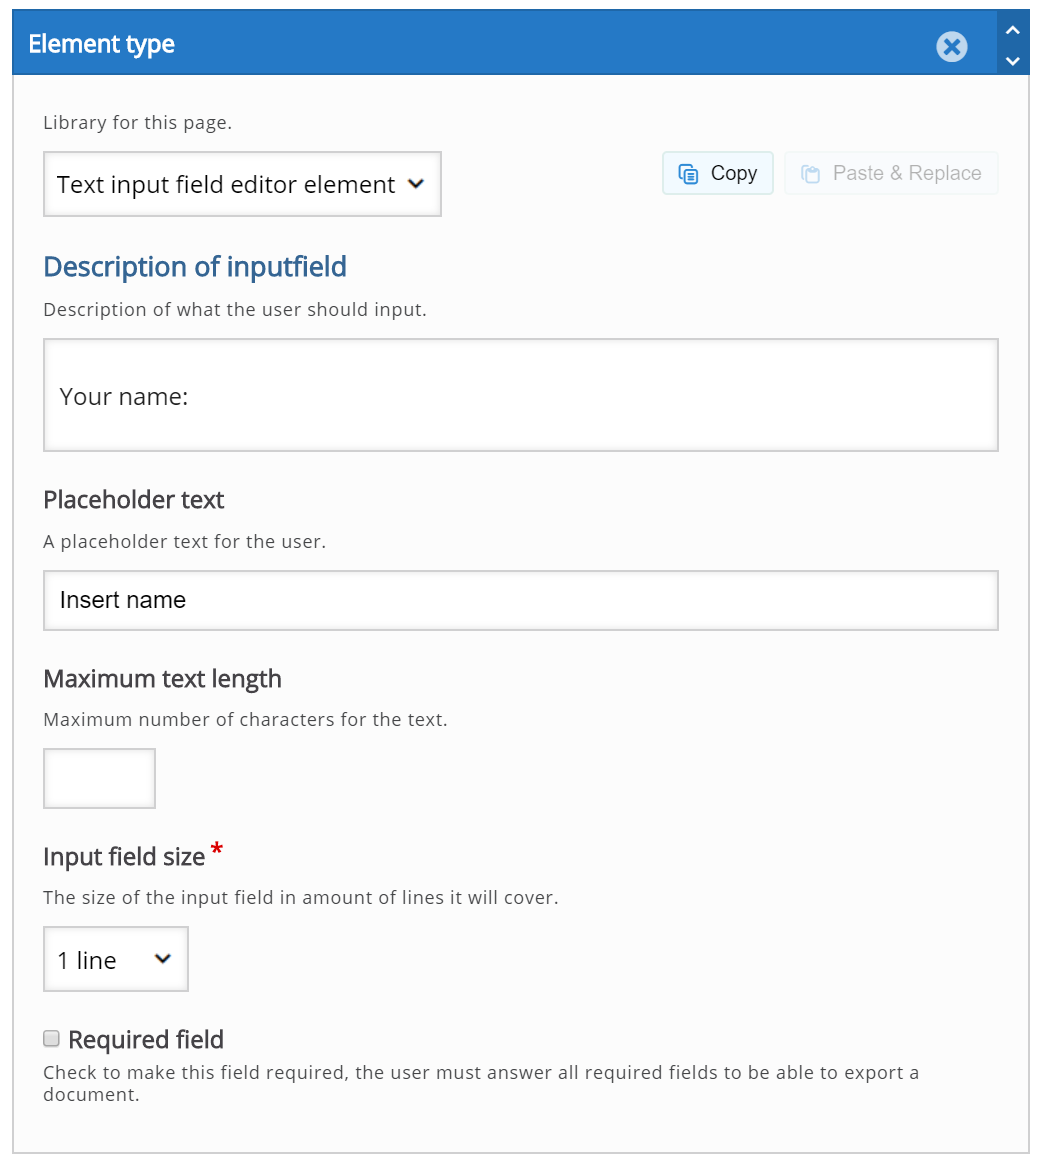
Step 7: Add Goals Page
Press the Add Page button to add another page to the Documentation Tool. This time, we'll choose Goals Page from the drop-down menu. The Goals Page editor will now appear. Add the exact same content for Goals Page as in the Documentation Tool mentioned in the above example. After adding content to the Goals Page you should have something like this: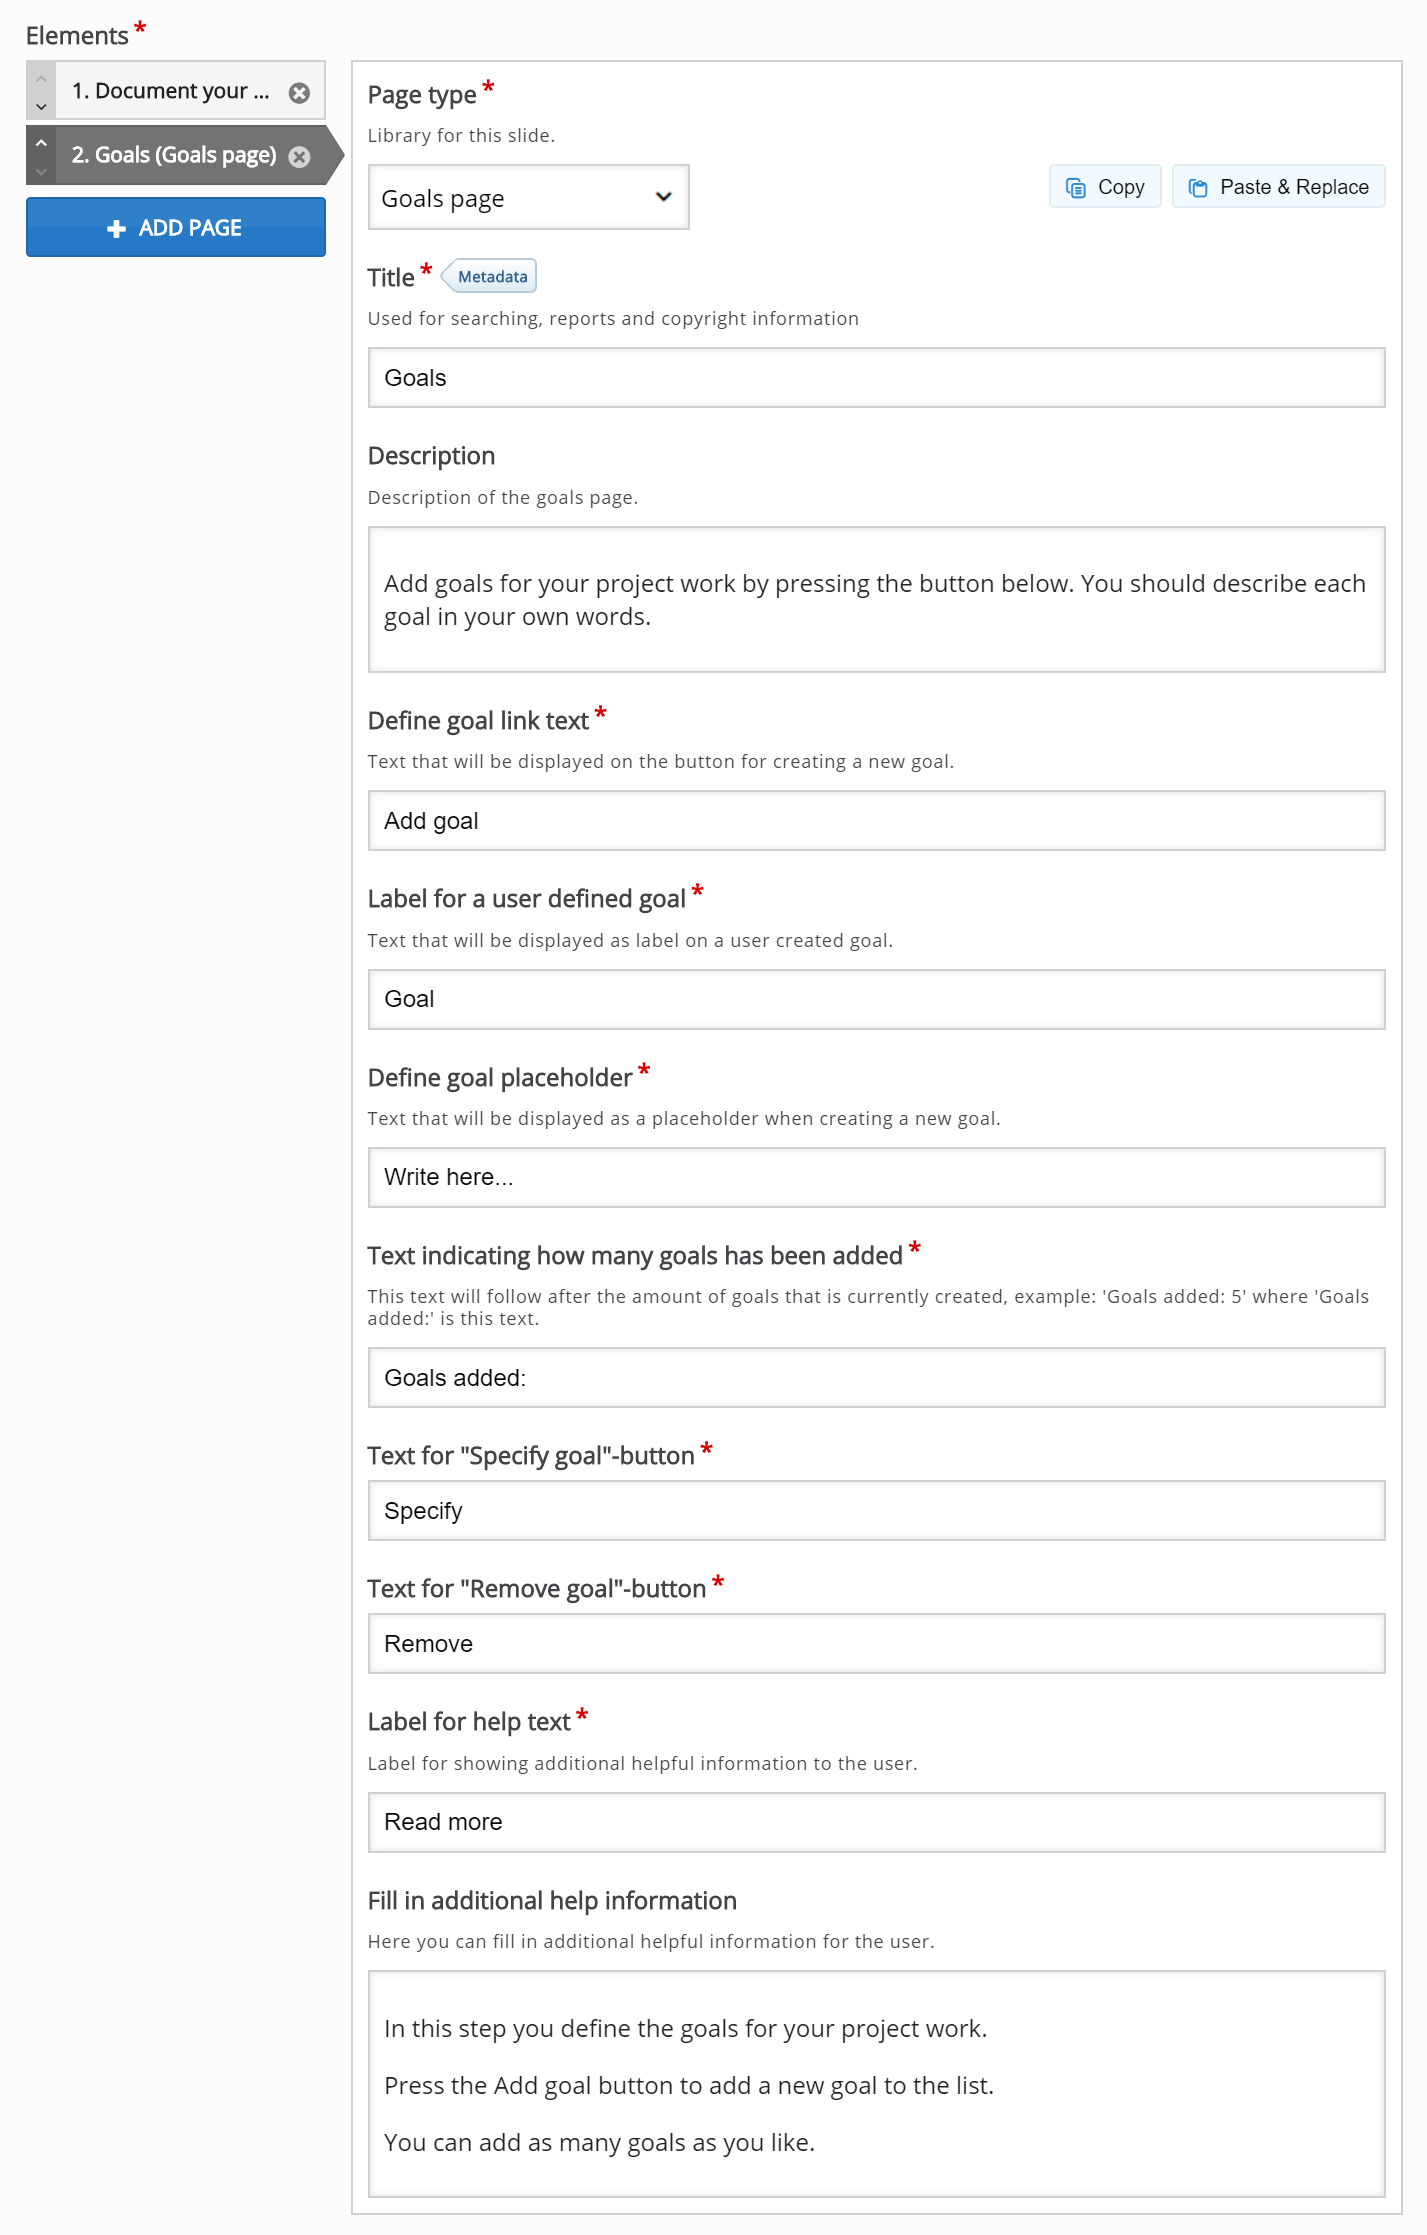
Step 8: Add Standard Page
Press the Add Page button to add another page to the Documentation Tool. This time, we'll choose Standard Page from the drop-down menu. The Standard Page editor will now appear. Add the exact same content for Standard Page as in the Documentation Tool mentioned in the above example. After adding content to the Standard Page you should have something like this:
Step 9: Add Standard Page
Press the Add Page button to add another page to the Documentation Tool. This time, we'll choose Standard Page from the drop-down menu. The Standard Page editor will now appear. Add the exact same content for Standard Page as in the Documentation Tool mentioned in the above example. After adding content to the Standard Page you should have something like this:
Step 10: Add Standard Page
Press the Add Page button to add another page to the Documentation Tool. This time, we'll choose Standard Page from the drop-down menu. The Standard Page editor will now appear. Add the exact same content for Standard Page as in the Documentation Tool mentioned in the above example. After adding content to the Standard Page you should have something like this: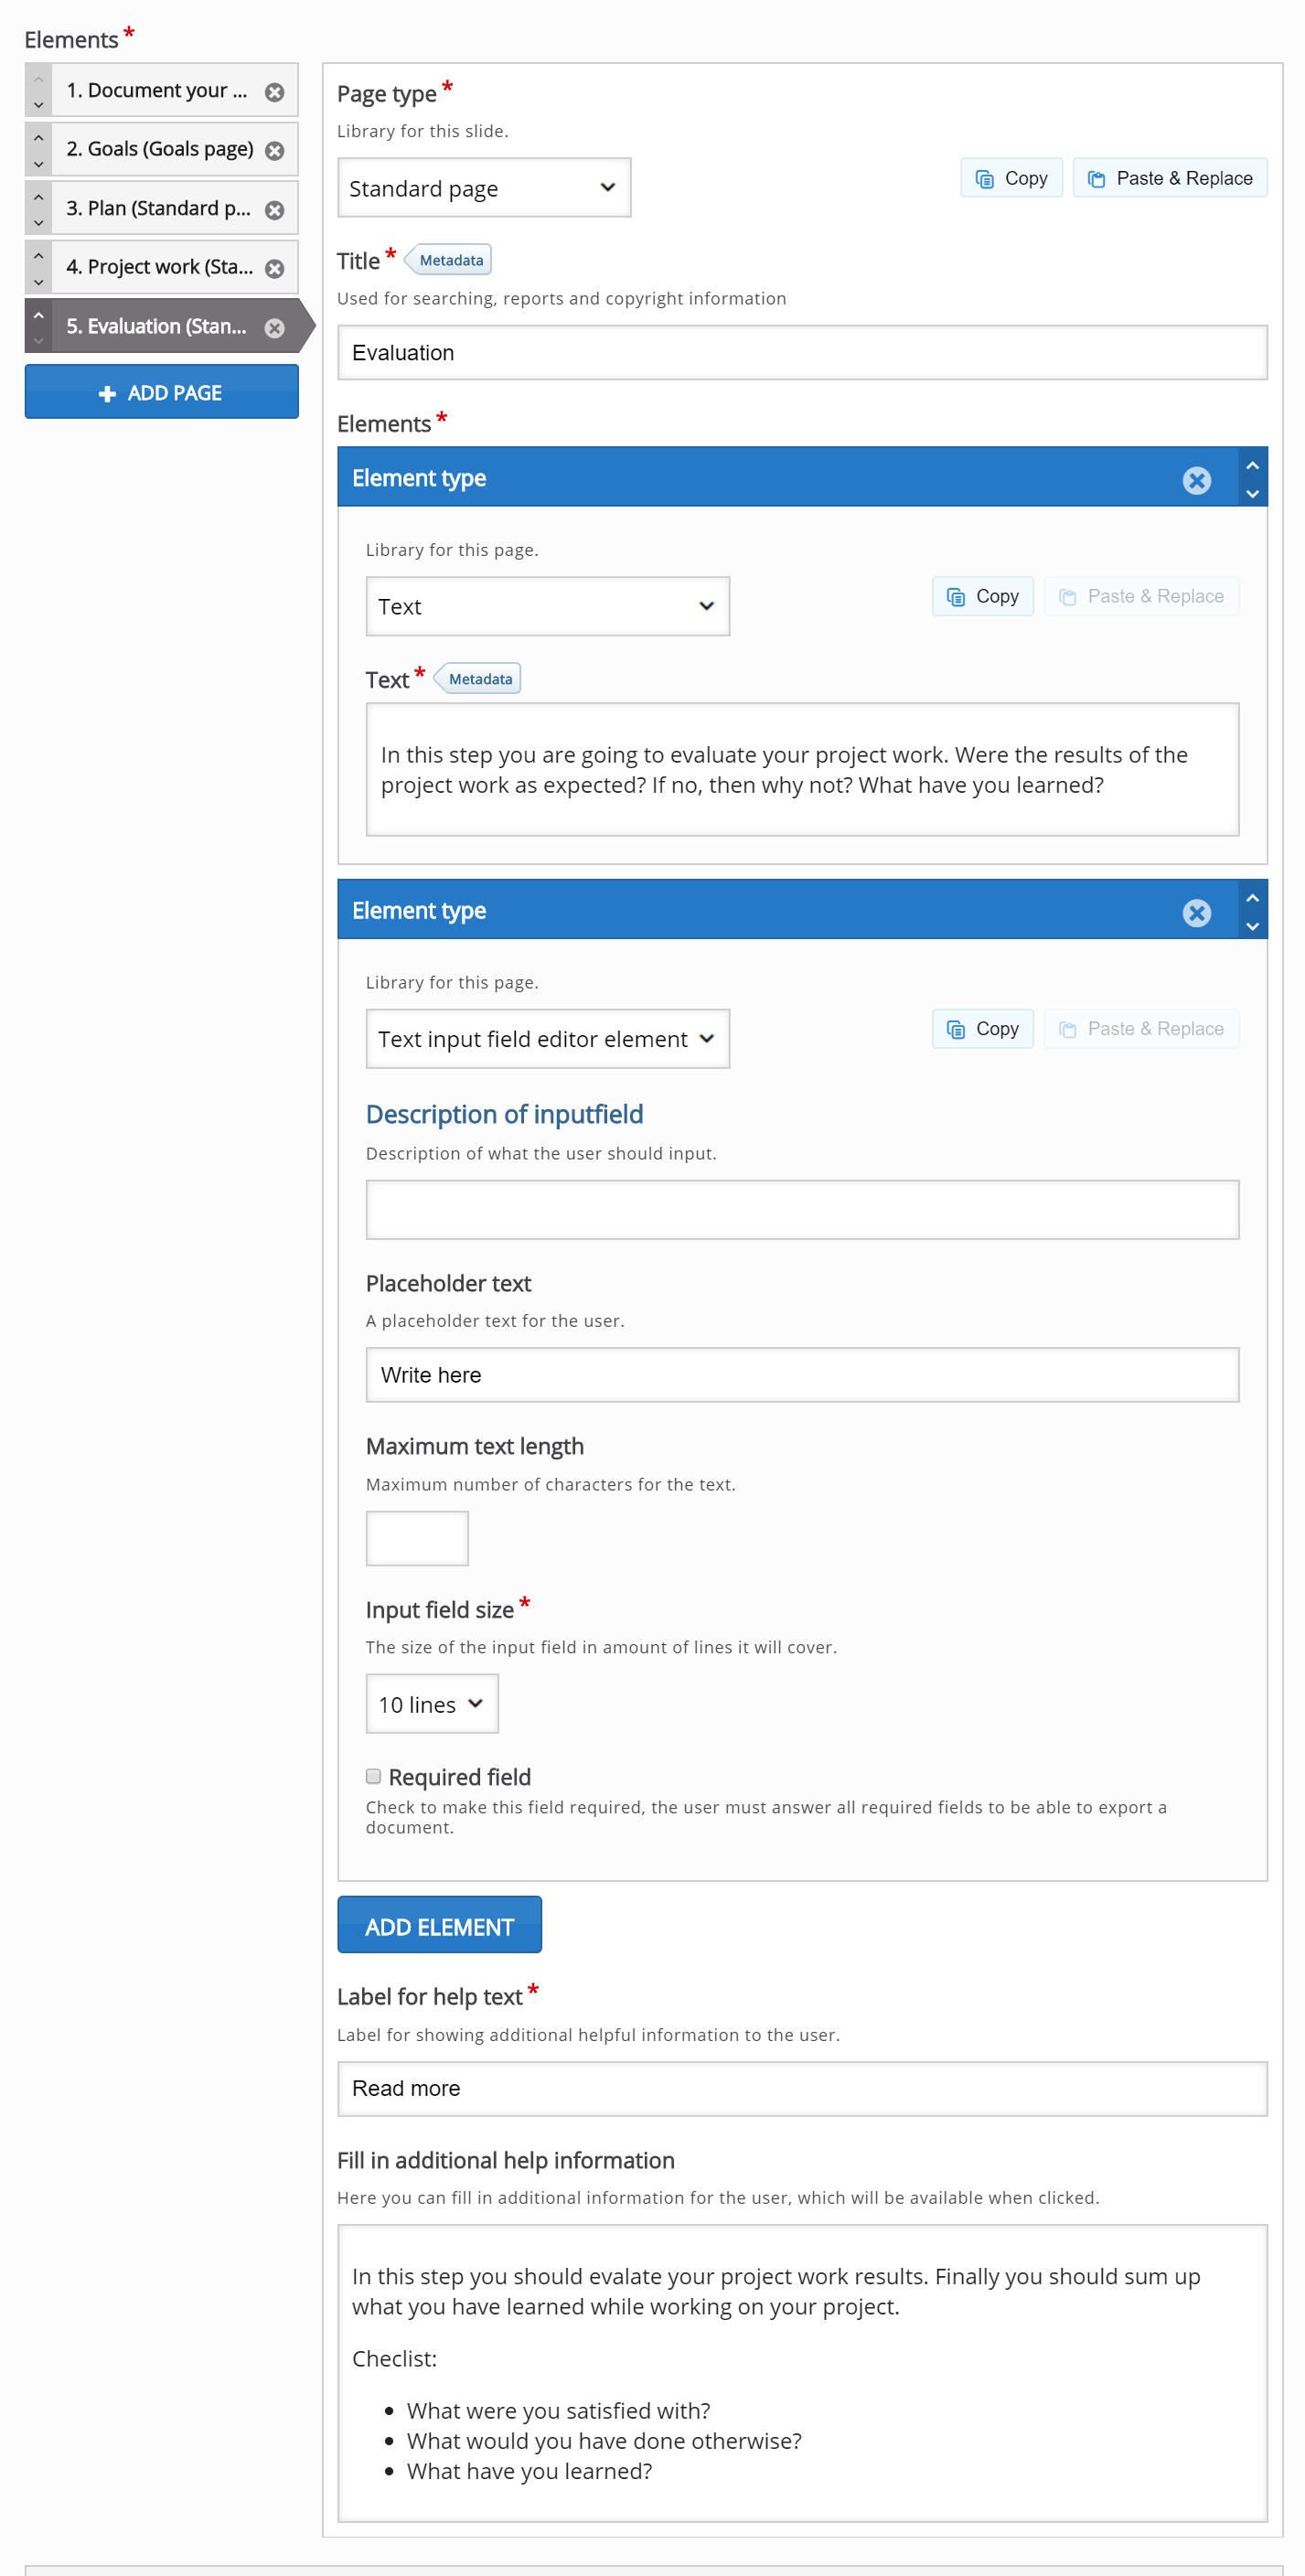
Step 11: Add Goals Assessment Page
Press the Add Page button to add another page to the Documentation Tool. This time, we'll choose Goals Assessment Page from the drop-down menu. The Goals Assessment Page editor will now appear. Add the exact same content for Goals Assessment Page as in the Documentation Tool mentioned in the above example. After adding content to the Goals Assessment Page you should have something like this: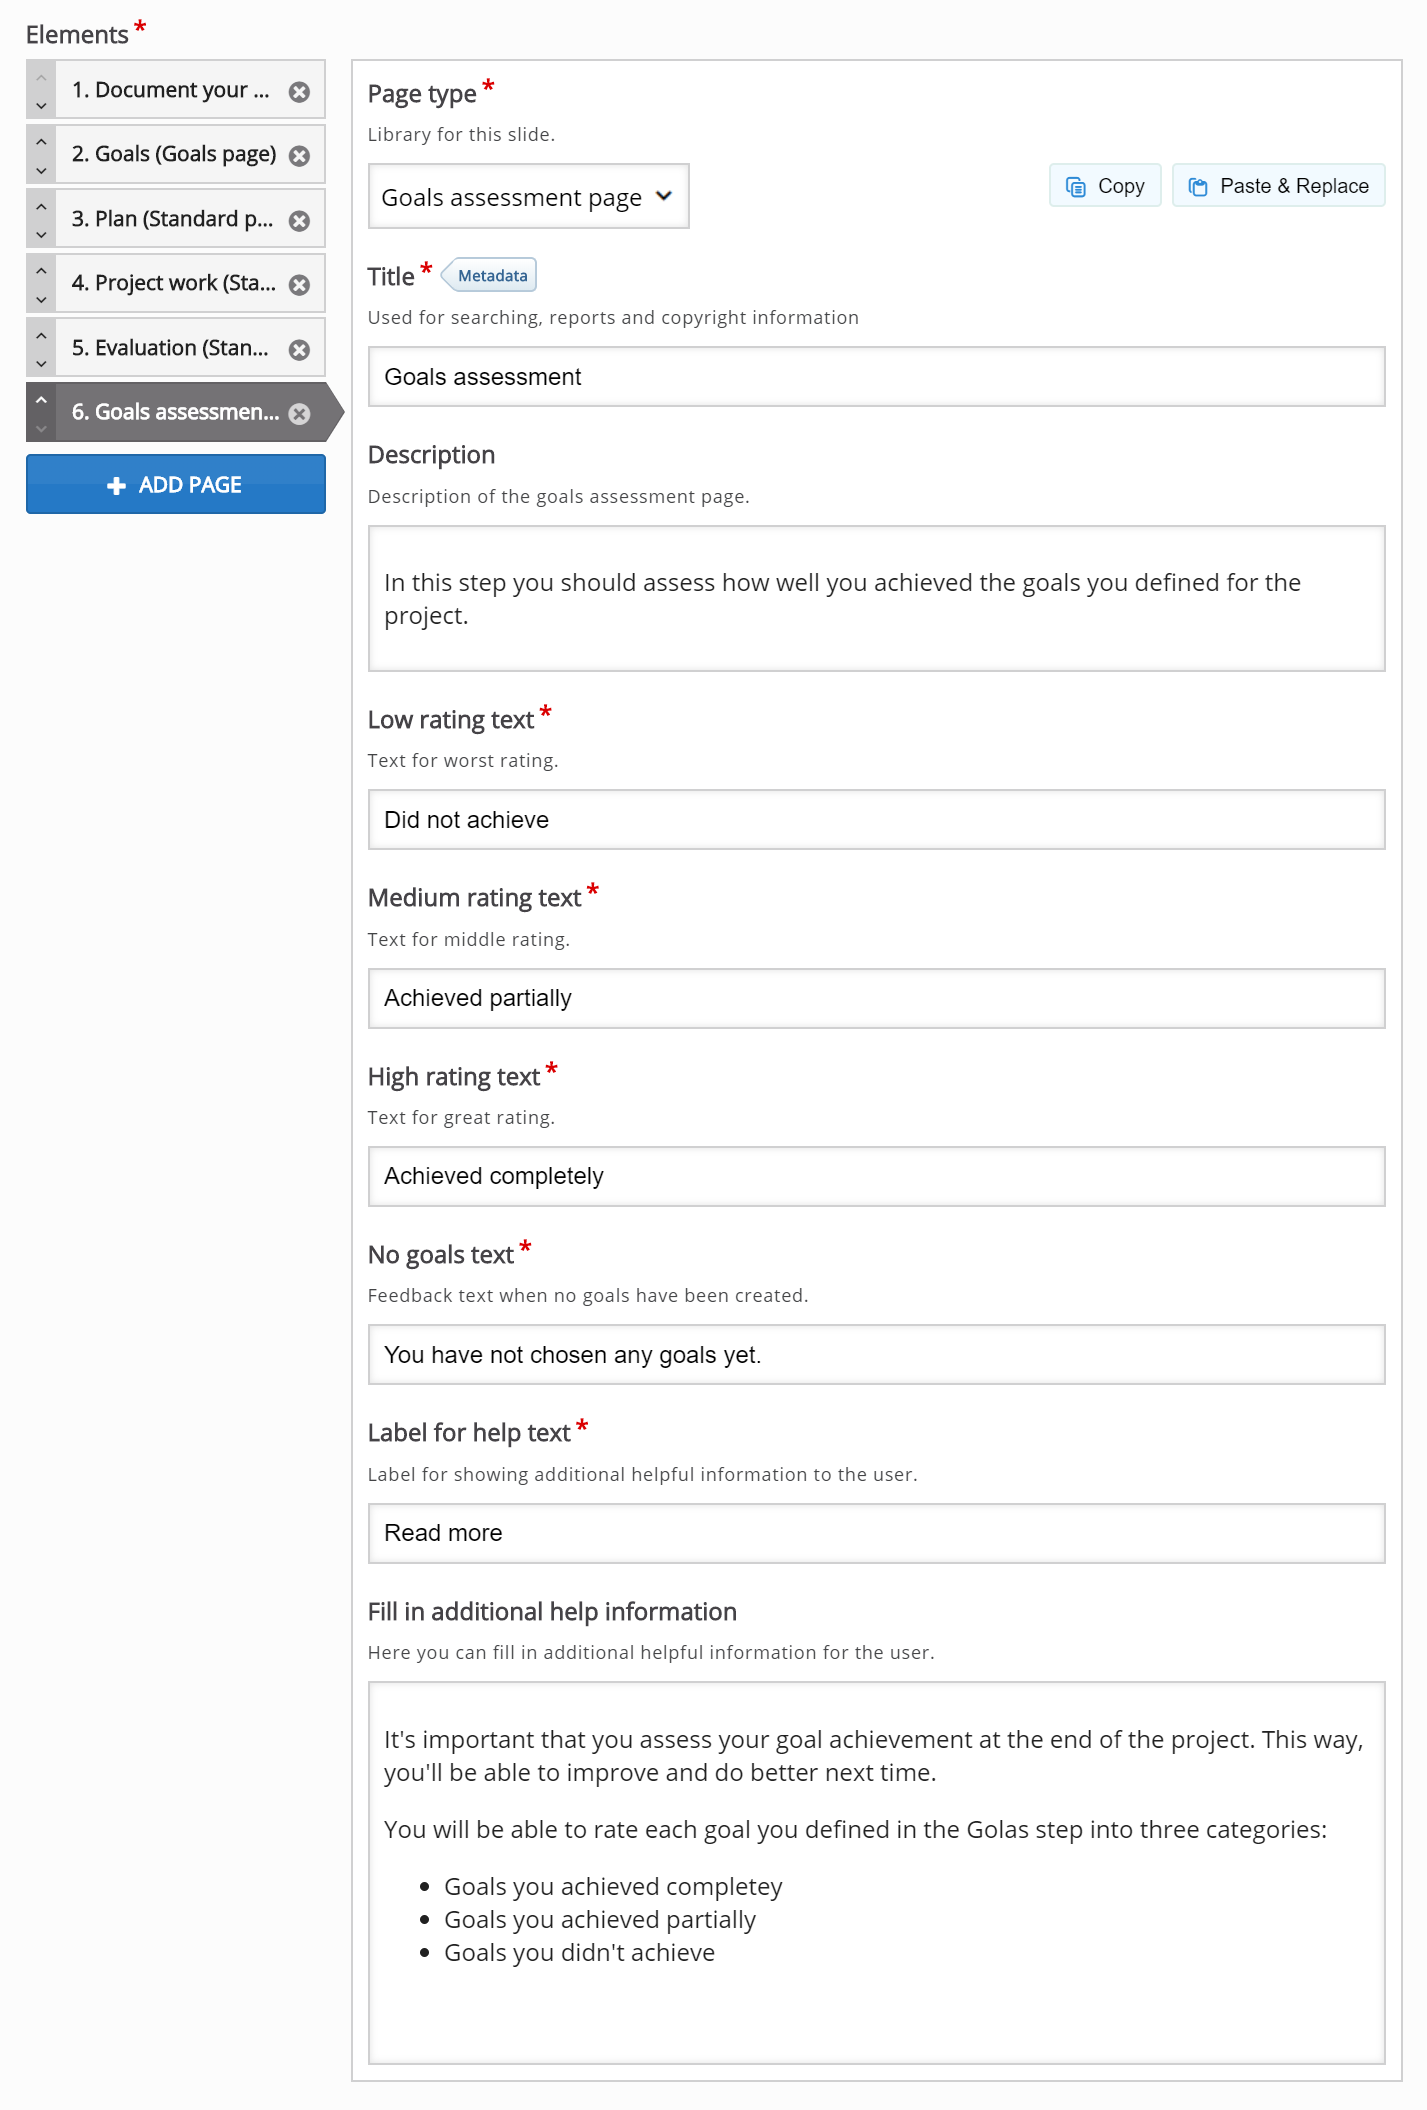
Step 12: Add Export Document Page
Press the Add Page button to add another page to the Documentation Tool. This time, we'll choose Document Export Page from the drop-down menu. The Document Export Page editor will now appear. Add the exact same content for Document Export Page as in the Documentation Tool mentioned in the above example. After adding content to the Document Export Page you should have something like this: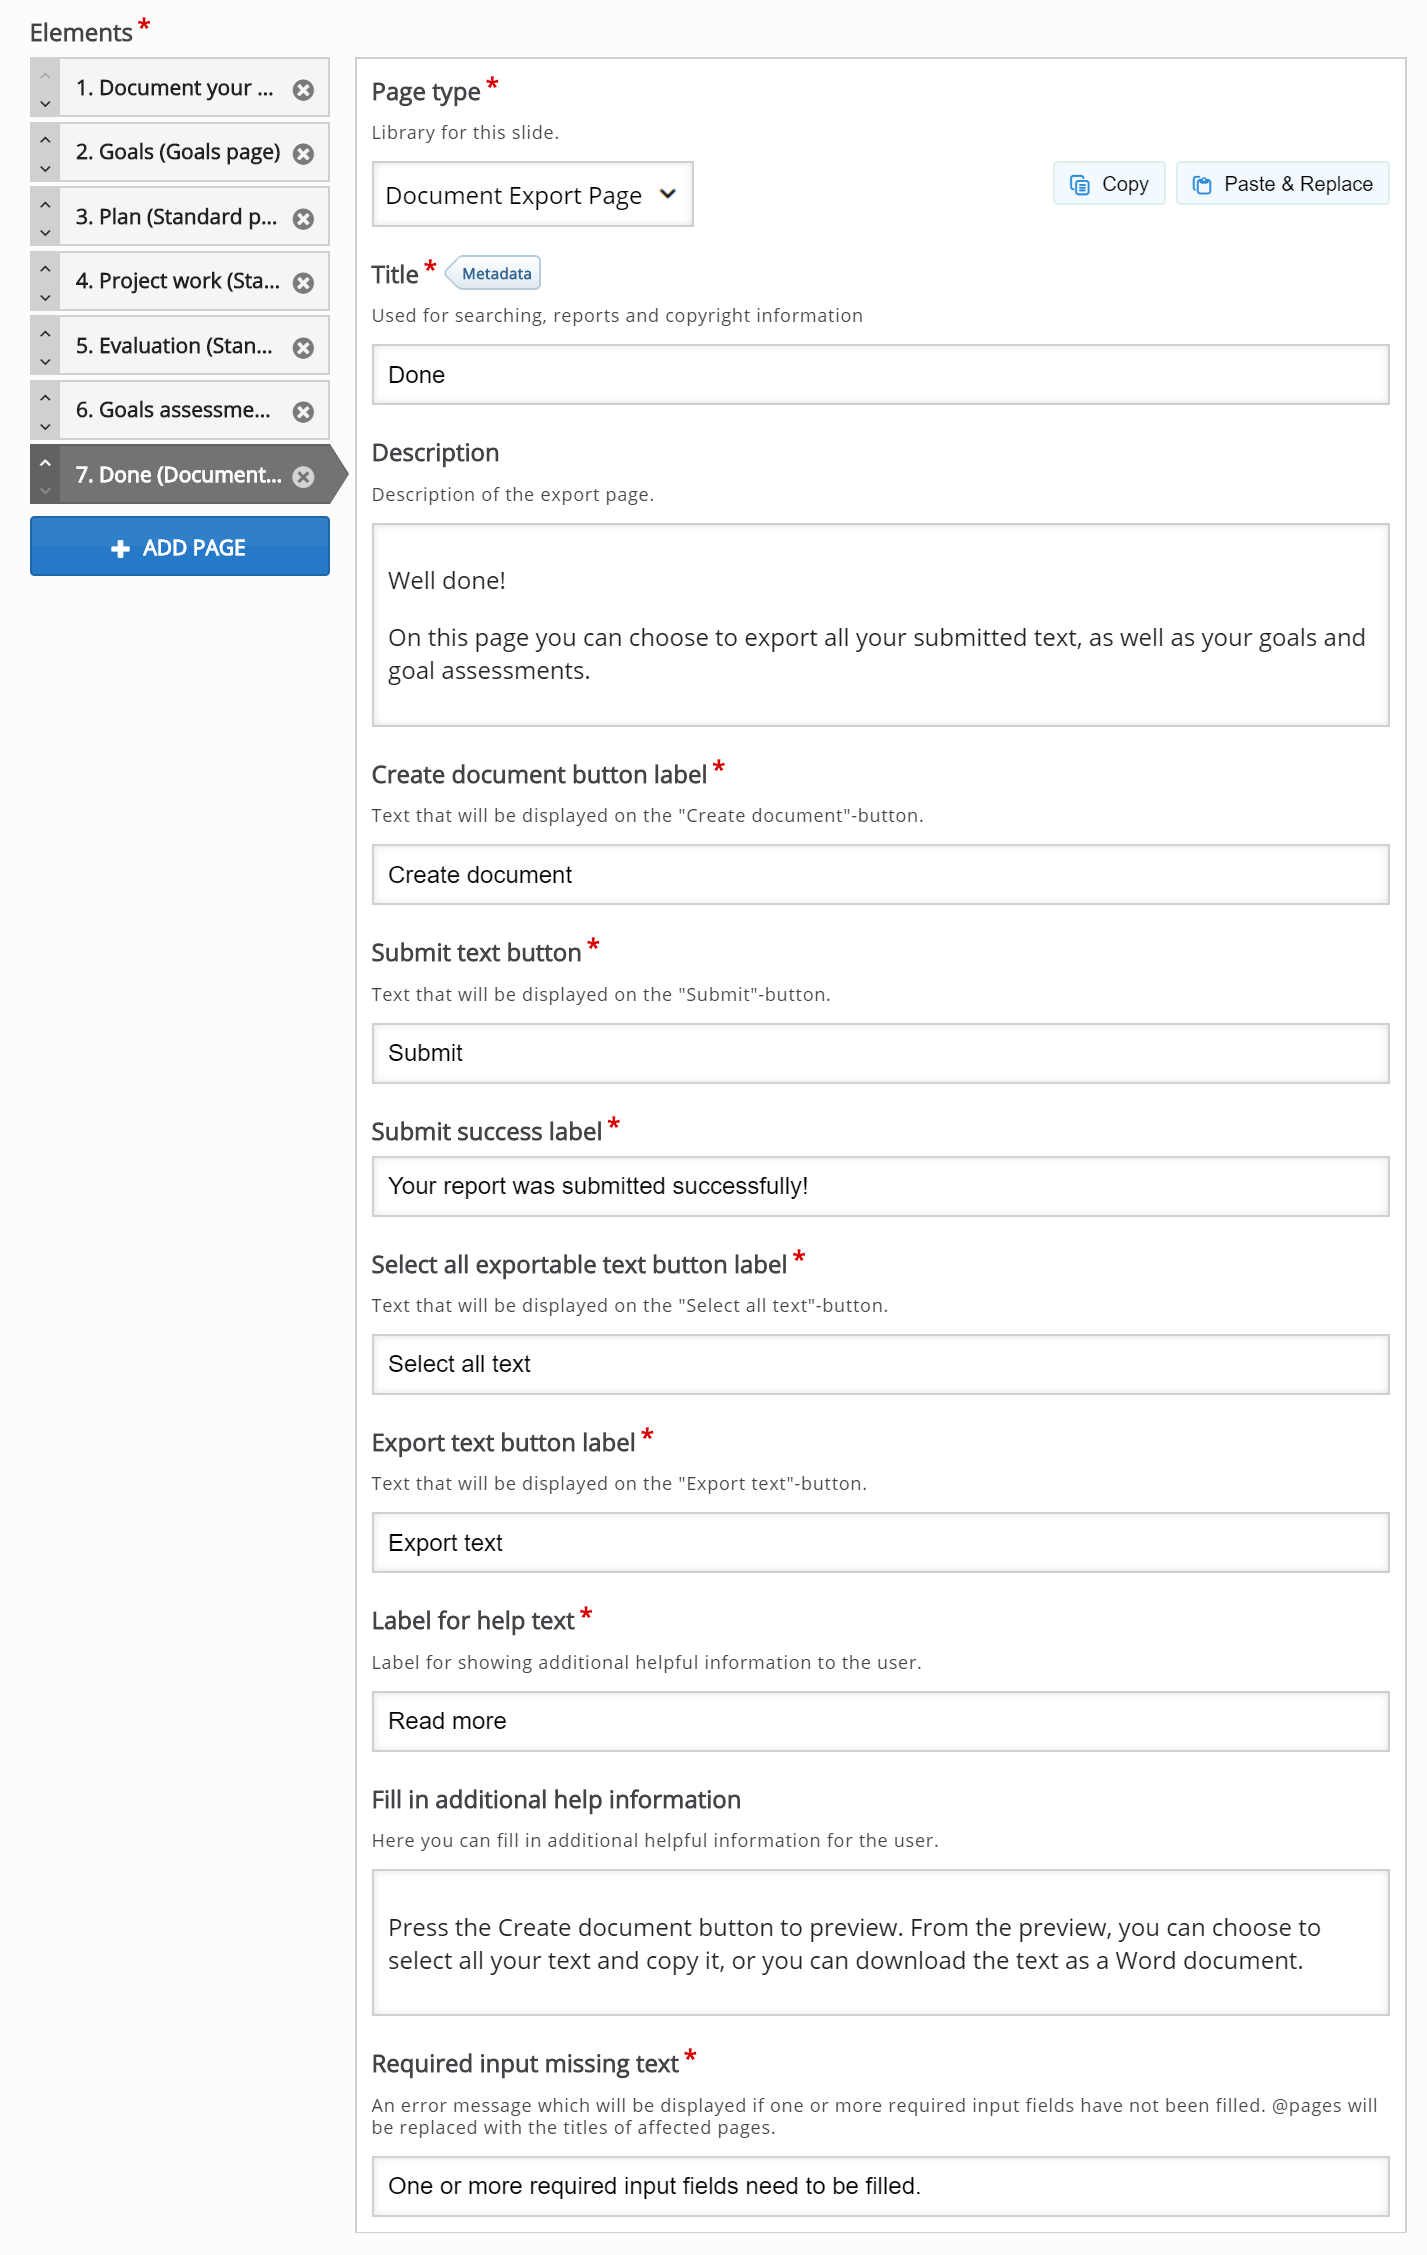
Step 13: Finishing up
Save the node/article to view your finished Documentation Tool.
You should now have a similar result as the example on top of this page.
Feel free to leave any comments or suggestions on how to improve this tutorial.
Comments
Michael_TechnoPeda
Thu, 11/26/2020 - 09:09
Permalink
Export only the introduction test of the first page
When I test this tool, which is really important pedagogically to guide the participant step by step to reflect on its learning journey, I got an export of the first text I put on the first page and nothing that I coded as a participant.
Is there a bug. I work on Moodle. Are there limitiations due to the interface with the LMS?
Thanks
BV52
Thu, 11/26/2020 - 18:17
Permalink
Hi Michael,The Documentation
Hi Michael,
The Documentation Tool is designed to export all information included what the user inputs in the content. I suggest that you post this in the forums and attach your content so that the community can help check it.
-BV
telugu
Wed, 02/03/2021 - 18:22
Permalink
image addition option in text input element
Hi,
Is it possible to have a full fledged tool bar in text input element for image embedding / addition option.
thanks in advance for help.
karinbrown
Wed, 08/25/2021 - 08:38
Permalink
Submit button
Hi here. It appears the submit button is new? The documentation tools I created last year don't have them. Can we make this optional? We just want students to export and the submit button confuses them.
BV52
Wed, 08/25/2021 - 18:47
Permalink
Hi karinbrown,Removing the
Hi karinbrown,
Removing the button through the editor option is not possible. However it is possible to remove this by using a PHP hook, to add your own CSS-file to the content type. Please visit the Visual Changes page for more details.
-BV
Ceit
Thu, 03/24/2022 - 20:28
Permalink
Document Tool Export and Submit issue
I am working with a professor that wants to use the Document Tool for coding a coding assignment. When using the Wizard in Moodle (3.8) everything looks fine when you get to the Document Export page. Everything looks like how it was created, the lines of codes are on different lines. You can even select all and when pasted into a document from the clipboard it is fine. The problem is when you "export" it to .docx file and submit it -- it looks like it's on one continuous line. I tried copying a multi-paragraph essay and it looked good on the Document Export page, but it was merged together when I exported it into .docx and when I looked at the report in the grade book. Any suggestions? We would really love to feature this as a way for learners to create projects.
friedeba
Fri, 10/07/2022 - 16:49
Permalink
Documentation tool: goal-specification and -assessment
I would like to use the tool either for goal- and for work-assassment. For this purpose I would like to specify goals and turn huge task into small steps. If I understood the tutorial right, this should be possible using the so called "Specify-Goal-Button" on the "Goals Page", but when using the activity, there is no "Specify-Goal-Button" to be seen.
And the other thing, I'm curious about, is, if there is still no possibillity to save the documentation, e.g. in the morning after setting the goals, and turn back to it later, e.g. in the evening, for assessment because for me this is an essential feature while using the activity.
Kind regards
aspex
Fri, 10/07/2022 - 17:42
Permalink
What would it cost to get this sorted?
There have been numerous requests to enable this tool to save the input and return to it later. I know everything is possible at a price, so what would it cost to get this function added?
Yizziegal
Tue, 12/09/2025 - 04:41
Permalink
Documentation tool
I wonder if you can just create a page for reflection questions where users type in their answers. I am having trouble trying to delete the side column from the page. I just want reflection questions, simple as that. Thank you.
BV52
Tue, 12/09/2025 - 18:23
Permalink
Hi Yizziegal,This should be
Hi Yizziegal,
This should be possible by using Essay with some specific settings.
Leave the "Keyword" blank
Enable "Ignore scoring" to leave an impression that there are no right/wrong answers
However this will not allow the students to download their answers.
-BV
Pages