Collage Tutorial
Use the Collage tool to put together images in a nice composition. There are several layouts to pick from.
Click the "Get started" button to explore all of the possible ways to use H5P!
Example
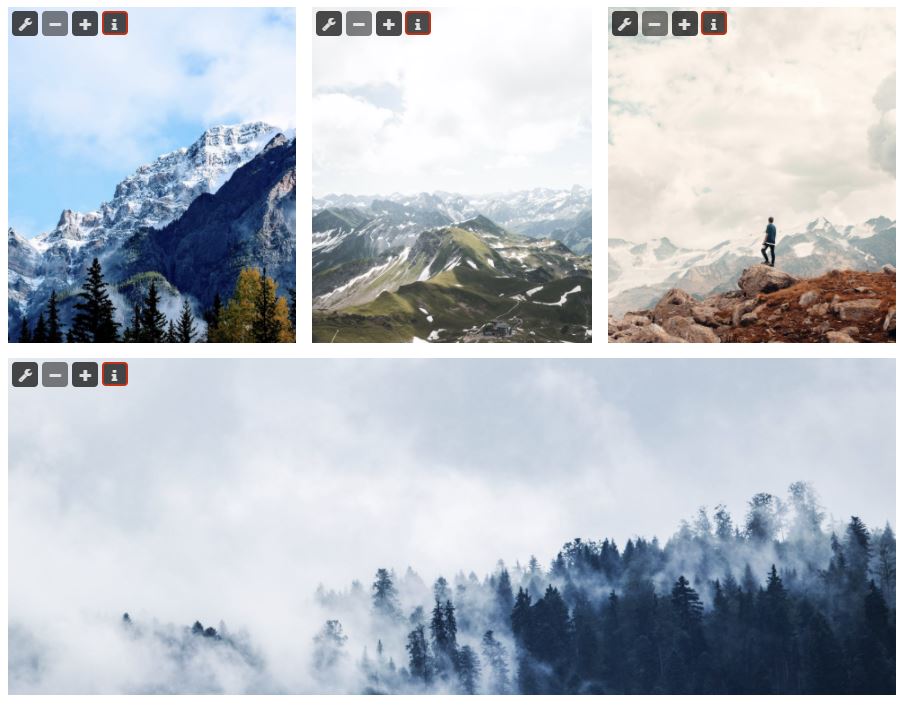
Here's the Collage we'll create in this tutorial:
Step 1: Topic
We are going to create a collage out of four mountain photos. You can use the photos provided below or you can choose some of your own photos. If you are using the photos below, save each of them on your computer before proceeding with the next step.
- https://www.pexels.com/photo/adventure-cold-daylight-fog-291732/
- https://www.pexels.com/photo/clouds-cold-fog-hike-1172228/
- https://www.pexels.com/photo/unrecognizable-traveler-in-rocky-terrain-in-overcast-weather-4013362/
- https://www.pexels.com/photo/green-pine-trees-covered-with-fogs-under-white-sky-during-daytime-167699/
Step 2: Creating a Collage
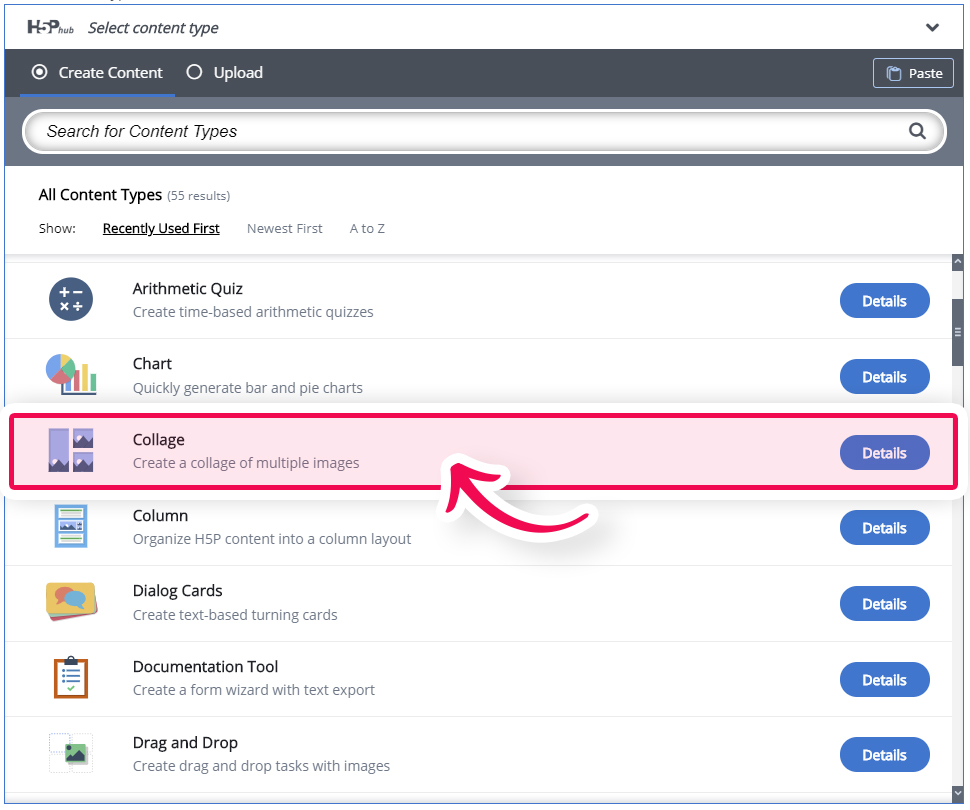
Select the New content option and choose Collage from the list of Content types:
Step 3: Collage editor
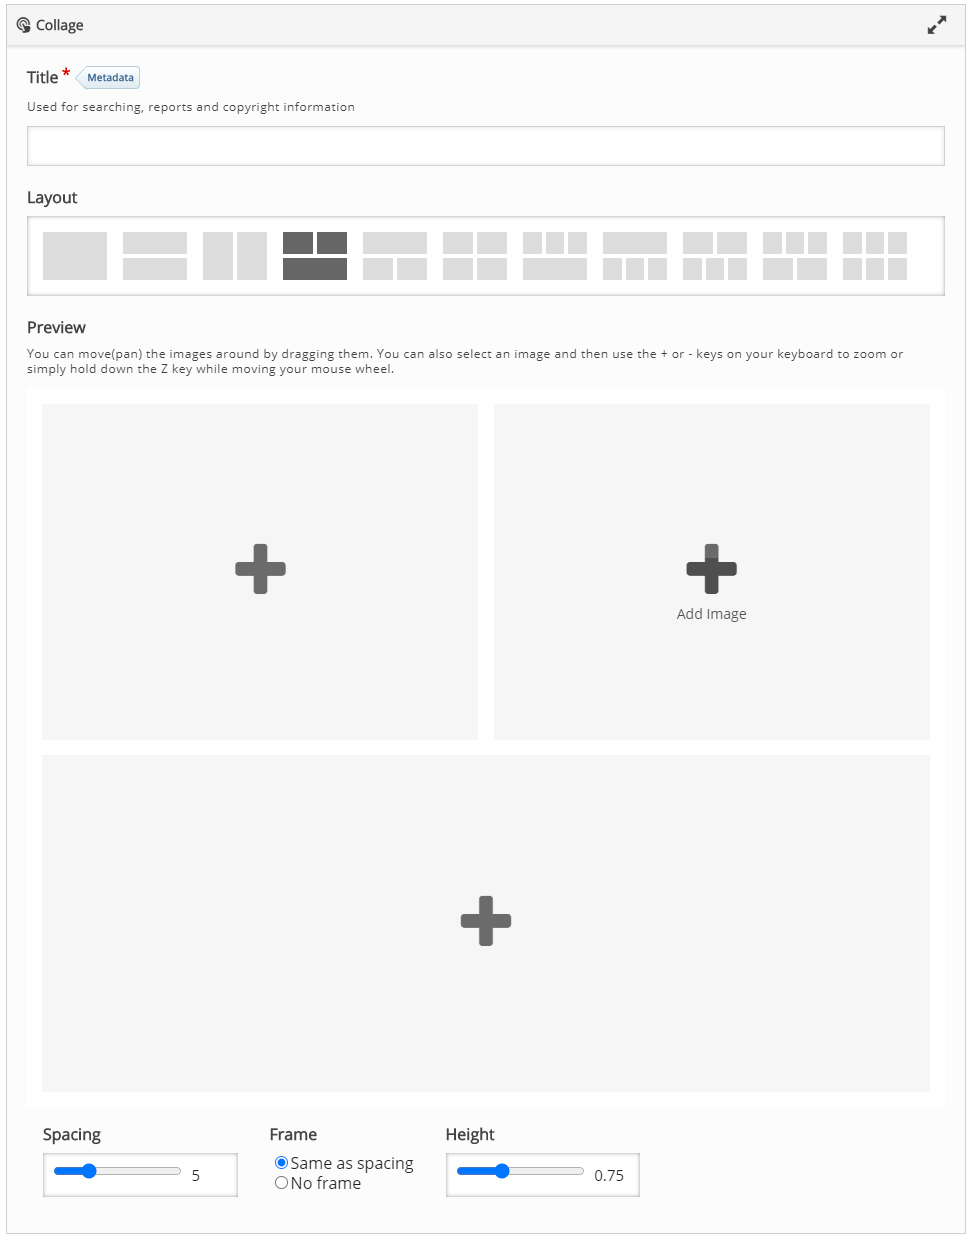
The Collage editor should now appear. The editor looks like this:
Step 4: Creating Content
Selecting a layout
By default, a three-image layout is selected. Since we want to use four images in this collage, we are going to select another layout. Select the layout shown in the screenshot below:

Adding an image
To add an image click on the "+" sign and select an image file from your computer.

To reposition the image you can click and drag until you are happy with the part of the image that shows, like so:
Once you are done with the 1st image, proceed with the rest in the same way.. at the end, your editor should look like this:
Spacing options
At the bottom of the editor, you'll find options to adjust the spacing between photos and the height of the content. You can adjust some of them to see how it will affect your content.

Step 5: Finishing up
Once you are happy with the spacing options go ahead and save the node/article to view your finished Collage.
You should now have the same result as the example at the top of this page.
Feel free to leave any comments or suggestions on how to improve this tutorial.
Comments
anapaulabm
Wed, 04/27/2016 - 00:28
Permalink
tt
tt
cristiane.buranello
Thu, 11/03/2016 - 18:46
Permalink
Galeria
Chrissuli
Wed, 06/07/2017 - 11:36
Permalink
Image Hotspots
Hi,
Feature/Query:
Use Case:
In this way a multi-layered learning experience can be created wereby students can tunnel down to mine information and even learning activities to the level/degree they are interested in or are required to do so for course purposes.
General comments:
So far in my review of H5P I have been impressed and excited at the possibilities it offers and the potential for future development. However, I have noticed that at present most of the features/functionalities seem to be isloated within seperate content type silos based mostly on technical concepts (constructs) rather than 'use cases'. For example, the arbitrary distinction between Image Hotspots and Find the Hotspot I find particularly strange. A Find the Hotspot content type within which can be embedded information, links and learning activities and tools in a similar way that it is done in Image Hotspots would add enormous value to the content type in providing a learning by discovery (tunneling) process for students. To my way of thining, the two content types are basically the same thing, only the initial selection option of a visible or invisible hotspot differentiates them.
The ability to link to other content types from within each other would be a huge force multiplier. In particular the abiltiy for students to tunnel down through layers of content (images, video, audio, text), extensible with learning activities (e.g. other content types) and links to external content (articles, scholar papers, libraries and study tools) would launch H5P to a completely new level of usability, especially for educational purposes/use cases, such as my own. This kind of integration would solve most of my content creation problems/objectives for me in one foul swoop, so I for one would be ecstatic if H5P could do this ;-)
It seems to me that in the range of content types already available, you already have the code and capability to do all this relatively simply.
How soon can you get it done by, please!? :)
Kr,
Chris
tim
Thu, 06/08/2017 - 09:37
Permalink
Hi Chris,Thanks for the
Hi Chris,
Thanks for the thoughtful message. I completely understand where you're coming from. Linking content types would certainly be a game changer. fnoks, on of the developers in the Core Team, is working on a prototype called 'Mini Course' which attempts to do just that. I can't give an ETA but keep a lookout for the release notes :)
h5pglandl
Tue, 12/04/2018 - 20:37
Permalink
Awsome
great content!
Mariacelg
Fri, 04/28/2023 - 16:24
Permalink
¿Como elaborar el collage?
¿Como elaborar el collage?