Multiple Choice Question Tutorial
The Multiple Choice content type is your staple multiple choice quizzing tool. Multiple Choice can be used to test the learner's level of knowledge on a given topic.
In this tutorial you will learn:
- When to use Multiple Choice questions
- How to create a Multiple Choice question
Click the "Get started" button to explore all of the possible ways to use H5P!
Example
Here's the Mulitple Choice question we'll create in this tutorial:
When to use Multiple Choice questions
Multiple Choice questions can be used for testing well-defined skills related to a certain topic. Mulitple Choice questions can be an effective assesment tool when thay are created properly and the learner is given immediate feedback on own performance. The H5P Multiple Choice questions can have a single or multiple correct options per question.
Multiple Choice questions can be used stand-alone or they can be used in Question sets, Interactive videos or Presentations. Either way, they are created in the same way.
Step 1: Topic
Let's say you have a text about Blackcurrants that you want to create a Multiple Choice question about. The example text below is pasted from Wiktionary:
Blackcurrant
A shrub, Ribes nigrum, that produces small, very dark purple, edible berries.
Step 2: Creating a Multiple Choice question
Select the New content option and choose Multiple Choice from the list of Content types:

Step 3: Multiple Choice question editor
The Multiple Choice question editor should now appear. The editor should look something like this:
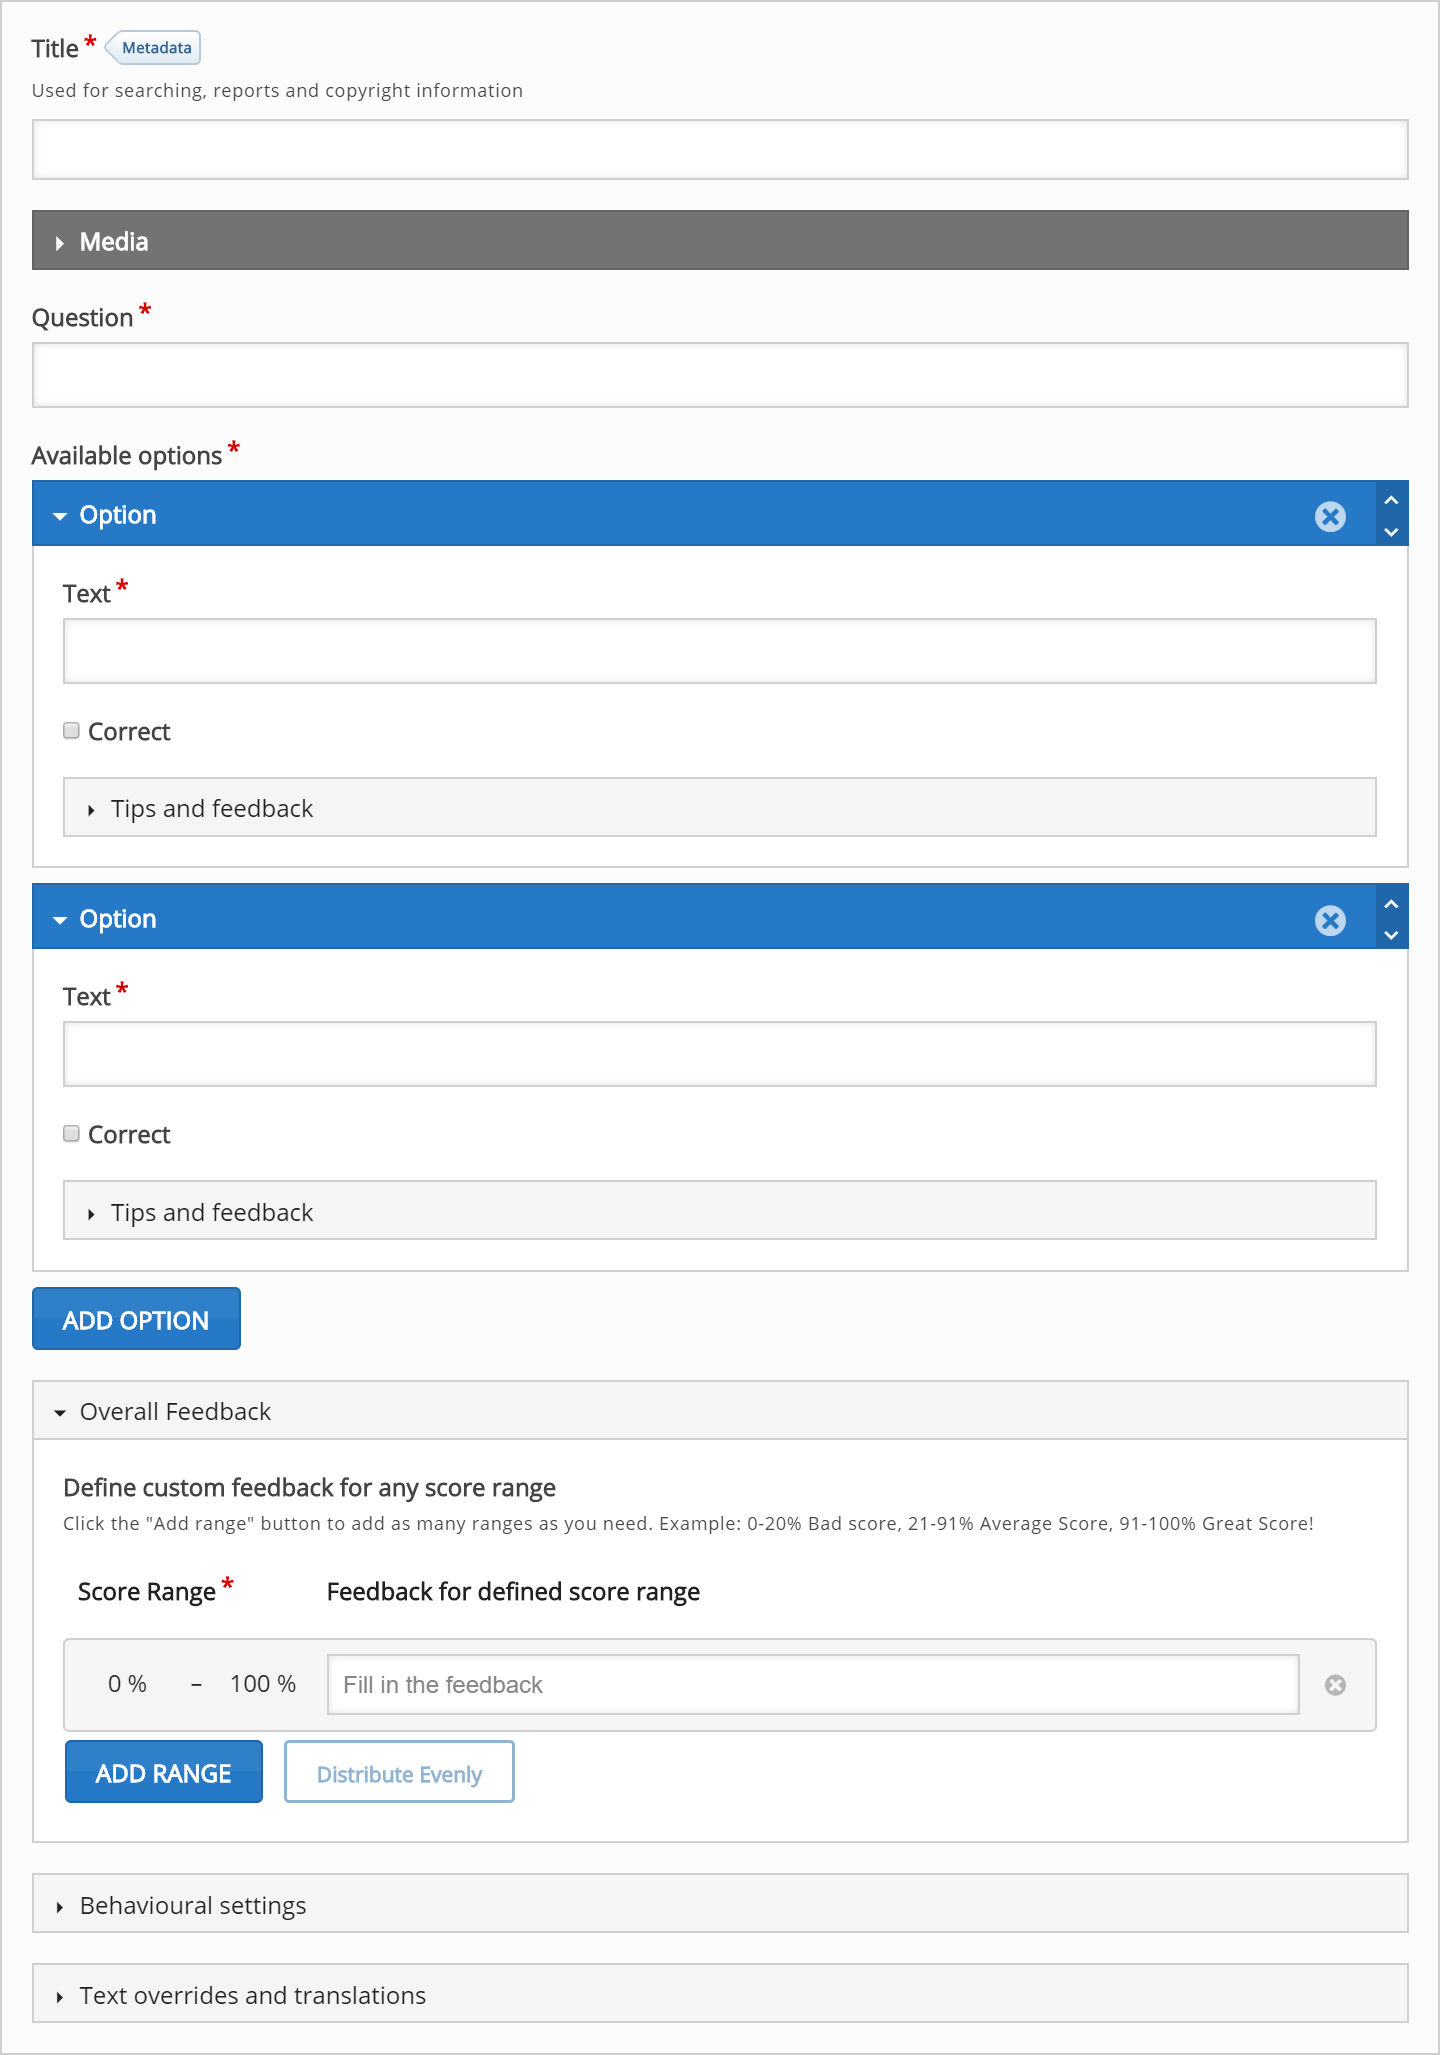 In this tutorial, we'll focus on creating the Multiple Choice question content using the above example.
The Multiple Choice question content type consists of a question and a set of options. The Question is used to introduce the problem to be solved, and the Options are the possible answers the learner can choose from.
Step 4: Media
Under Media, you can add image or video files relevant to the question.
You will have something like this in the editor: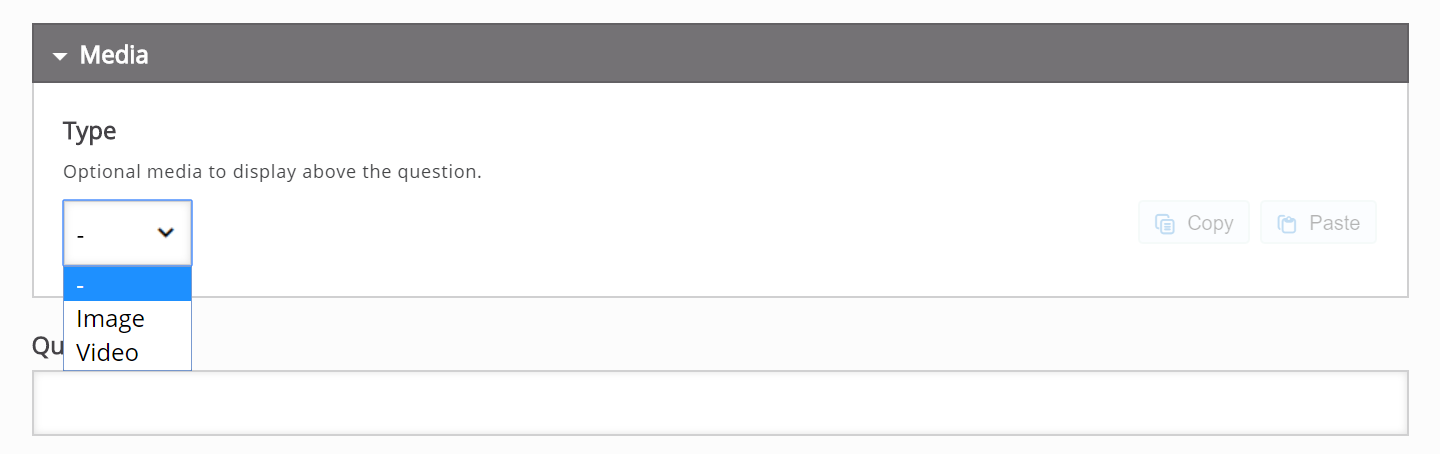 Video:
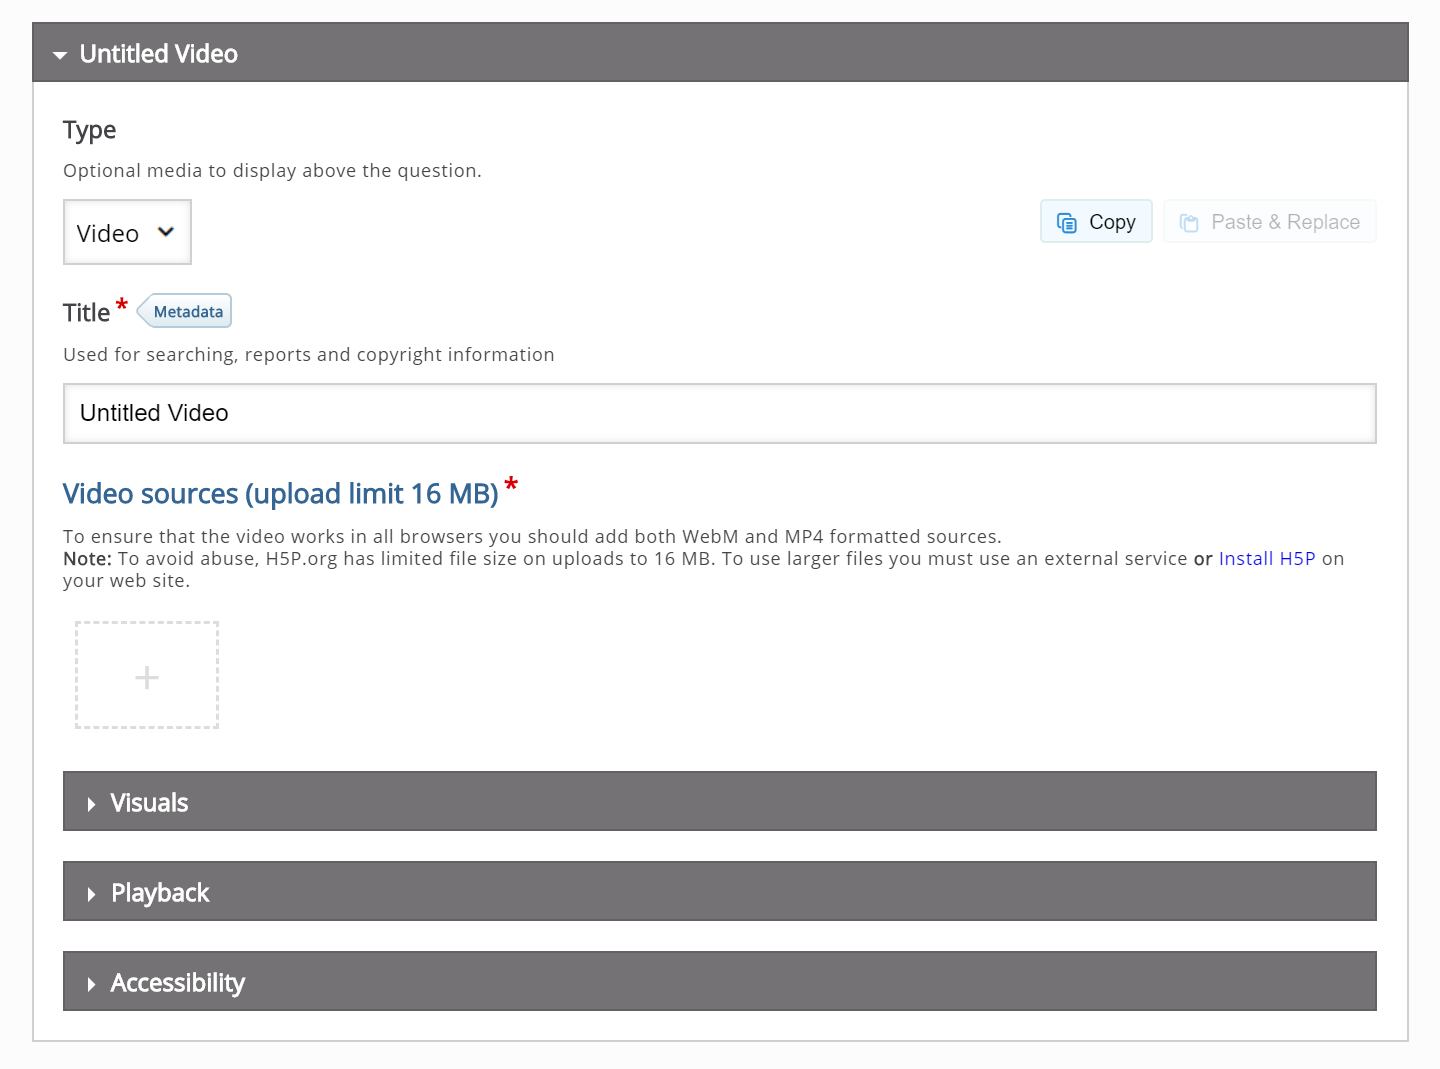 Image:
We are now going to select the media as Image from the dropdown as in the example. Insert the following image under the Image field: 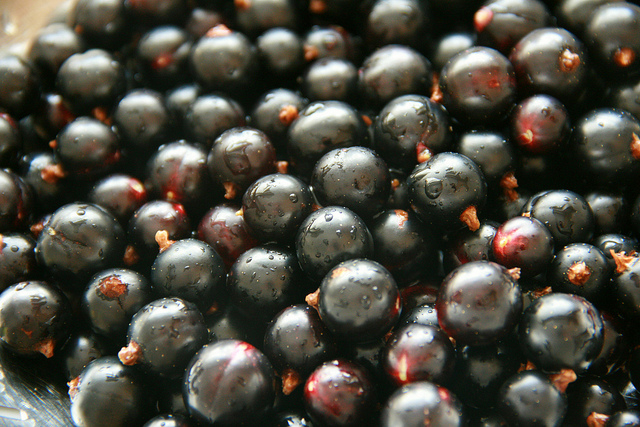
This picture by Karen Jackson was found on Flickr and is licensed with the Creative Commons Attribution-NoDerivatives license.
Your editor should now look like this: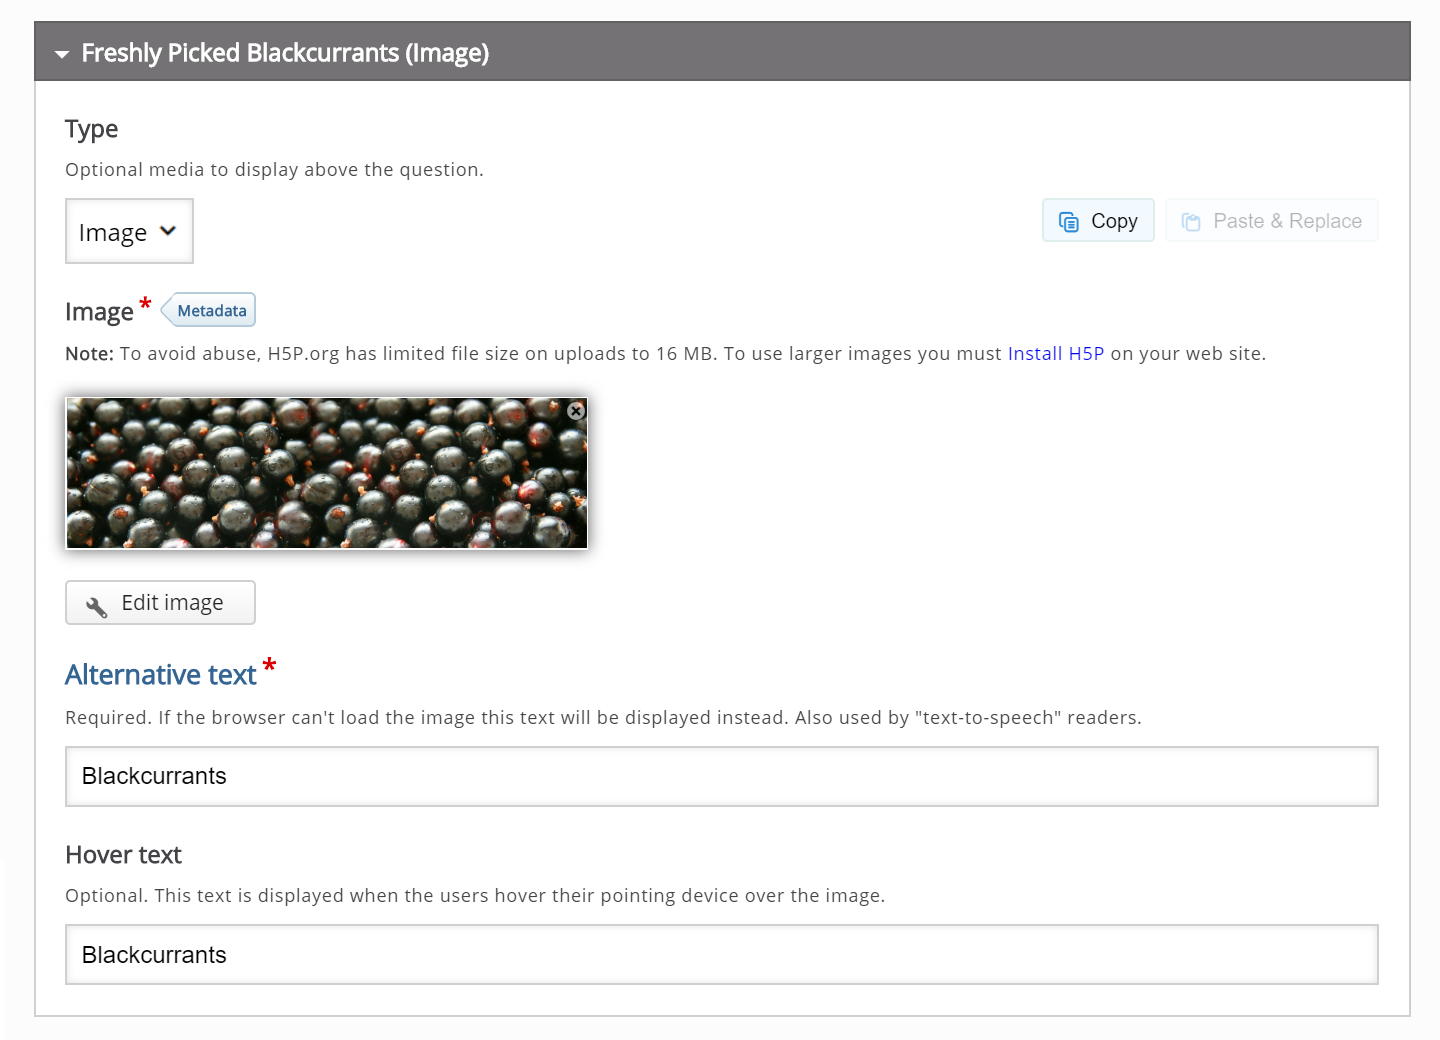
Use pictures that are similar in size to ensure a smooth user experience for the learner.
Step 5: Question
We'll add a simple Question related to the example text about Blackcurrants for the learner to solve. Type the following text in the field labeled Question in the top of the editor:
What color does the blackcurrant berry actually have?
Your editor should now look similar to this: 
Step 6: Available options
Under Available options, we add the answering options the learner can choose from. Two empty available options are listed by default since we usually need at least one correct and one incorrect answering option.
In this tutorial, we'll use three answering options related to the question about what color the blackcurrant berry actually has:
- Very dark purple
- Dark blue
- Black
Type in Very dark purple in the field labeled Text under the top Option and check the Correct checkbox as this is the correct answering option.
You should now have something like this: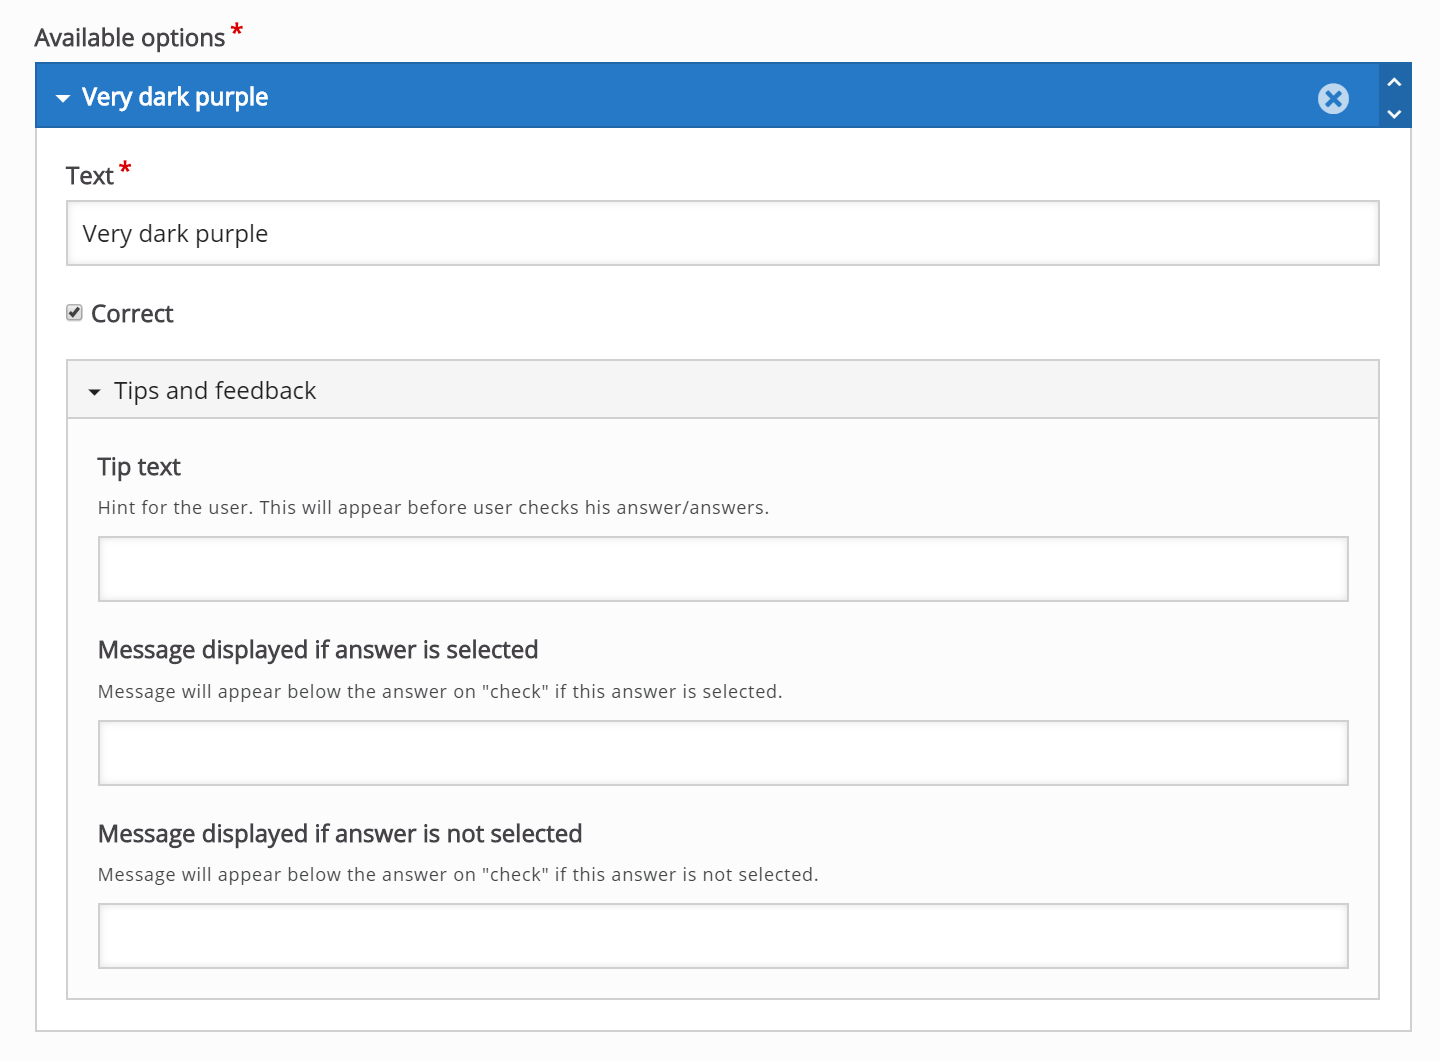
Move on to the second and bottom Option, and type in Blue in the text field labeled Text. Leave the Correct checkbox unchecked as this an incorrect answering option.
We want to add a third answering option. Currently, we only have two available options, so we'll have to add another one by pressing the Add option button below the two currently available options: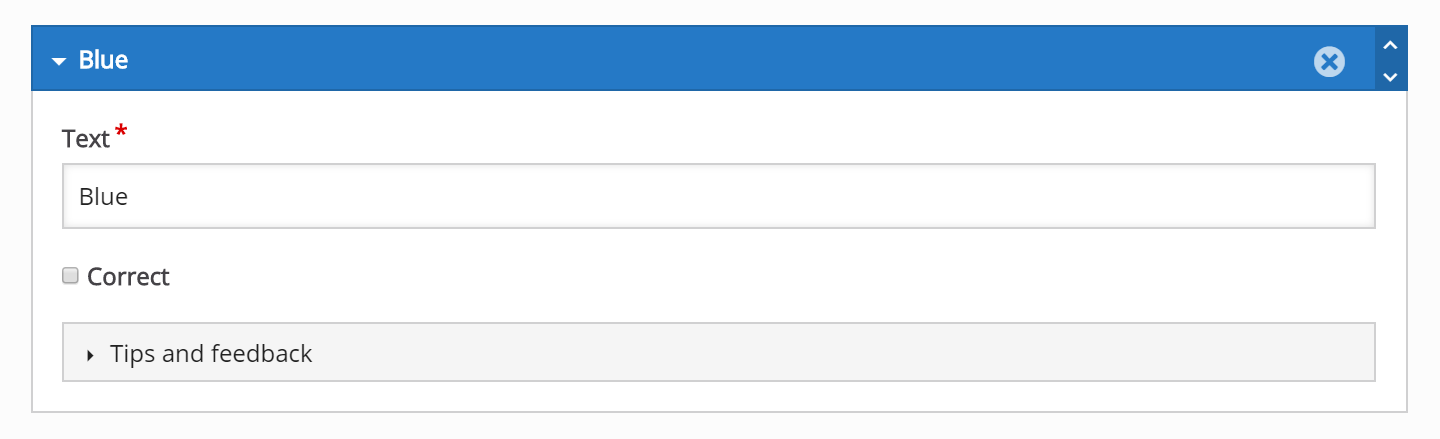
Another Option will be added after you press Add option. In the third and now bottom Option, type in Black in the text field labeled Text. Leave the Correct checkbox unchecked as this a second incorrect answering option.
We are now done with adding answering options.
You can add as many answering options as you want. You remove answering options by pressing the
button in the top right corner of the Option. You change the order of the answering options by pulling the
button in the top left corner of the Option.
Step 7: Question Type under Behavioral Settings
User can select one of the following question type in Multiple Choice present under Behavioral Settings
- Automatic
- Multiple Choice (Checkboxes)
- Single Choice (Radio Buttons)
Automatic:
By default, the question type 'Automatic' is selected. If you have multiple correct options, then it will behave like Multiple choice and checkboxes will be displayed automatically. If you have one correct option, then it will behave like Single Choice and radio buttons will be displayed automatically.
Multiple Choice:
You can select the question type 'Multiple Choice' from the drop-down if you have multiple correct options and checkboxes will be displayed
Single Choice:
You can select the question type 'Single Choice' from the drop-down if you have a single correct option and radio buttons will be displayed.
You will have something like this in the editor: 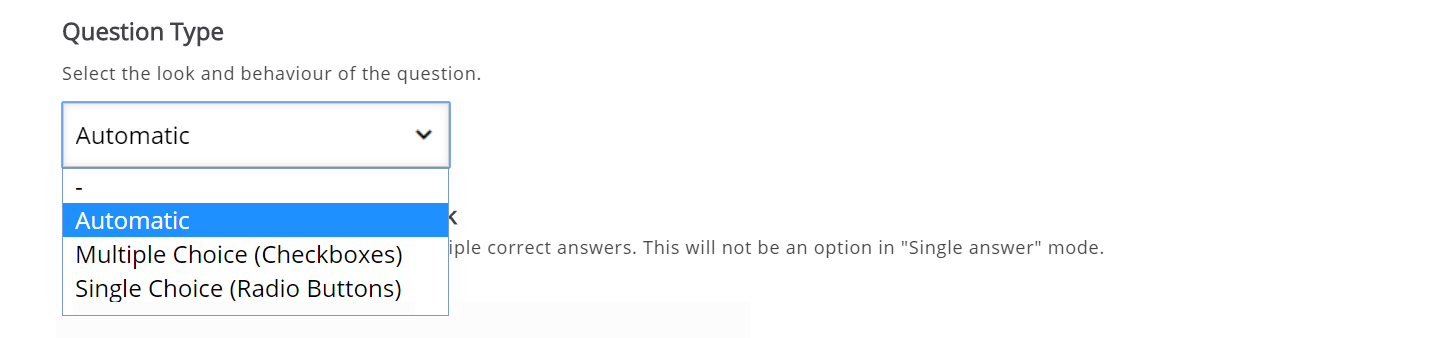 In this case, we only want to use a single correct answer, so we'll keep the default question type as 'Automatic' from the drop-down present under Behavior Settings. The Give one point for the whole task is more relevant when Multiple Choice questions are used in Question sets, Interactive videos or Presentations, so we're not concerned whether this is checked or not for now.
Check the Randomize answers checkbox to make the answering options display in an arbitrary order.
Your editor should now look similar to this: 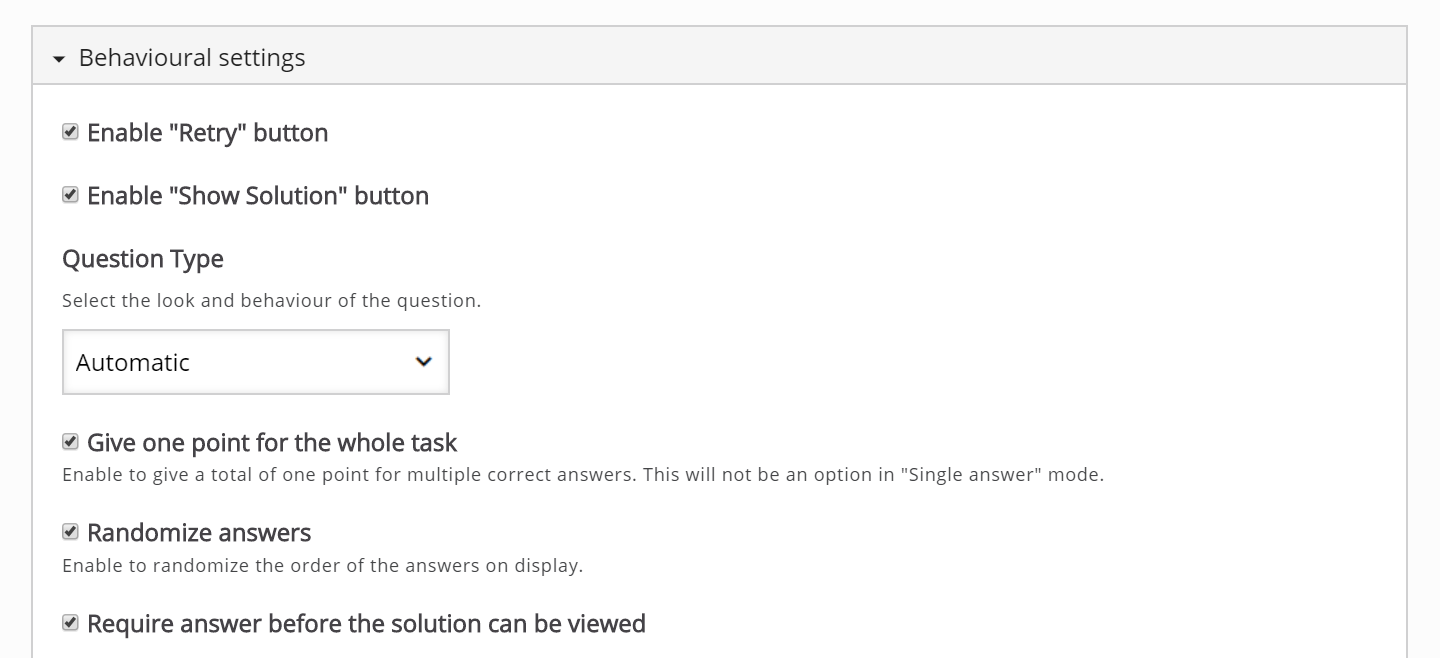
Step 8: Feedback
This is an optional step and you can skip to Step 9 to finish up.
Multiple Choice allows the learner to get feedback on selected answering options. This might be useful to provide the learner with pointers on what to study more after selecting a certain answering option.
For each option, we'll add some feedback to the learner.
In the first and correct Option, we type in the text You selected the correct option, well done in the Chosen feedback field. In the Not chosen feedback field, type in the text Read the text about blackcurrants one more time.
In the second and incorrect Option, we type in the text Read the text about blackcurrants one more time in the Chosen feedback field. In the Not chosen feedback field, type in the text You did not select this incorrect option, well done
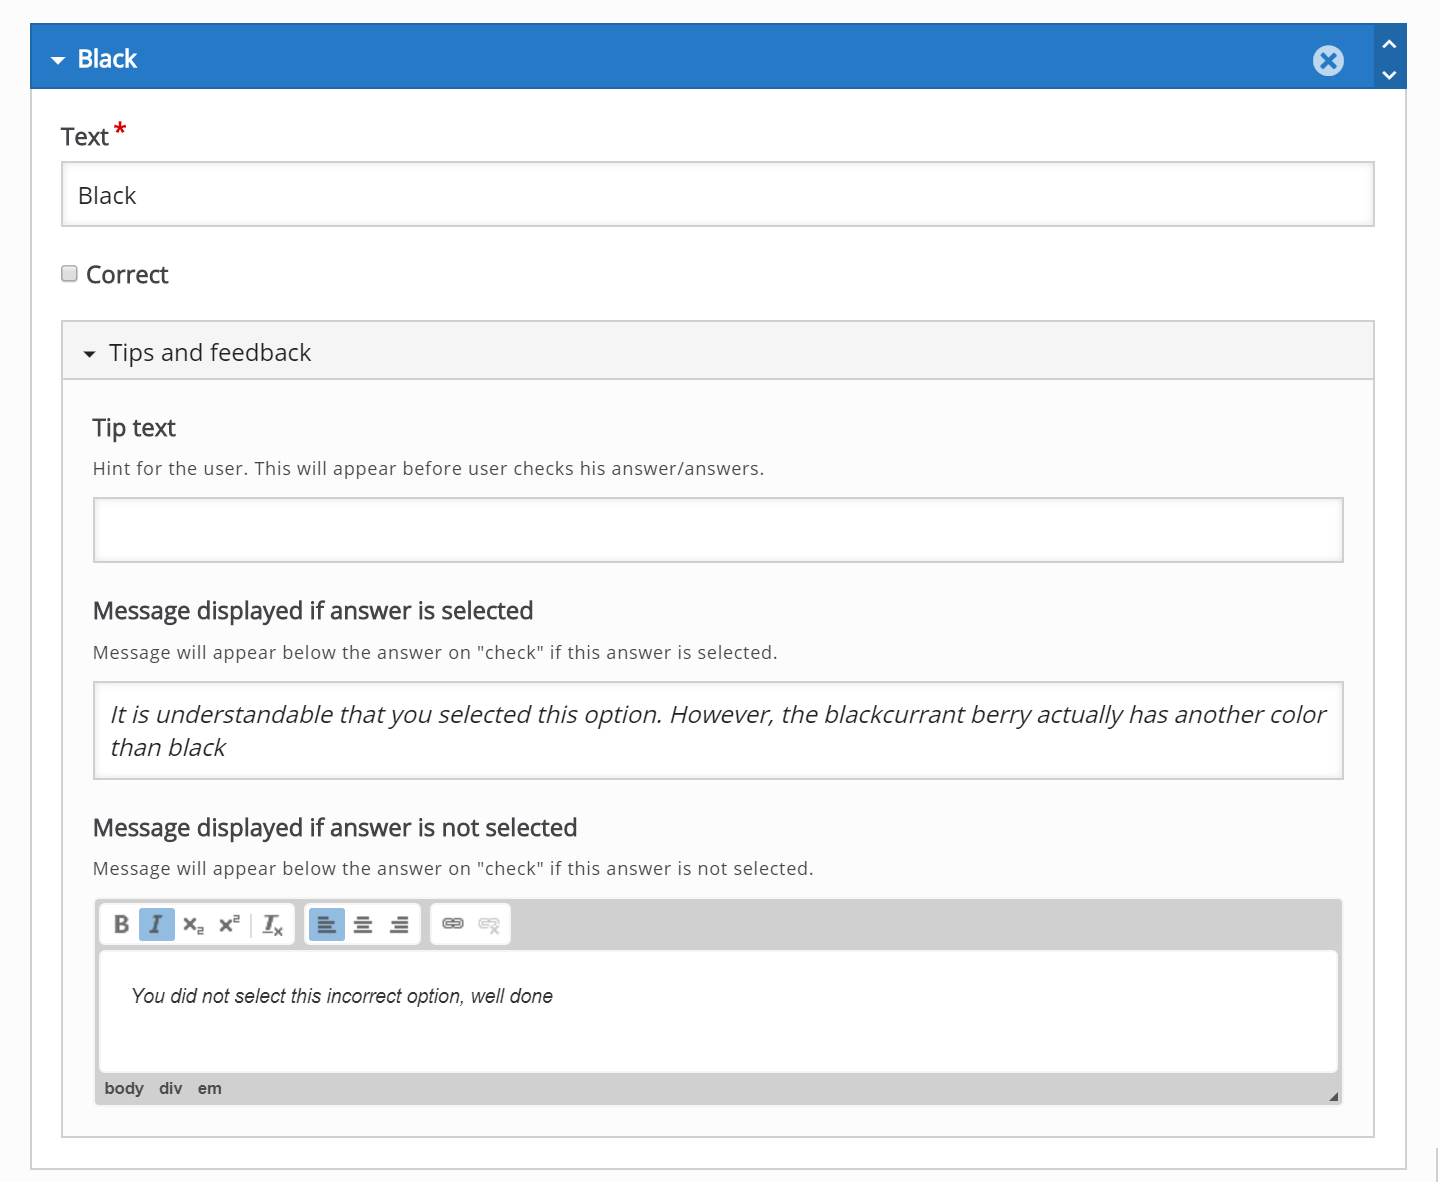
In the third and incorrect Option, we type in the text It is understandable that you selected this option. However, the blackcurrant berry actually has another color than black in the Chosen feedback field. In the Not chosen feedback field, type in the text You did not select this incorrect option, well done
Under Available options, you should now have something like this: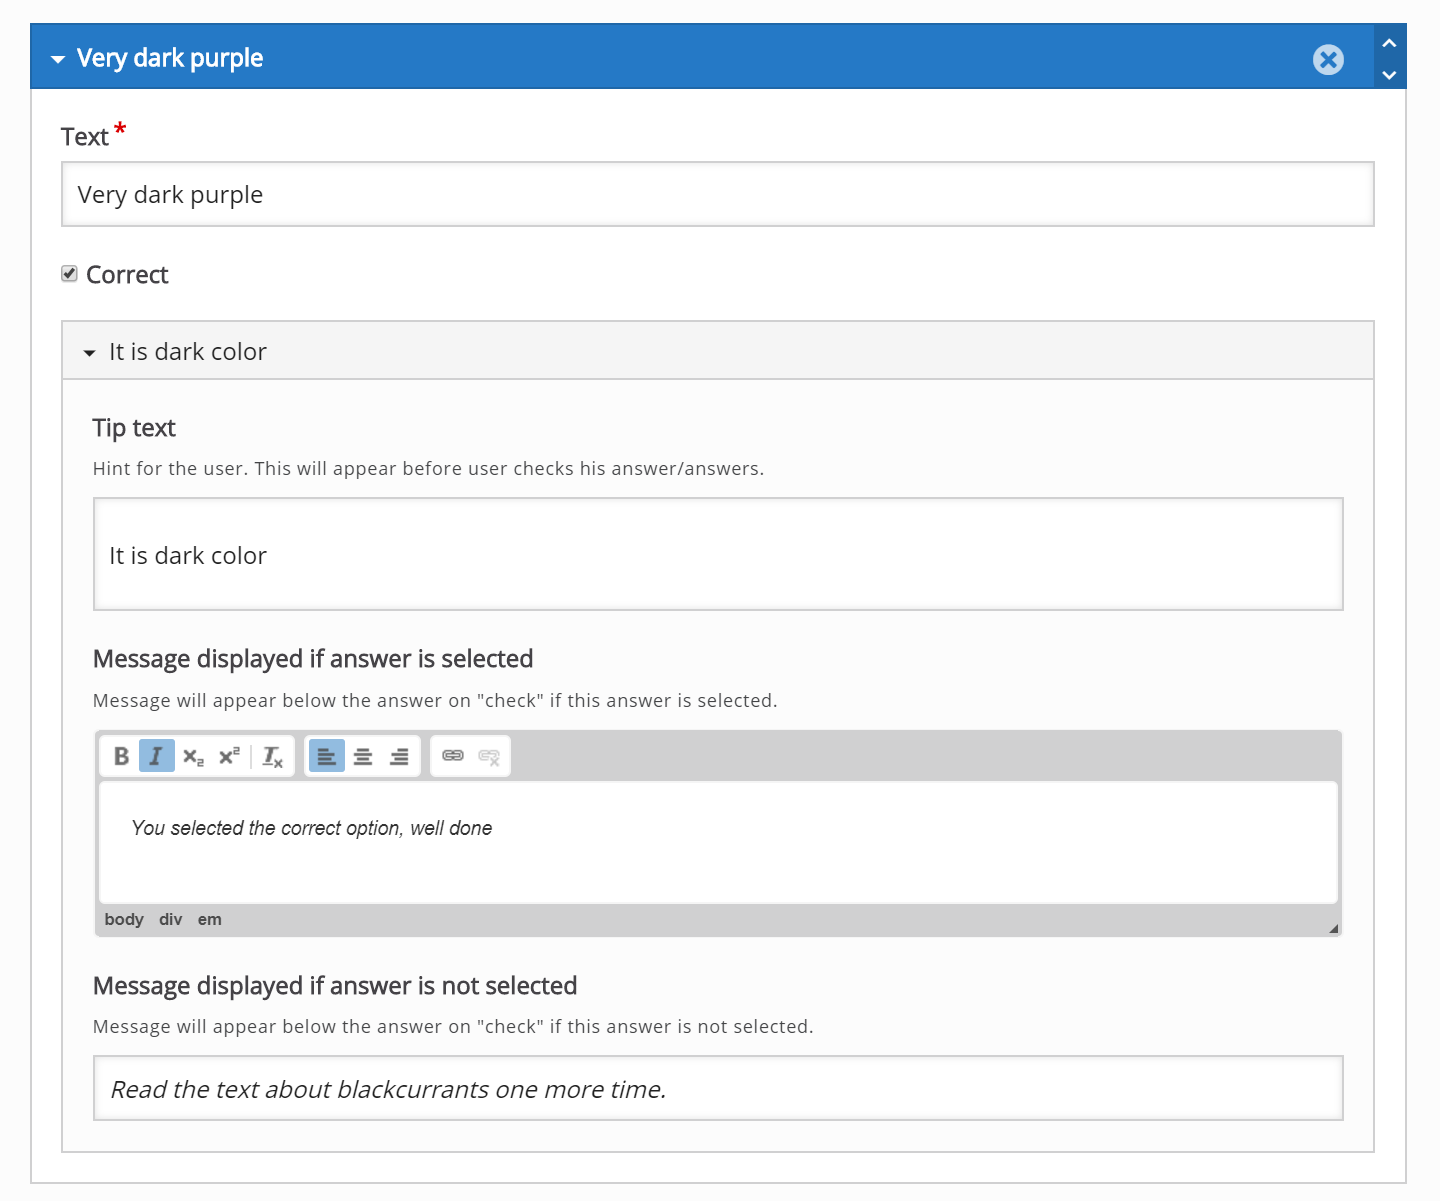

Use the
button to collapse an Option for a better overview when editing.
Step 9: Finishing up
At the bottom of the editor, you'll find the Enable try again button option. Leave this checked, as we want the learner to be able to try to solve the Multiple Choice questions multiple times.
Save the node/article to view your finished Multiple Choice question.
You should now have the same result as the example at the top of the page.
Feel free to leave any comments or suggestions on how to improve this tutorial.
Comments
hamidme
Thu, 11/20/2014 - 05:18
Permalink
Can only set a question at a time
Hello I can't set more than one multichoice question at a time. if want to set up to 10 multichoice question, how do i go about it?
Thanks
falcon
Thu, 11/20/2014 - 10:46
Permalink
Use questionset
To do that you can use the Questionset content type, and add multiple multichoice questions to the questionset. See the questionset tutorial.
We're also experimenting with a miniquestionset content type where you can add many singlechoice questions and get a more lively user experience.
hamidme
Thu, 11/20/2014 - 11:04
Permalink
Thanks...I got!
Thanks...I got!
Carlos Ricart d...
Tue, 07/20/2021 - 11:25
Permalink
No question set in the options
Hi there,
I was trying to add some questions to my first multiple-choice, but I do not have the option you say "QuestionSet".
Where can I find it?
Many thanks,
Carlos R.
BV52
Tue, 07/20/2021 - 19:40
Permalink
Hi Carlos,To provide a best
Hi Carlos,
To provide a best possible experience for new users and to ensure that people use H5P.org only for trying out H5P (we've had more traffic than our server can handle lately, ref also the warnings when you create content, embed content and view the content) there are limited content types that are available.
Check the getting started page for information on how you can use all the content types and use H5P for real. We unfortunately are not able to provide free hosting, only free software :) Hopefully you'll consider supporting the H5P Core Team by using H5P.com.
-BV
dbodnariuc
Sat, 01/09/2016 - 19:55
Permalink
Scored Quiz, or Personality Quiz
I just stumbled across H5P project, and I am amazed. It's a fantastic idea, and as a Drupal and Worpress webmaster, I see some major opportunities.
When I founfd this website, I was actually looking for a scored quiz, or a personality quiz. Are there any plans for something like that. There is a Drupal personality test module but with H5P this would be so much better....
Love it!
falcon
Mon, 01/11/2016 - 11:50
Permalink
I'm glad you like H5P! Yes,
rkelly25
Fri, 05/20/2016 - 19:26
Permalink
tag within video
Is there a way to tag questions throughout the video at various points? For instance having a video stop at 1:10 to answer a question before moving on with the video.
falcon
Wed, 05/25/2016 - 13:49
Permalink
Have you tried to create
Have you tried to create interactive videos?
simonhardaker
Mon, 05/23/2016 - 10:27
Permalink
Option of summary feedback for the whole question
Hi,
I think having individual feedback for each answer option is good but I'd also like to see the addition of summary feedback for the whole question that you had the option of revealing if the question is answered correctly or incorrectly.
Are there any plans to incorporate such a feature?
Thanks
Simon
falcon
Mon, 05/23/2016 - 17:23
Permalink
Hi Simon, that would make a
Steve Covello
Wed, 11/02/2016 - 21:26
Permalink
A word of caution about how the correct answers appear
If you post a number of answers in your MC question, but mindful that when the user clicks on the "Show Solution" button, the length of the content will cause a scroll bar to appear within the content space allocated within the video player space.
Some users might not be expecting scrolling content within a video player (when have they ever seen that before?), so they may miss the content hidden below the bottom. This issue is the same even if you are in full-screen display (the internal content scales along with the video player).
It would be handy if there was a more prominent indicator that there was more content below the screen other than just the subtle appearance of a grey scrollbar on the right.
tomaj
Fri, 11/04/2016 - 07:43
Permalink
Created Jira-ticket
Hi Steve,
I created a Jira task on this, so it can be looked into.
Thanks for reporting! :)
JamesAustralia
Thu, 08/03/2017 - 12:32
Permalink
Progress Update of Jira Task
Hi there, I've noticed the Jira task is unresolved. Can I help provide more information to get this fixed please?
Thanks :)
thomasmars
Fri, 08/04/2017 - 11:41
Permalink
Hi,If you sign up to the Jira
Hi,
If you sign up to the Jira board which tomaj linked to you can help provide more information to the issue to help getting it resolved.
I'm not sure to which extent you can contribute, but you can at the very least add comments, which would be much appreciated :)
epikinon
Tue, 01/31/2017 - 00:11
Permalink
adding sound in media menu
Hi, I find it surprising that the choice for sound is not available in the media menu for muctiple choice questions. Are you planning to add it or is there a round about way for me to add mp3's in my MCQ's.
Thank you very much,
Alex
tomaj
Tue, 01/31/2017 - 08:14
Permalink
Not exactly
Hi Epikinon,
There are no plans for exactly what you are asking for. But there are some (unfinished) plans for audio improvements, that might spill into the realm of what you mention.
A hack for what you want, might be to have the audio in a video. But that's the best I can think of for now.
Good luck!
- Tom
vaishalimutreja
Mon, 02/06/2017 - 07:58
Permalink
New question.
How to add second question. I cannot find add new question option.
fnoks
Mon, 02/06/2017 - 08:48
Permalink
Hi,To create several Multiple
Hi,
To create several Multiple Choices in a sequence you would need to use Question Set
sbzarate
Sat, 02/11/2017 - 12:10
Permalink
Math editor
Hi! Is there a feature here that is similar to the Math editor in MS Word?
tim
Sat, 02/11/2017 - 17:27
Permalink
Not yet. There have been
Not yet. There have been quite a few requests for it.
widapldesign
Thu, 03/16/2017 - 21:33
Permalink
MC Question
Hi. In Interactive Video, what do you click or create so that the user must answer the correct answer before moving onto the video? It seems like now, they can just click any answer and hit submit and they will move on.
thomasmars
Fri, 03/17/2017 - 09:34
Permalink
Hi, you need the following
Hi, you need the following combination of options:
1) In behavioural settings of Interactive Video, enable the "Prevent skipping forward in a video" option
2) Create a Multiple Choice
3) In adaptivity tab of Multiple Choice, enable the "Require full score for task before proceeding" option
qqq2017
Sun, 04/30/2017 - 20:01
Permalink
default image is small
Hi
When I create a multiple choice, the problem is an image, when it displays, the image looks small with a + button, is it possible to make it look big with a - button?
Never mind I figued out myself. Shold disable Zoom
Thanks
OTTLtd
Tue, 10/17/2017 - 14:20
Permalink
Customise look and feel some more?
Hello
Is it possible to change the look and feel of the question (other than the three options in the drop down)? So to change the colour of the button and the hover colours and whether it is raised or flat look, for example? Ideally I'd like it to pick up from my theme in wordpress....
Thanks for any advice
BV52
Wed, 10/18/2017 - 07:46
Permalink
Hi OTTLtd,The easiest way is
Hi OTTLtd,
The easiest way is to use a PHP hook, to add your own CSS-file to the content type. Please visit the Visual Changes page for more details.
-BV52
OTTLtd
Wed, 10/18/2017 - 11:27
Permalink
Thank you
Hi BV52
Thank you for the pointer. Sorry, it hadn't occured to me to look under 'developer guide' .... that reflects my curent level of knowledge :) But hey it's going to be a wet weekend, it's time to get my learning hat on.
cheers
BV52
Thu, 10/19/2017 - 05:37
Permalink
You're welcome OTTLtd, if you
You're welcome OTTLtd, if you have any questions/clarifications feel free to post in the forums.
-BV52
mgalastica
Tue, 11/07/2017 - 18:24
Permalink
Questions score
Hello everyone. I love this type of content.
A consultation, I have created multiple choice questions and I have placed scores.
The overall score is 100, but if I'm wrong in one question, it puts me in 80, when in reality it should be 95.
I'm setting it up wrong?
How do you do with the scores?
Thanks.
BV52
Wed, 11/08/2017 - 03:10
Permalink
Hi mgalastica,Welcome to H5P
Hi mgalastica,
Welcome to H5P!
Do you mind sharing the content that you created so that we can check?
-BV52
eyssette
Thu, 04/05/2018 - 15:58
Permalink
Paragraphs
Saving the content erases paragraphs. Is it possible to use html tags (or at least something equivalent to the <p> or <br> tags) with Multiple Choice Questions?
BV52
Fri, 04/06/2018 - 04:29
Permalink
Hi eyssette,Using HTML tags
Hi eyssette,
Using HTML tags are not possible as of the moment. But if you could share a screenshot and the content that you are creating maybe we can't find a solution to your issue. Also to do this please post a separate thread for this.
-BV52
ChrisChrisChris
Fri, 08/03/2018 - 11:24
Permalink
Adding a hyperlink in the question
Hi, is there any way to add a hyperlink (e.g. to a url) in the question?
Thanks
BV52
Fri, 08/03/2018 - 15:07
Permalink
Hi Chris,I'm afraid this is
Hi Chris,
I'm afraid this is not possible not unless you make changes to the code. You can also post this as a feature request. In order for your feature request to attract as much interest as possible make sure it follows the below guidelines:
It is clear from every perspective how the feature will work. We recommend describing the feature with one or more user stories, for instance “As an author I want it to be possible to pick between different effects for the check answer animation so that the learners will see a variety of effects and also I can adapt the effects to my target audience(I’ll be using pink unicorns which works really well for both my target audience which are 4 year old girls and venture capitalists)”
If the feature can be illustrated with images or videos it always helps
Make it clear what content types this is relevant for, and or if this is a new content type
Make sure you post the feature in the Feature Request forum.
-BV52
bryn.albani
Tue, 10/09/2018 - 14:50
Permalink
Image not centered
Hi,
Is there a way to center the image over the question? Or a way to set the image to zoom and take up the whole top of the question (like in the blackberries example question)?
Thanks
BV52
Wed, 10/10/2018 - 06:22
Permalink
Hi Bryn,Centering is not
Hi Bryn,
Centering is not possible but occupying the half top of the screen is. All you need to do is use a big enough pixel wise and disable image zooming in the behavioural settings. If I'm not mistaken the example above uses an image that is 1024 x 683.
-BV52
arjunparos
Fri, 05/17/2019 - 09:03
Permalink
Adaptive Questionnaire
Is there a support for making questions adaptive (like increase complexity when the answers are right and decrease it when it is wrong) ???
BV52
Mon, 05/20/2019 - 05:13
Permalink
Hi arjunparos,I'm afraid
Hi arjunparos,
I'm afraid there are not H5P contents that have this feature. However you can use Branching Screnario, to some degree you can control which questions the users will see depending on their previous answers.
-BV52
arjunparos
Mon, 05/20/2019 - 12:04
Permalink
Oh ok ok! is it in the
Oh ok ok! is it in the pipeline ??
arjunparos
Mon, 05/20/2019 - 12:35
Permalink
Is Branching Scenario
Is Branching Scenario available for Drupal 8??? If no, is adaptive questioning being made available for future releases? Is it on the pipeline?
BV52
Tue, 05/21/2019 - 04:59
Permalink
Hi arjunparos,Yes Branching
Hi arjunparos,
Yes Branching Scenario is available in Drupal 8. All contents that you see in H5P.org are available when you install the plugin.
Adaptive questions is not in the pipeline I'm afraid, you can read more about future plans from the core team in the Roadmap. You can also post a feature request for this. In order for your feature request to attract as much interest as possible make sure it follows the below guidelines:
It is clear from every perspective how the feature will work. We recommend describing the feature with one or more user stories, for instance “As an author I want it to be possible to pick between different effects for the check answer animation so that the learners will see a variety of effects and also I can adapt the effects to my target audience(I’ll be using pink unicorns which works really well for both my target audience which are 4 year old girls and venture capitalists)”
If the feature can be illustrated with images or videos it always helps
Make it clear what content types this is relevant for, and or if this is a new content type
Make sure you post the feature in the Feature Request forum.
-BV52
arjunparos
Tue, 05/21/2019 - 07:35
Permalink
Unfortunately, the branching
Unfortunately, the branching is not available as a content type in Drupal 8:( Can you please help if I have to install any extension? Please let me know..
BV52
Wed, 05/22/2019 - 03:59
Permalink
Hi arjunparos,Can you please
Hi arjunparos,
Can you please check the version of H5P and if you have any updates to it. The Branching Scenario was released early this year and if you haven't updated it you will not have it on the list of contents. If it is up to date you can try downloading my test content and upload it to Drupal.
-BV52
caro.brosens
Wed, 07/10/2019 - 11:12
Permalink
Images/GIFS in answer
Hi, is it possible to insert a GIF/image instead of a textual answer? As I'm working on an online course which includes sign language, this would be incredibly useful!
TIA
BV52
Thu, 07/11/2019 - 02:08
Permalink
Hi Caro.brosens,I'm afraid
Hi Caro.brosens,
I'm afraid this is not possible with the current features of the content. However you can post this as a feature request. In order for your feature request to attract as much interest as possible make sure it follows the below guidelines:
It is clear from every perspective how the feature will work. We recommend describing the feature with one or more user stories, for instance “As an author I want it to be possible to pick between different effects for the check answer animation so that the learner will see a variety of effects and also I can adapt the effects to my target audience(I’ll be using pink unicorns which works really well for both my target audience which are 4 year old girls and venture capitalists)”
If the feature can be illustrated with images or videos it always helps
Make it clear what content types this is relevant for, and or if this is a new content type
Make sure you post the feature in the Feature Request forum.
You can also try using Drag and Drop if it will suite your case scenario.
-BV52
Marioh65
Mon, 07/15/2019 - 22:47
Permalink
Massive questions upload
Hi, is there a way to upload multiple questions from a file in a multple choice exam for moodle?
Regards.
BV52
Tue, 07/16/2019 - 18:33
Permalink
Hi Marioh65,Bulk uploads to
Hi Marioh65,
Bulk uploads to any contents is not yet available.
-BV52
BRINDA D
Sun, 09/29/2019 - 06:21
Permalink
How to add new question for multiple choice ? + symbol not there
How to add new question for multiple choice ? + a(symbol ) is not seen. pl guide.
BV52
Mon, 09/30/2019 - 19:45
Permalink
Hi BRINDA D,You can use Quiz
Hi BRINDA D,
You can use Quiz (Question Set) to create multiple instances of MCQs.
-BV52
lianabel
Thu, 11/14/2019 - 21:51
Permalink
Thank
Thank you! I was having a problem disciphering why I was seeing check box instead of circles in the options and this post helped me figure it out. I was simple really!
Pages