Drag and Drop Tutorial
The Drag and drop content type allows learners to drag a piece of text or an image and drop it on one or more corresponding dropzones.
In this tutorial you will learn:
- When to use Drag and drop
- How to create a Drag and drop
Click the "Get started" button to explore all of the possible ways to use H5P!
Video tutorial
The below video summarizes what you may do with Drag and Drop and how:
Textual Tutorial - Example
Here's the Drag and drop we'll create in this tutorial:
When to use Drag and drop
Drag and drop enables the learner to associate two or more elements and to make logical connections in a visual way. Here are some examples:
- Group elements that belong together or have something in common
- Match an object with another object
- Put elements in the correct order
- Place elements at a correct position
Drag and drop can be used to test the learner's knowledge on a given topic as a variation to Multichoice questions. Drag and drop can be used stand-alone or they can be included in Question sets, Interactive Videos or Presentations. Either way, they are created in the same way.
Step 1: Topic
Let's say you have a text about Strawberries that you want to create a Drag and drop question about. The example text below is pasted from Wiktionary:
Strawberry
The juicy, usually red, edible fruit of certain plants of the genus Fragaria.
Step 2: Create Drag and drop question
Select the New content option and choose Drag and Drop from the list of Content types:
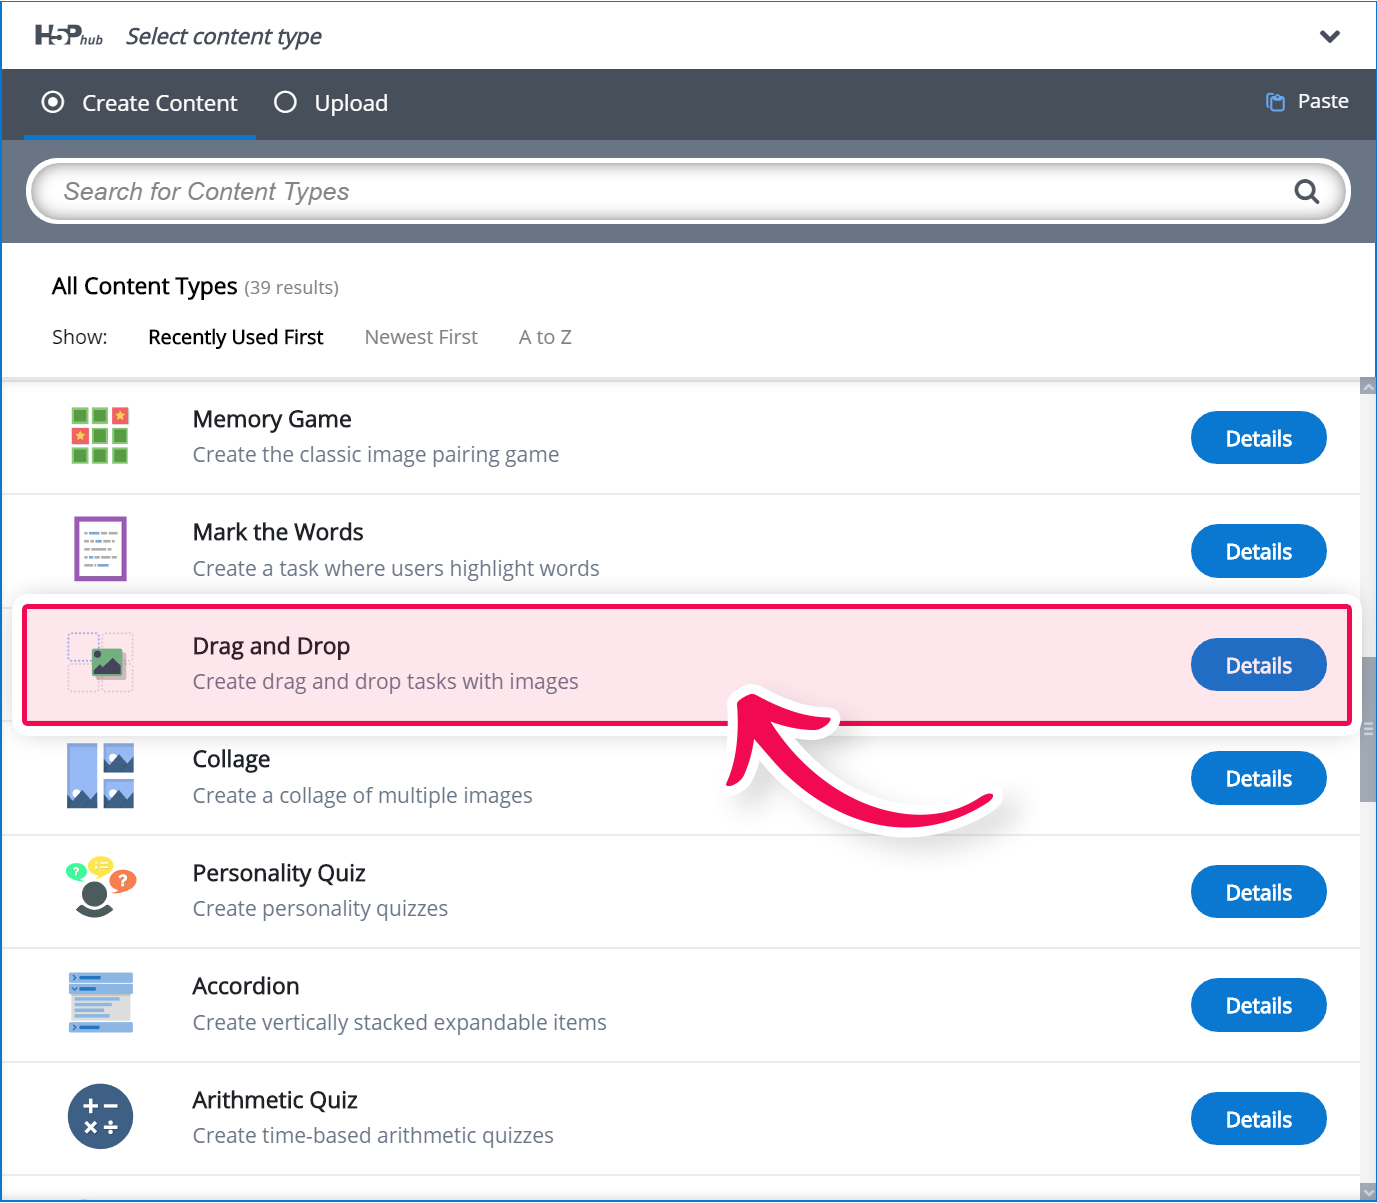
Step 3: Drag and drop question editor
The Drag and drop question editor should now appear. The top part of the editor looks like this:
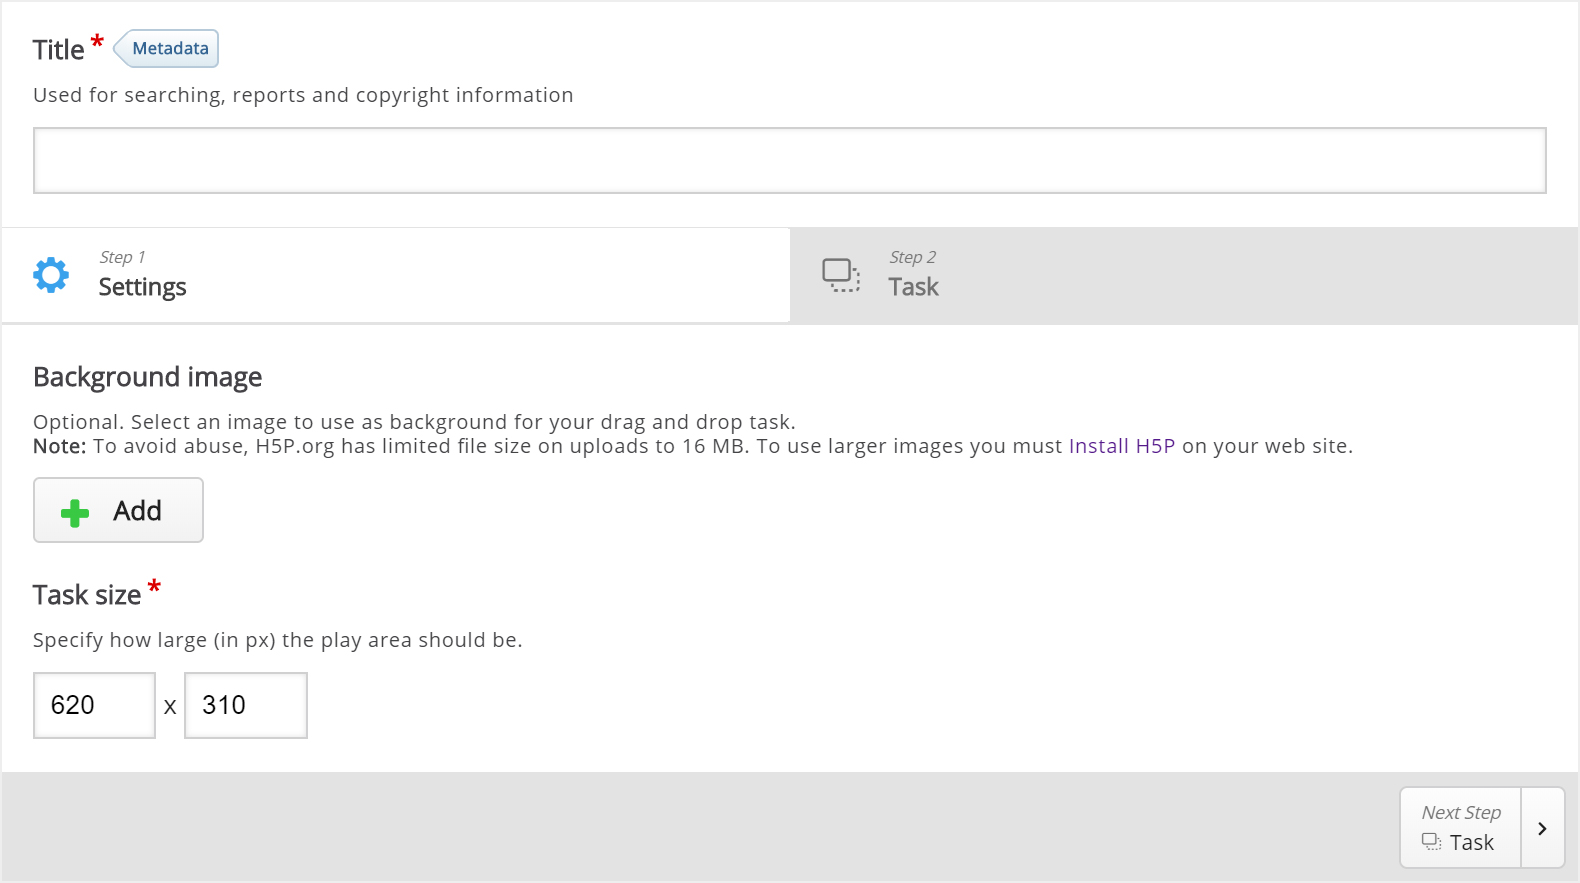
We'll focus on creating the Drag and drop question content in this tutorial. The content creation happens in the top part of the editor, so we'll focus on this part here.
There are two steps in creating a Drag and drop question: Settings and Task. You can press the Settings and Task tabs at the top of the editor at any time to navigate between the views.
Step 4: Settings
Settings deals with general settings such as background image and size.
We'll add this background image:
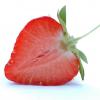
The picture was downloaded from Wikimedia and is licensed with Creative Commons Attribution Share Alike.
Press the ![]() button to add a background image. Browse to where you downloaded the strawberry image above and select it.
button to add a background image. Browse to where you downloaded the strawberry image above and select it.
H5P 1.1 only: You can add license information for the background image by pressing the Edit copyright button:
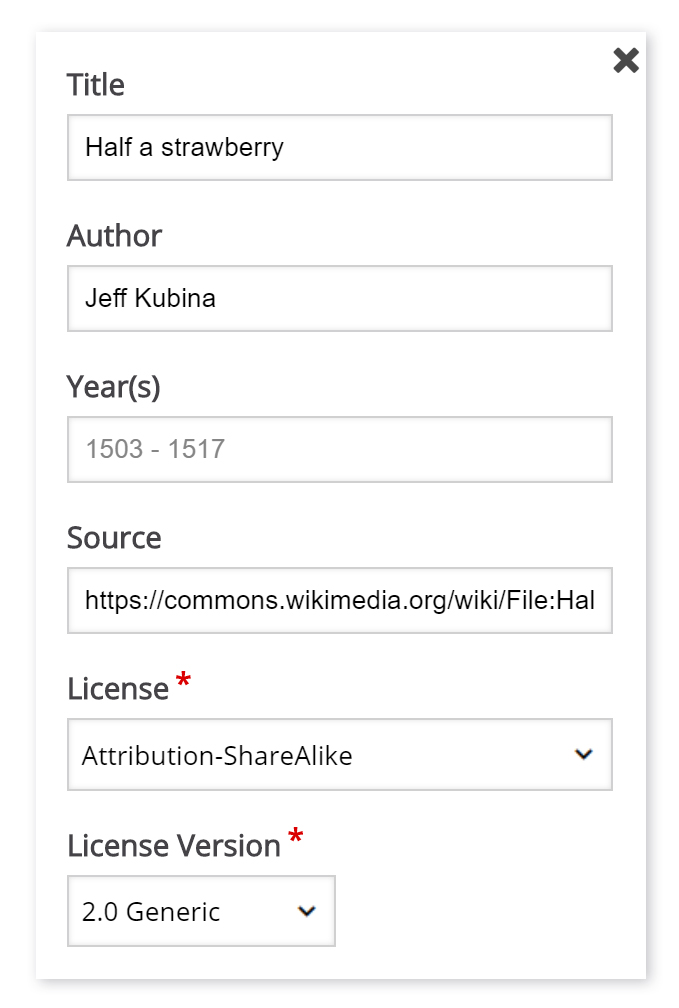
The Year(s) field is not relevant in this context so we'll leave this blank.
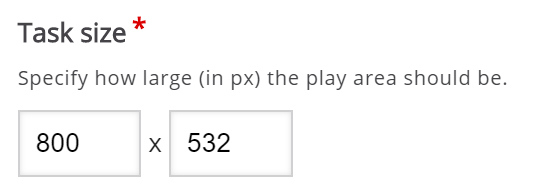
Now that we've added a background image, I can define the size of the Drag and drop question. Since the image has a width of 800 px and a height of 532 px, I'll use this size for the task.
The Drag and drop question will be scaled to the maximum width of the page where it is placed, after saving. The Size defines the width and height of the editor as well as the aspect ratio of the Drag and drop question, rather than the actual size in pixels when it is viewed.
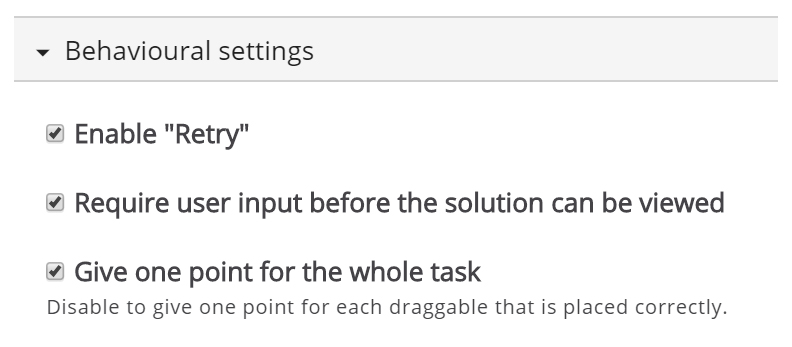
Since we want learners to be able to try to solve the Drag and drop question multiple times, as opposed to only have one go, we'll check the Enable "Retry" option.
The Give one point for the whole task option is more relevant when we add Drag and drop question to Question sets, Interactive Videos or Presentations. This option controls the score the learner gets for solving the Drag and Drop question when it is placed in a sequence of multiple tasks. Since we are creating a stand-alone Drag and drop question, it doesn't matter whether we'll leave this option checked or not.
Step 5: Task
Press the Task tab in the top right half of the editor to start creating the task itself.
You'll see that the background image is displayed with the size defined in the Settings tab.
We'll create a Drag and drop question where the user tries to associate the strawberry with its corresponding genus name. According to Wikipedia, a genus is a taxonomic rank used in the biological classification of living and fossil organisms.
From the example text above, we know that the strawberry belongs to the Fragaria genus. Other examples of berry genuses are Rubus (e.g. Raspberries) and Vaccinnium (e.g. Blueberries). We'll use these last two examples as false alternatives.
You will see a toolbar above the background image.

The toolbar allows you to insert:
 | Dropzones |
 | Texts |
 | and Images |
Dropzones are areas on which Text and Image draggable elements can be dropped.
Step 6: Dropzone
We start off by adding a Dropzone over the strawberry shown in the background image. Press the Dropzone button in the toolbar, drag it onto the background image and drop it somewhere above the strawberry.
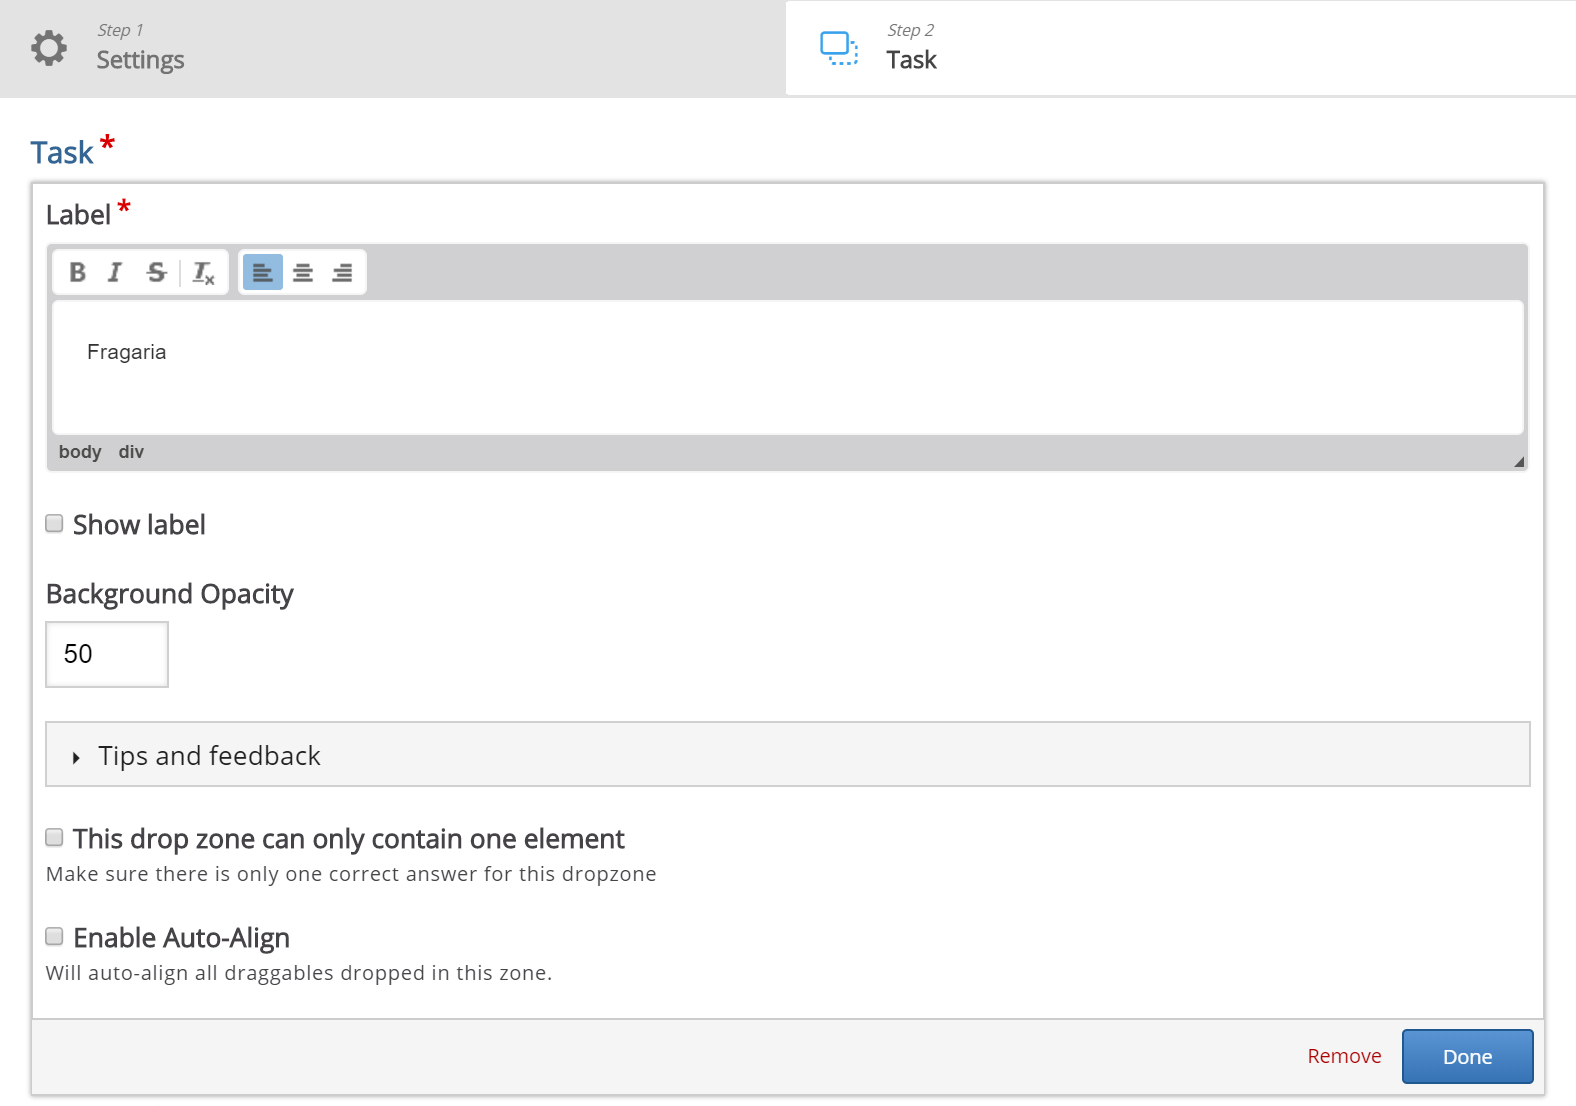
Dropzone options appear when you drop it. We add the Label Fragaria, which is the name of the genus the Strawberry belongs to. Set the opacity to 50 to make it semi-transparent.
You will have something like this:
Press Done.
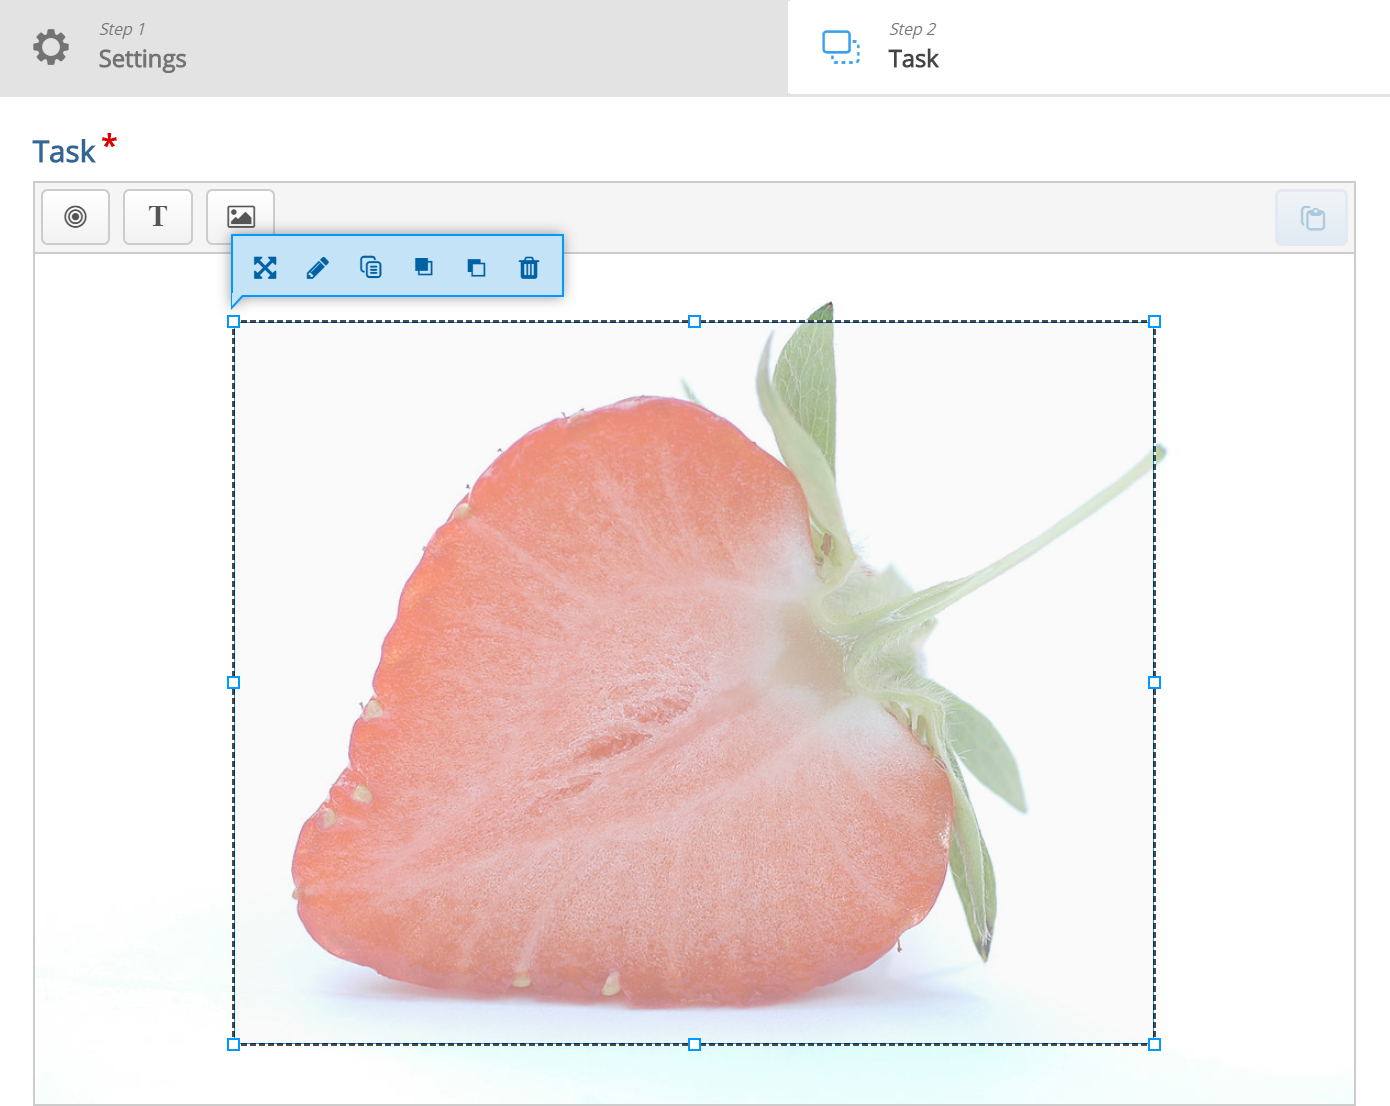
You will now see a white dropzone placed over the background image. Move and resize the dropzone so that it is placed roughly over the Strawberry in the background image. You move the dropzone by pressing and dragging it to where you want it placed. You resize the dropzone by pressing the lower right corner of the dropzone and dragging up/down or left/right to scale the dropzone to the right proportions.
Double-press the dropzone to edit it at any time.
You should now have something like this:
Step 7: Add text
In this tutorial we'll add three Text draggable elements; one correct and two incorrect. Images can be used as draggable elements in the same way as Text.
Press the Text button in the toolbar and drag it onto the background image. You can place it to the right of the strawberry. Text options appear when you drop it.
In the Label field, type in Vaccinium. Under Select drop zones, check the Fragaria checkbox. We know this is an incorrect match, however, we want the learner to be able to drop the Vaccinium object on the Fragaria dropzone. If this option was unchecked, the learner would not have been allowed to drop the object on the dropzone. This is more relevant in cases where you have more than one dropzone.
Leave the opacity to 100 and press Done. You will now see the Vaccinium draggable object where you placed it.
Move and resize the draggable object as you please. You move it around by pressing on it and then drag it to where you want it. You resize by pressing in the lower right corner of the object and then pull in any direction to scale.
Add two more Text draggable elements by following the exact same procedure as above. However, label these elements Fragaria and Rubus respectively. Place them in a neat alignment to the right of the Strawberry.
Double-press the draggable object to edit it at any time.
Hopefully, you will now have something like this:
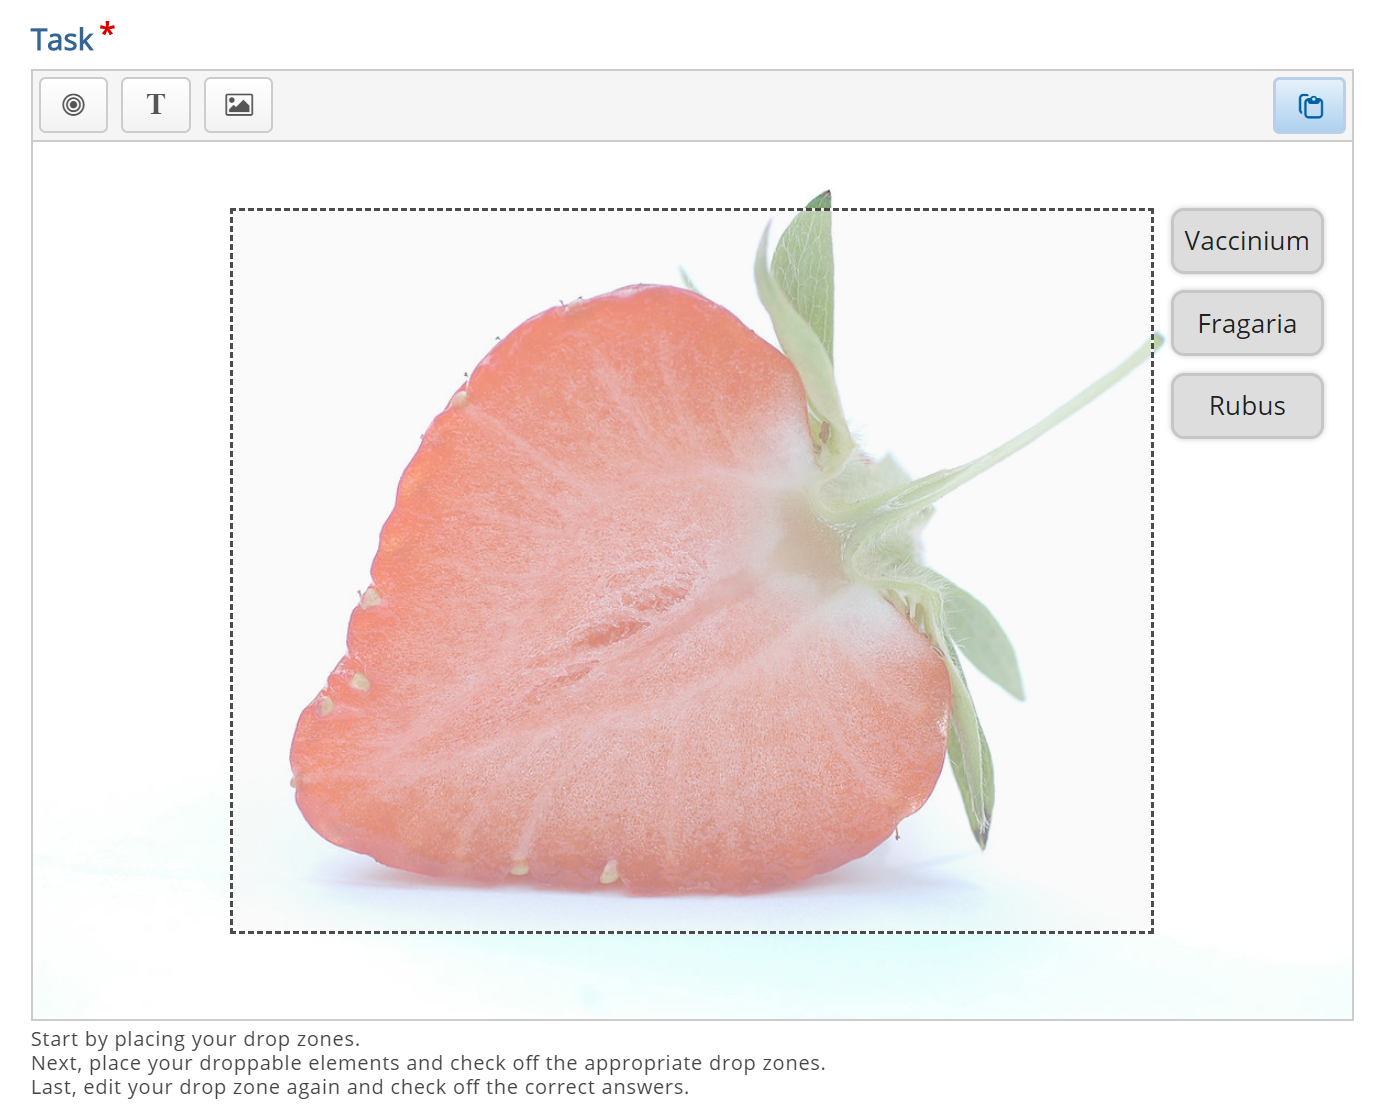
Step 8: Define the correct match
In order to define which match between dropzone and draggable elements is correct, you double-press on the dropzone. This will bring up the same dropzone options as in Step 5.
Since you have defined an association between the three draggable elements and the Fragaria dropzone in the previous step, you will now see a Select correct elements option. Check the Text: Fragaria checkbox to define this draggable object as the correct match.
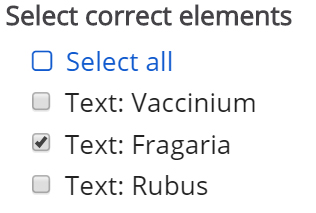
Now, set the opacity to 0 (zero) and press Done.
Multiple correct elements can be placed on a dropzone.
Step 9: Finishing up
We are now more or less finished. We might want to add an instructional text such as: Which genus does the Strawberry belong to? Drop the correct genus name on the Strawberry.
This is done by adding a Text element and type in our instructions in the Label field.
As instructional text should not be a draggable element, we do not select a corresponding dropzone.
Place the instructional text in the top right corner and resize it as you please.
You should now have something like this:
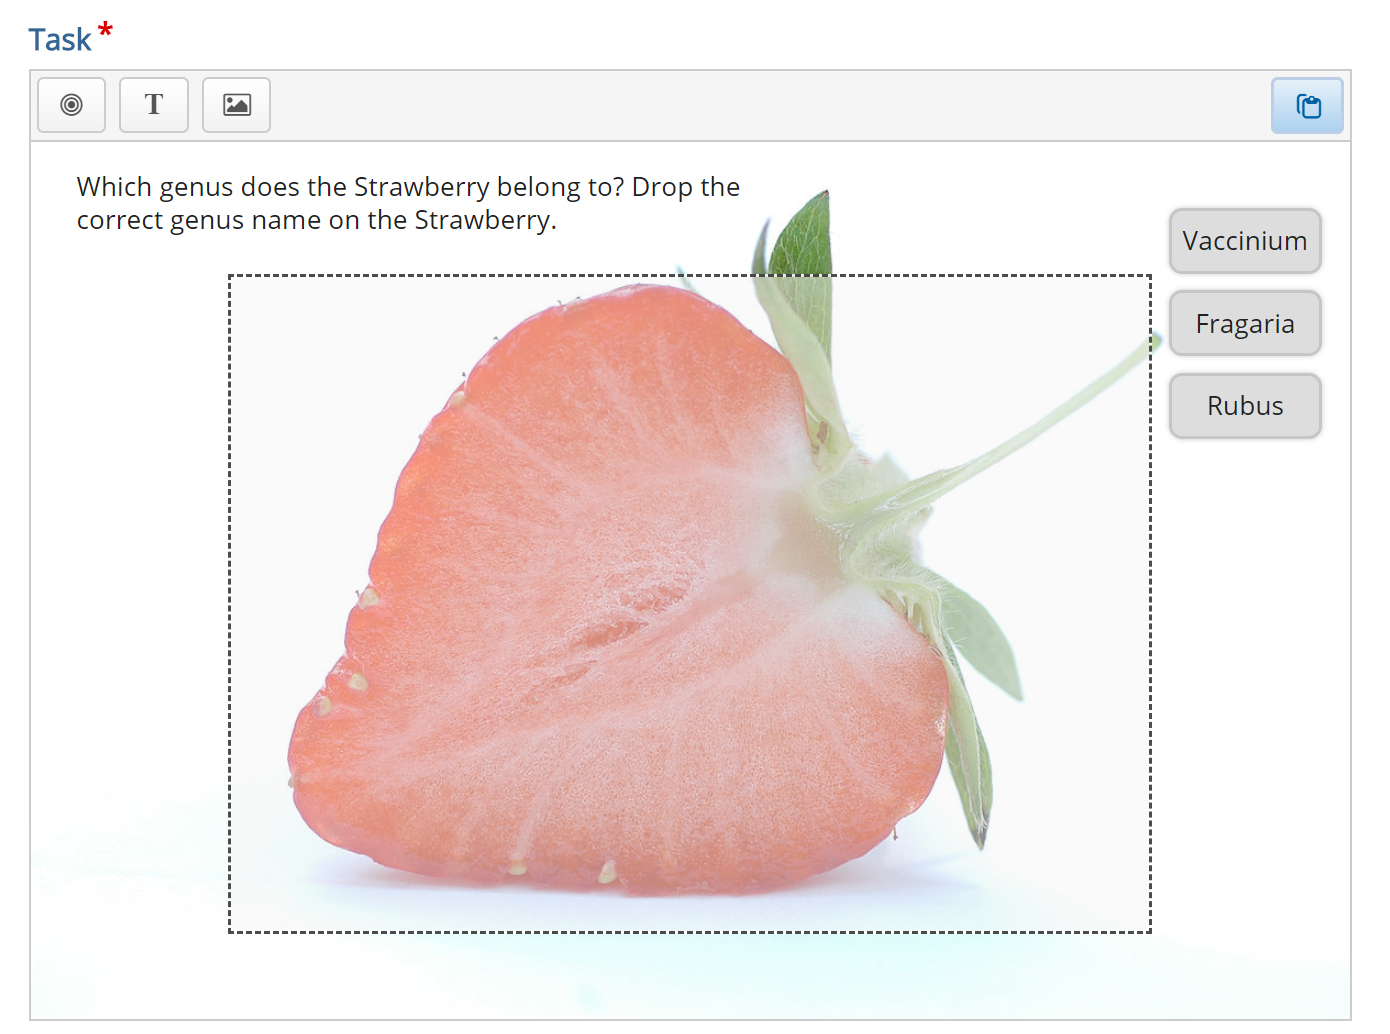
Save the node/article to view your finished Drag and drop question.
You should now have the same result as the example.
Feel free to leave any comments or suggestions on how to improve this tutorial.
Comments
Jindy
Sat, 09/28/2019 - 06:49
Permalink
Unable to move draggable elements to side or below background
I can’t get Step 7 in the tutorial to work correctly – ie “Press the Text button in the toolbar and drag it onto the background image. You can place it to the right of the strawberry.”
I can create and edit the draggable text element, but I can’t move it off of the background image - I would like the draggable elements to be below the background image.
I’ve tried it in both Chrome and Firefox, so it’s not a browser issue; I’m obviously missing something.
The interaction is here - https://h5p.org/node/604612
BV52
Tue, 10/01/2019 - 19:35
Permalink
Hi Jindy,The background image
Hi Jindy,
The background image that was used in the documentation has enough white space in it for the draggables to fit. I suggest that you edit your backgorund image and add some white space where you want to place your draggables.
Another way is to add your "background" as an image but not activate it as a draggable. This way you will be able to adjust the size of it, the only drawback is that you may run into some pixelization in expanding your image.
-BV52
Jindy
Tue, 10/01/2019 - 22:31
Permalink
Thanks for your response; I
Thanks for your response; I had already tried creating white space within the image, but it distorts the rest of the image (ie the photos) when that image is uploaded. I don't believe I activated the background image as a draggable - could you explain more about that, please?
BV52
Wed, 10/02/2019 - 19:28
Permalink
Hi Jindy,Instead of uploading
Hi Jindy,
Instead of uploading the image as a background as in Step 3, you add as a draggable discussed in step 5. Just make sure that you do not place anything under select drop zones. This way you can resize the image within the space provided and leave space for your draggables.
-BV52
Jindy
Tue, 10/15/2019 - 00:12
Permalink
Issue resolved
Thank you so much for your help with this - it's now sorted. Much appreciated!
iliana cardenas
Wed, 11/20/2019 - 09:25
Permalink
Answers erased
Hello
I use H5P with Moodle and i want to know, Is there’s a way to use "retry" without the good answers being erased ?Just change the bad answers ?
Thank you
BV52
Wed, 11/20/2019 - 19:41
Permalink
Hi Iliana,The answer is no
Hi Iliana,
The answer is no and yes. No this feature is not available on the current version of Drag and Drop but Papi Jo has a prototype version that has feature. You can head over to this thread for more details.
-BV
elwalsh
Tue, 02/11/2020 - 15:06
Permalink
Image format not accepted?
I have used H5P many times and not encountered this problem... when attempting to upload an image, i get the message "file type isn't allowed". I have tried with JPEG, PNG and GIF. Please advise!
BV52
Tue, 02/11/2020 - 17:26
Permalink
Hi elwalsh,Please check my
Hi elwalsh,
Please check my answer here.
-BV
leendec
Sun, 03/15/2020 - 19:15
Permalink
Hi, I have made a nice
Hi, I have made a nice exercies dropping words under pictures.It all looks great and works but when I publish it on Canvas, the words appear on top of their text box. When I drag them, the word moves with its box. How can I fix this? Thank you
leendec
Sun, 03/15/2020 - 19:17
Permalink
text appears outside the box when I publish in Canvas
Hi,
I have created a matching exercice : drag the correct word onto the picture. It all looks great in the edit mode, it all works but when I view/publish it, the words move out of the text box. I can drag the whole thing to the right place but the word is now on top of the textbox. Any idea why? thanks
BV52
Mon, 03/16/2020 - 17:44
Permalink
Hi leendec,Would you mind
Hi leendec,
Would you mind sharing a sample content with this issue so that we can check.
-BV
leendec
Mon, 03/16/2020 - 18:46
Permalink
how to share?
Hi,
Sorry, I am very new to this. I have embedded the activity in Canvas. How can I share it with you?
regards, Leen
BV52
Tue, 03/17/2020 - 17:05
Permalink
Hi leendec,You can post the
Hi leendec,
You can post the URL of the content here.
-BV
Neo College
Fri, 03/20/2020 - 03:19
Permalink
No answers?
How do I display the answers? I don't see an option do display the correct solution.
BV52
Fri, 03/20/2020 - 17:10
Permalink
Hi Neo College,Not on the
Hi Neo College,
Not on the official version of Drag and Drop but you might want to take a look at Papi Jo's prototype features.
-BV
Neo College
Thu, 07/02/2020 - 01:21
Permalink
What does the button "Show
This is perfect! Well almost, I wish it could be part of the Question set to have multiple questions.
Claudia Zappa
Mon, 03/23/2020 - 19:36
Permalink
COME CONDIVIDERE CON GLI
COME CONDIVIDERE CON GLI STUDENTI E POI RICEVERE LE RISPOSTE?
Marina Grinko
Fri, 03/27/2020 - 00:58
Permalink
Drag and Drop Blues
I have 1 image and several labels. I wonder what I'm doing wrong? As I drag the label, the correct area is highlighted. That too easy, right? Please help!
Marina Grinko
Fri, 03/27/2020 - 00:58
Permalink
Drag and Drop Blues
I have 1 image and several labels. I wonder what I'm doing wrong? As I drag the label, the correct area is highlighted. That too easy, right? Please help!
Marina Grinko
Fri, 03/27/2020 - 00:59
Permalink
Drag and Drop Blues
oops here is the link
https://h5p.org/node/764228
BV52
Fri, 03/27/2020 - 17:39
Permalink
Hi Marina,Creating a Drag and
Hi Marina,
Creating a Drag and Drop with multiple dropzones and multiple draggables is a three step process:
I've fixed your content and you can download it here.
-BV
Marina Grinko
Fri, 03/27/2020 - 19:20
Permalink
Drag and Drop Blues OVER!
thank you very much,
I am not sure how to download it, but is it Ok to use your 'fixed' version? Will it be available indefinitely?
thanks again. - MG
BV52
Fri, 03/27/2020 - 19:23
Permalink
Hi Marina,You can click on
Hi Marina,
You can click on the reuse button at the bottom of the content. It is available indefinitely by I have a habit of cleaning my test contents and I might accidentally include this.
-BV
devlies
Sat, 03/28/2020 - 21:53
Permalink
drop zone lightens up when right answer hovers over
I unchecked highlighting the dropzone (never) but still the dropzone gives an indication of what is the correct answer. I don't find this a very useful feature. If I state 'never', it should not be highlighted, I guess.
Could you please 'lighten this up' for me please?
Kind regards, Erik
BV52
Mon, 03/30/2020 - 17:18
Permalink
Hi Erik,I think I've answered
Hi Erik,
I think I've answered the similar question here.
-BV
Zollypop
Wed, 04/01/2020 - 19:25
Permalink
Show wrong answers
Hi,
Is there a way to show which answers are wrong during a drag and drop activity?
If they place one wrong but the rest are correct, it doesn’t show the wrong answer so they wouldn’t know which is wrong or whether they had any answers that were wrong.
Thanks,
Zoe
BV52
Wed, 04/01/2020 - 21:44
Permalink
Hi Zoe,Please check my answer
Hi Zoe,
Please check my answer here.
-BV
lklassen
Fri, 04/17/2020 - 20:32
Permalink
Image file types
I have created an original document and saved it as both JPEG and PNG files that I'd like to use as the image for which students will drag and drop labels, but I get the message "file type isn't allowed".
What am I doing wrong?
BV52
Fri, 04/17/2020 - 20:41
Permalink
Hi lklassen,You should find
Hi lklassen,
You should find what you are looking for in this thread.
-BV
Clem11
Wed, 07/01/2020 - 10:12
Permalink
Feedback
Hi,
this is a nice activity, but, is it normal that the feedback is very limited? That's too bad because I need to create quite long feedbacks sometimes and because of that, I can't choose this activity (same thing for the hotspots for example).
Thank you for your answer.
Dorothée URCA
Tue, 10/06/2020 - 10:30
Permalink
Wrong notation with Drag and Drop activity
Hi,
I have a problem with the notation in the Drag and Drop activity.
I created 10 labels (1 point for each label) but the final score is on 15 points. I don't understand what I did wrong, could you help me ?
Thank you for your answer !
BV52
Tue, 10/06/2020 - 19:43
Permalink
Hi Dorothée URCA,Would you
Hi Dorothée URCA,
Would you mind reposting this here and attach your content. I suspect that this is related to this bug report however I need to see the content to make sure.
-BV
DimaSmart
Mon, 12/14/2020 - 18:21
Permalink
Impossible
This is impossible to work with. I have no idea who created and worked on it. I should be as simple as this
Identify drop zone 1 (option to draw a rectangular for text of prictre)
Identify correct answer drop zone 1 (option to enter text).
Example with strawberry is unhelpful.
Tutroals should not be a page to read, I tshpu;ld be a task to accomplush- involvment=learning.
BV52
Mon, 12/14/2020 - 18:41
Permalink
Hi DimaSmart,Thank you for
Hi DimaSmart,
Thank you for the feedback, I will forward this to the H5P core team.
You can also check my simple video here. Apologies in advance since I skipped most of the steps except the part to create the draggables and drop zones.
-BV
swin
Wed, 12/23/2020 - 20:16
Permalink
I couldn't figure out how to
I couldn't figure out how to add distractors to the "Drag Text" activity so though I would try here, but it seems as if there is a similar issue. I can create Text labels, but they only become draggable if you associate them with a drop zone. Ideally, you want to associate them with NO dropzone so that they are draggable but do not score.
BV52
Wed, 12/23/2020 - 20:23
Permalink
Hi Swin,The reason behind
Hi Swin,
The reason behind this is when you are creating the draggables you are not choosing the drop zones. In the draggable settings you should choose not only the drop zone that is correct you should also choose all the drop zones that you would like that draggable to be dragged into. This video should provide more details on how to create a Drag and Drop activity with multiple drop zones and draggables..
-BV
swin
Wed, 12/23/2020 - 20:35
Permalink
As soon as I posted I
As soon as I posted I realised my mistake. Its caught me out before, but I will be more ware next time. Sorry about that :(
jimjudges
Fri, 01/29/2021 - 15:18
Permalink
More than one single object can be correct using OR logic
Is it possible to have a drag and drop question that gives 1 point for selecting any correct answer?
For example if we have drop zone 1 with three separate draggable answer images A, B, or C. Dragging either of the correct answers A OR B would give 1 point but dragging the wrong answer C would give zero points.
So this is simliar to dragging multiple objects but it is using the OR logic rather than AND.
Is this possible at the moment?
Many thanks for any help.
jimjudges
Fri, 01/29/2021 - 15:20
Permalink
1 point for selecting any correct answer using OR logic
Is it possible to have a drag and drop question that gives 1 point for selecting any correct answer?
For example if we have drop zone 1 with three separate draggable answer images A, B, or C. Dragging either of the correct answers A OR B would give 1 point but dragging C would give zero points.
So this is simliar to dragging multiple objects but it is using the OR logic rather than AND.
Is this possible at the moment?
Many thanks for any help.
BV52
Fri, 01/29/2021 - 19:01
Permalink
Hi jimjudges,I'm 99% sure
Hi jimjudges,
I'm 99% sure that there is no "OR" logic in Drag and Drop but that 1% may be a single setting that I haven't accidentally enabled/disabled that may bring a eureka moment.
-BV
jimjudges
Mon, 02/01/2021 - 16:45
Permalink
Hi BV,I am sure you are right
Hi BV,
I am sure you are right - should I submit this as a feature request ?
All the best,
Jim
BV52
Mon, 02/01/2021 - 20:17
Permalink
Hi Jim,Feel free to do so ;-)
Hi Jim,
Feel free to do so ;-)
-BV
Jennypetrit
Sat, 07/10/2021 - 20:13
Permalink
Pictures with background
Hi this is just amazing. thanks a lot
i have created a content with a picture background to be more specific "a tree" and then I added apples to make my som drag them into a básquet.
but I can not remove the background of the apples they look like flascards I tried yo convert them into a PGN extension but the programm just accepts JPG extentions.
in the demo there is a chess game where the pictures they don't have that background.
can you help me please
thank you so much
tonyn
Mon, 08/23/2021 - 19:01
Permalink
"Dropzone prefix" text override
How do you change the text override for dropzone prefixes to its associated label? The default is “Dropzone {num} of {total}.” Is there a “{label}” or “{name}” option?
lougiebelle.dimaano
Mon, 08/30/2021 - 02:39
Permalink
I cannot find the drag and drop activity
I cannot find the drag and drop activity the h5p and i need it for my LMS. Thanks
BV52
Mon, 08/30/2021 - 18:48
Permalink
Hi,To provide a best possible
Hi,
To provide a best possible experience for new users and to ensure that people use H5P.org only for trying out H5P (we've had more traffic than our server can handle lately, ref also the warnings when you create content, embed content and view the content) there are limited content types that are available.
Check the getting started page for information on how you can use all the content types and use H5P for real. We unfortunately are not able to provide free hosting, only free software :) Hopefully you'll consider supporting the H5P Core Team by using H5P.com.
-BV
kcorfman
Thu, 02/10/2022 - 17:54
Permalink
Any idea why in the most
Any idea why in the most recent question of this type I created, the content title appears at the top of the question? Not true of the others. (I use the titles for my own organization and don't want them to appear on the page.)
angelicaprofessor
Mon, 04/11/2022 - 05:12
Permalink
Error to place the elements
I designed an exercise with two columns (column 1: feminine and column 2: masculine) and it only allows to place the answer in the correct, so it would be really obvious for students to find out the answers for the exercise. ¿What should I change in the settings?
BV52
Mon, 04/11/2022 - 18:43
Permalink
Hi angelicaprofessor,Please
Hi angelicaprofessor,
Please follow the steps below when creating a Drag & Drop activity with multiple drop zones and multiple draggables:
Create the drop zones
Create the draggables and place a check on the drop zones you would want the draggable to be dragged into (in most cases all the dropzones). This does not indicate the correct answer but only tells the content where you want to allow the draggable to be dropped.
Edit each drop zone to place a check on the correct draggables.
You can also check this simple video on how to create a D&D with multiple drop zones and draggables.
-BV
Pages