Course Presentation Tutorial
The Course presentation content type allows you to create a slide-based presentation of your learning material. Elements such as slide titles, links, pictures, audio and video clips, as well as various quiz types can be embedded seamlessly right into the presentation for a richer learning experience.
In this tutorial you will learn:
- When to use Course presentations
- How to create a Course presentation
Click the "Get started" button to explore all of the possible ways to use H5P!
Video tutorial
The following video shows what Course Presentations may be used for and how to make one:
Textual tutorial - example
Here's the Course presentation we'll create in this tutorial:
When to use Course presentations
Course presentation enables you to author and deliver your course material directly in your browser. Course presentations contain slides where you can add various multimedia- and interactive elements to engage the learner.
Course presentations are used when you want to package a piece of learning content in a structured and interactive format. Learners swipe through slides to experience the learning material while solving various quizzes or watching videos along the way.
Try Course presentations as an alternative to presenting your learning content as Powerpoint presentations, PDFs or text-based web pages. Course presentations are very flexible to use, as they are simple to create, publish and edit.
Step 1: Topic
We'll use the Wikipedia article about Cloudberries as background material for our Course presentation. We'll use a couple of pictures from Wikimedia Commons as well.
Let's create three slides, with a test at the end:
- Slide 1: Cloudberries
- Slide 2: Where to find them?
- Slide 3: Uses
- Summary
Step 2: Creating a Course presentation
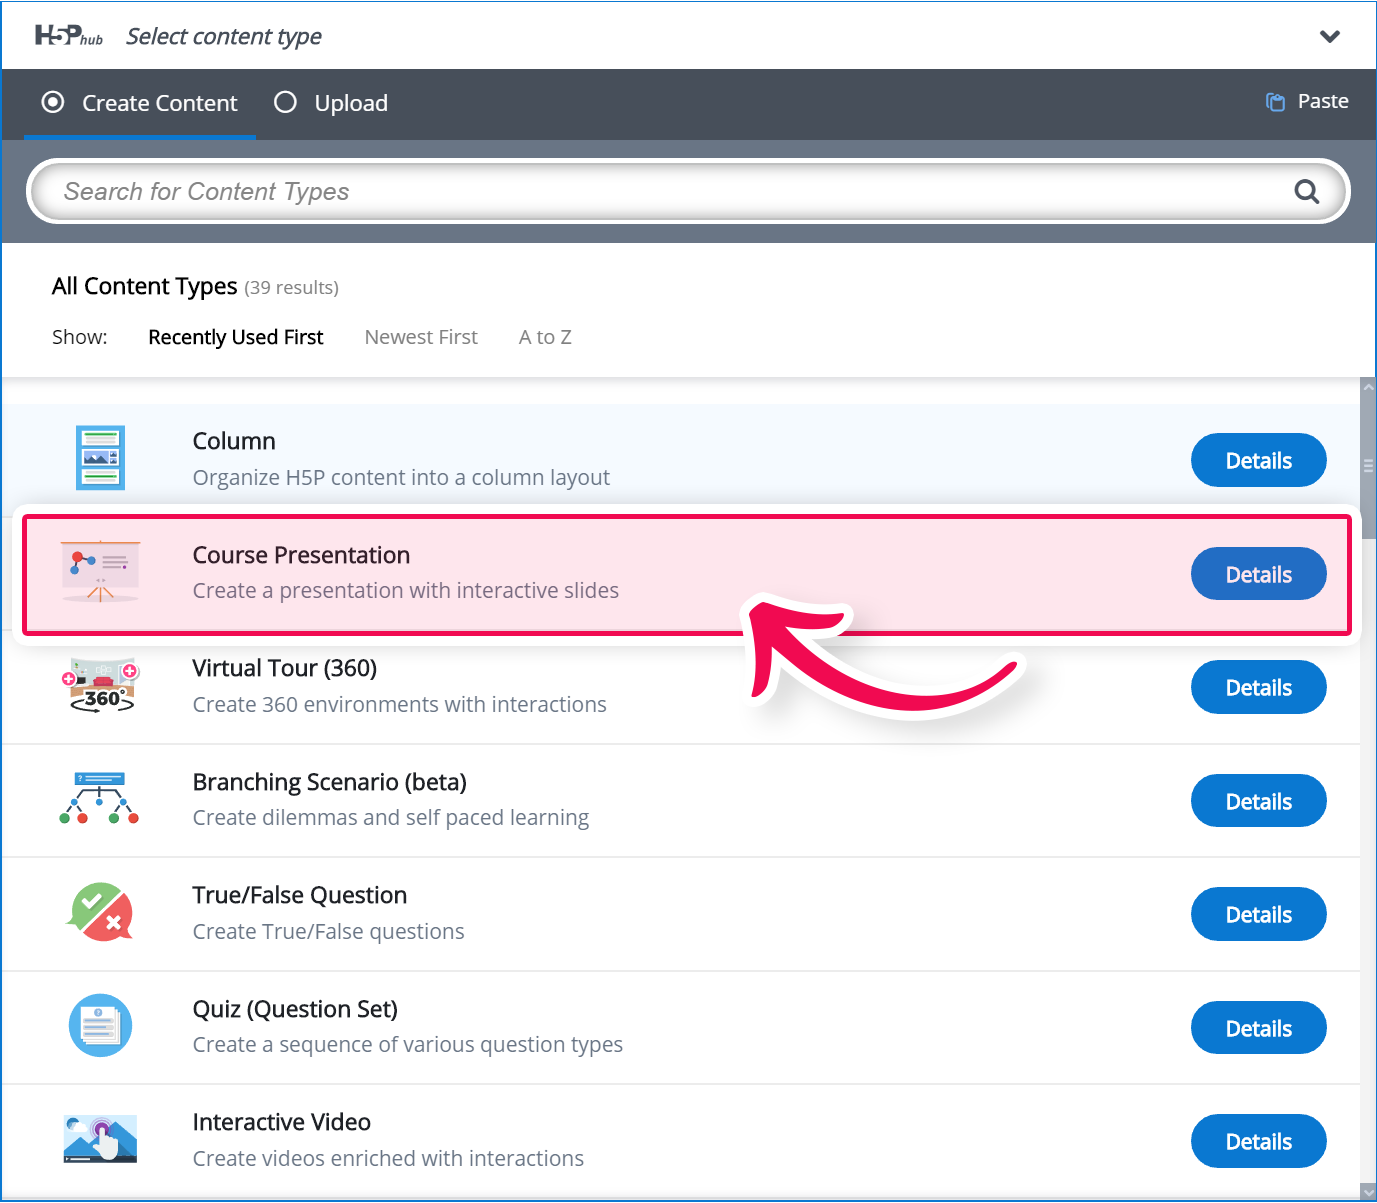
Select the New content option and choose Course presentation from the list of Content types:
Step 3: Course presentation editor
The Course presentation editor should now appear. The top part of the editor looks like this: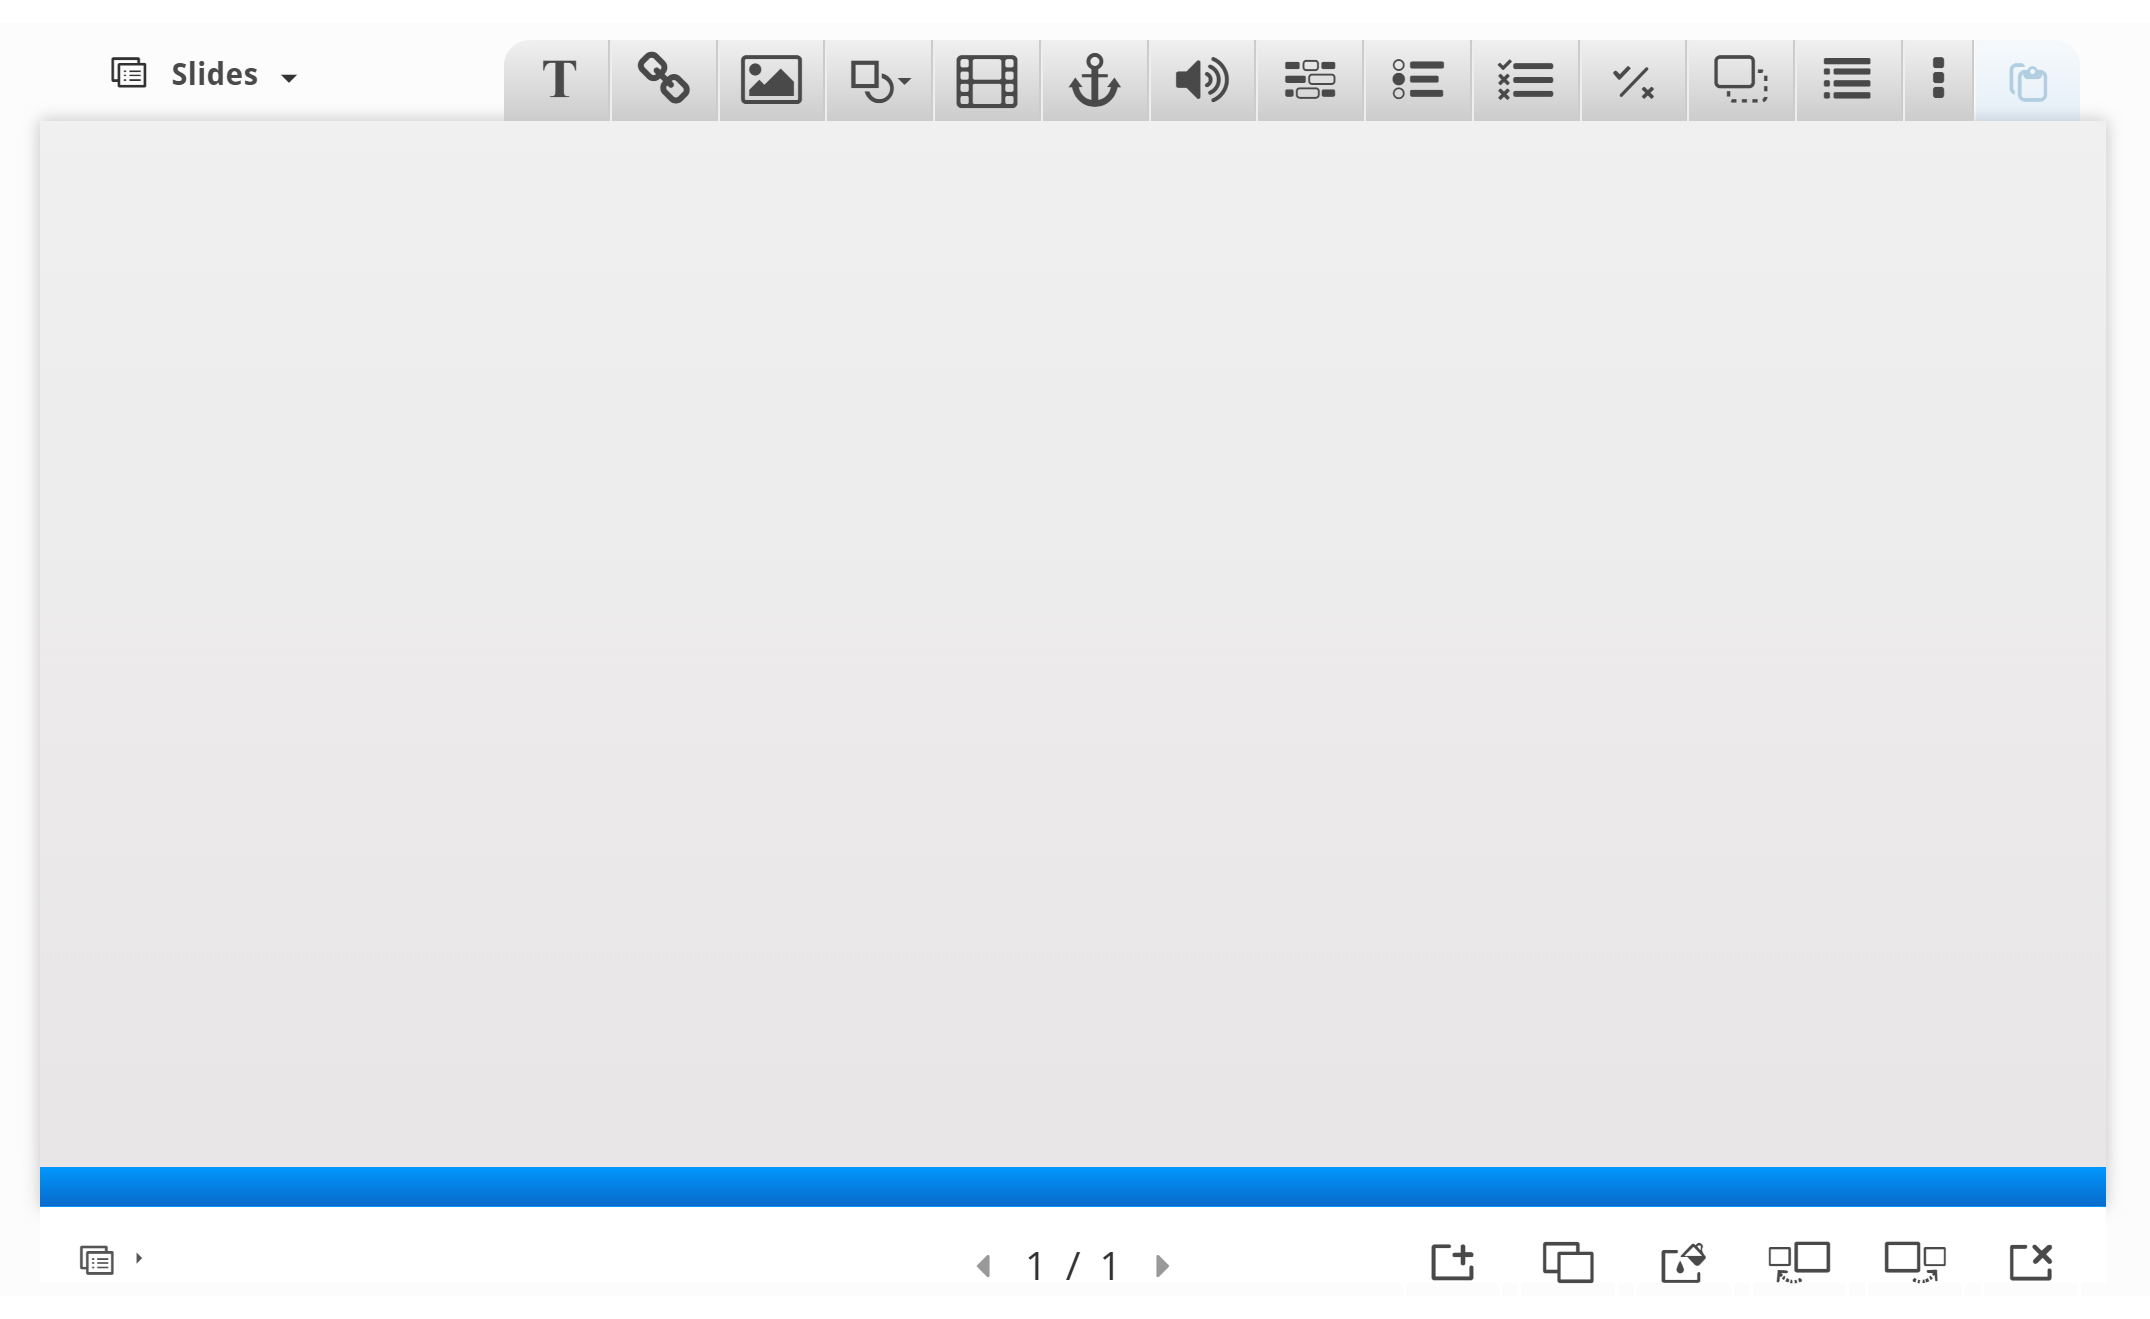
In this tutorial, we'll focus on creating the Course presentation content. The content creation happens in the top part of the editor, so we'll only focus on this for now.
The Course presentation editor is WYSIWYG. The end-user view of the Course presentation will look very similar to the editor's view.
Step 4: Slide 1
We'll start by adding a slide in the slides panel to the left. The slide titles can be used to navigate between the slides.
You can remove the slides panel entirely by pressing the Remove slides button. However, this action cannot be undone.
Press the  button to open the "Slides" menu.
Press the pen next to "No title" ![]() to add a slide title.
to add a slide title.
Use Cloudberries as the title. You should now have something like this:
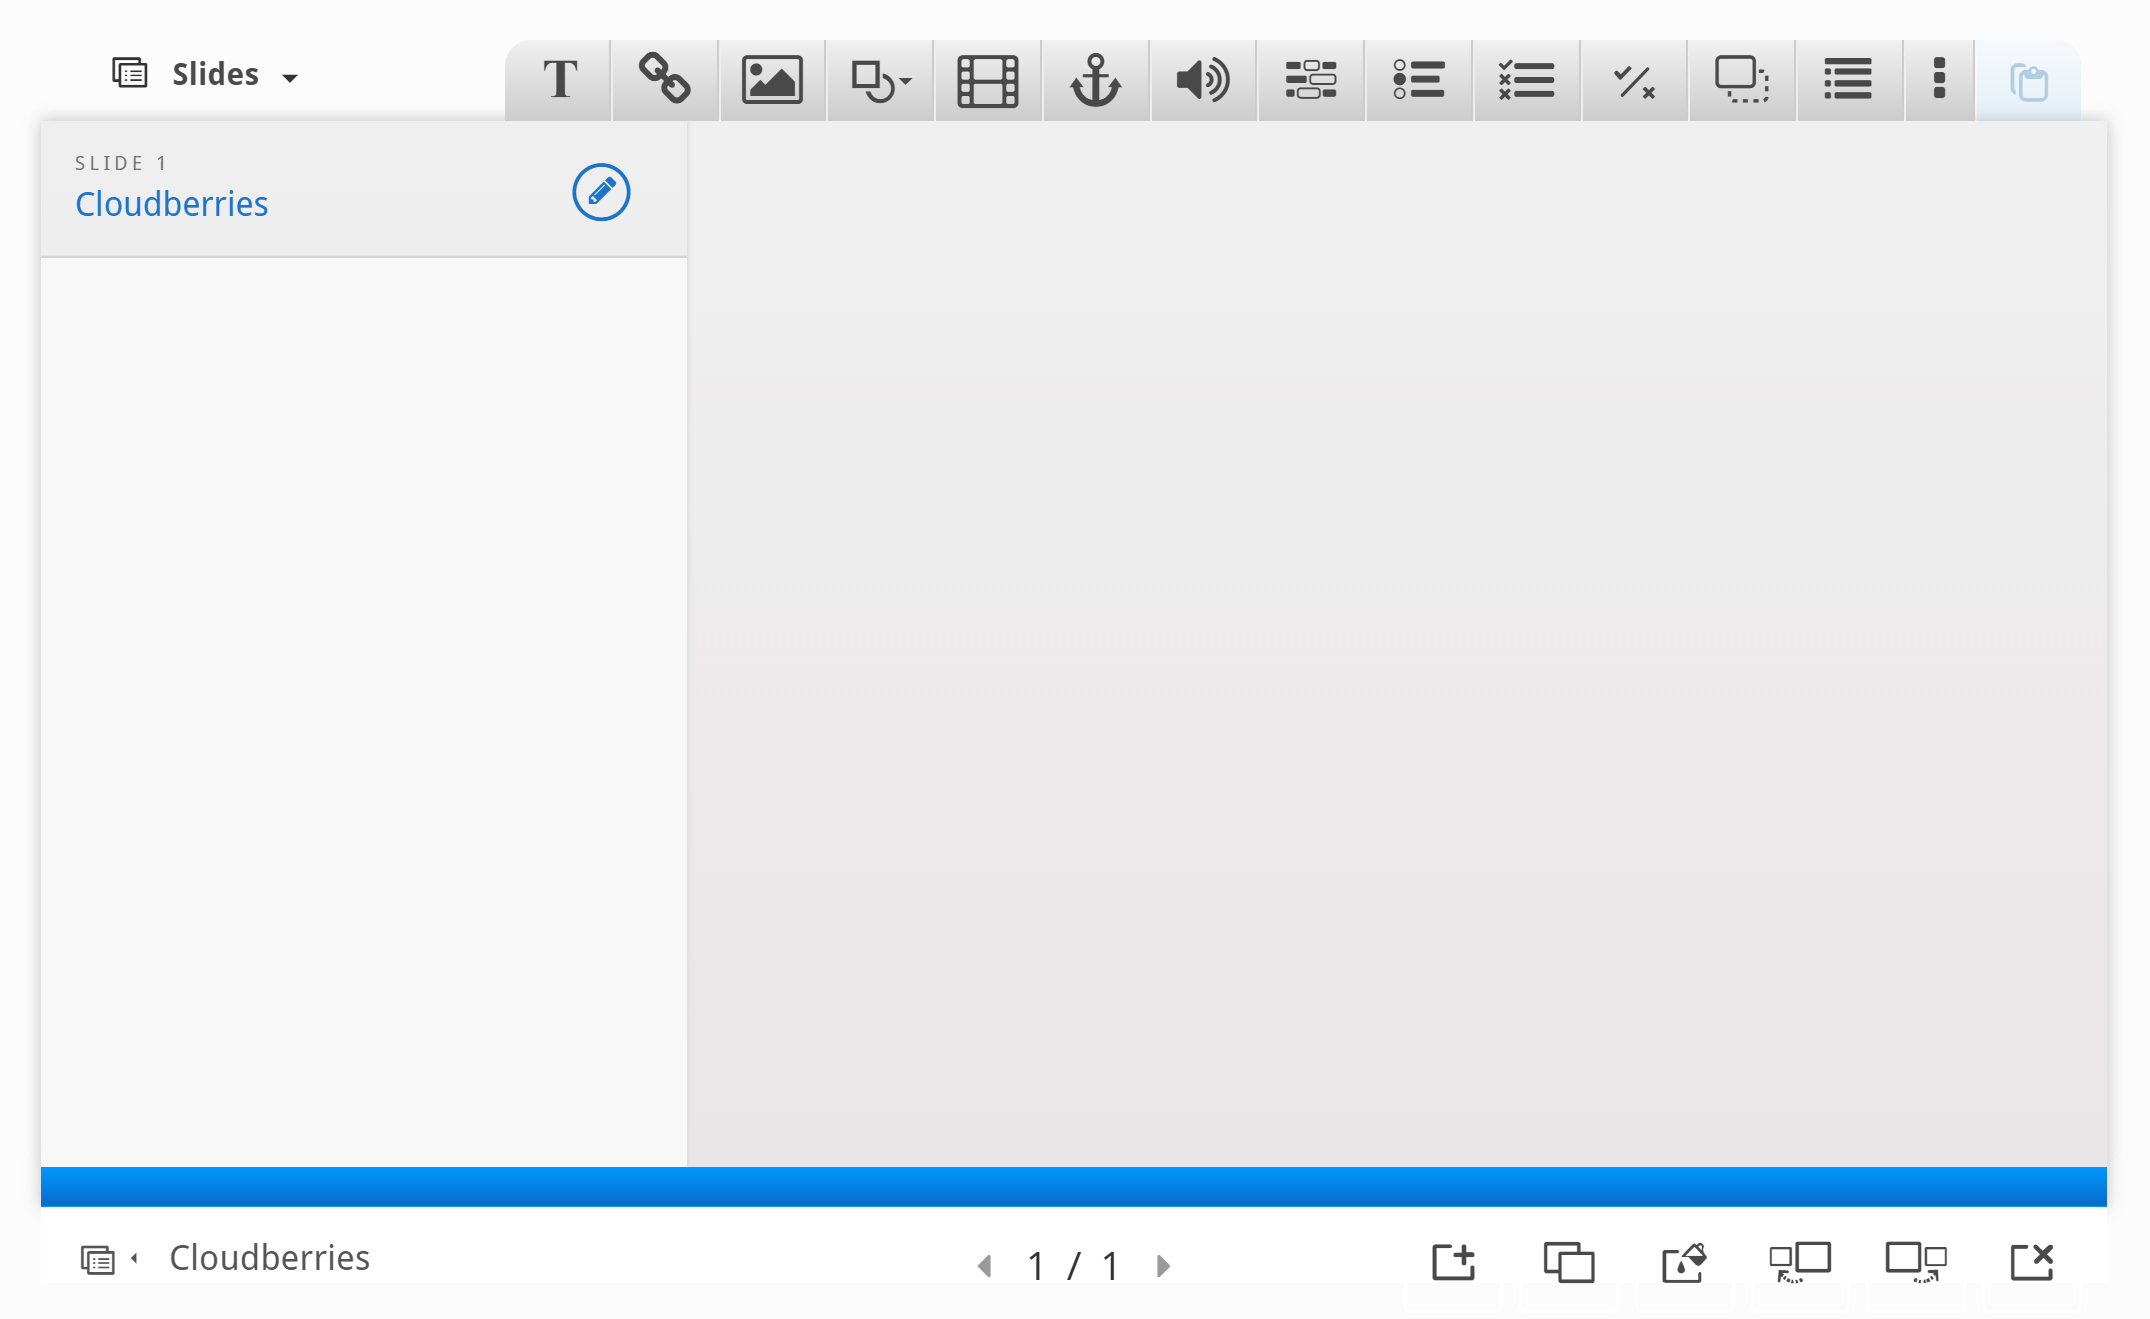
Now we can move on to adding some images.
We'll use these two images from Wikimedia:
Note the license information and URL and save the pictures to a local folder.
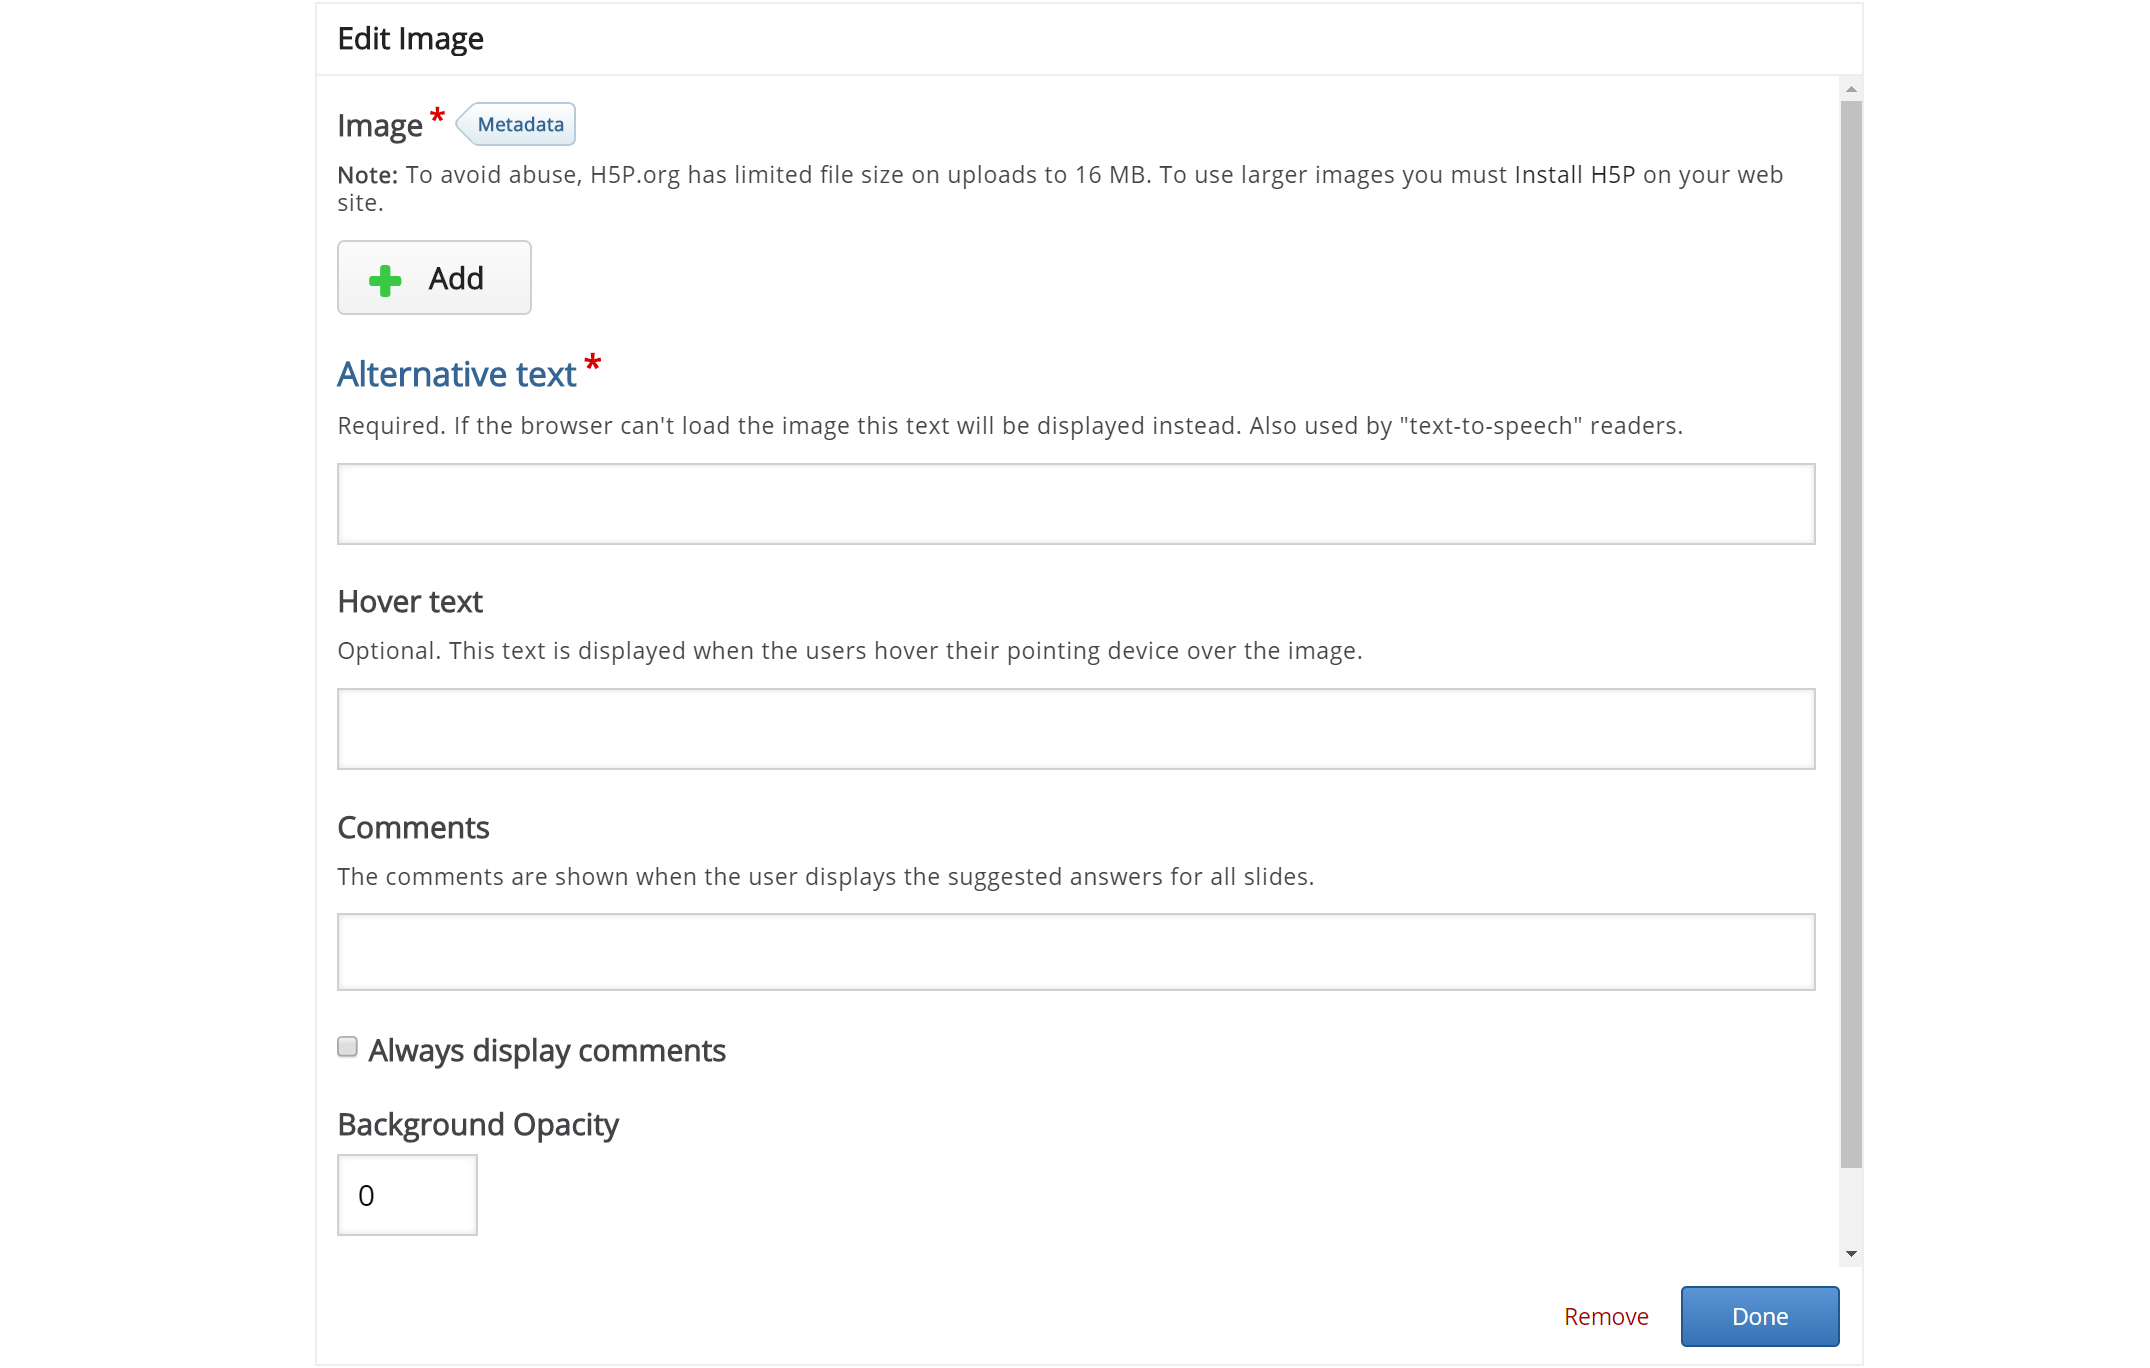
We add the pictures by using the ![]() button in the top toolbar. Press this button, drag it to where you want the image to be placed and drop it there. A dialog will automatically open:
button in the top toolbar. Press this button, drag it to where you want the image to be placed and drop it there. A dialog will automatically open:
Press the  button, browse to where you saved the cloudberry flower picture and select it for upload.
We must also remember to add multimedia license information. Add the following information to the Metadata  dialog:
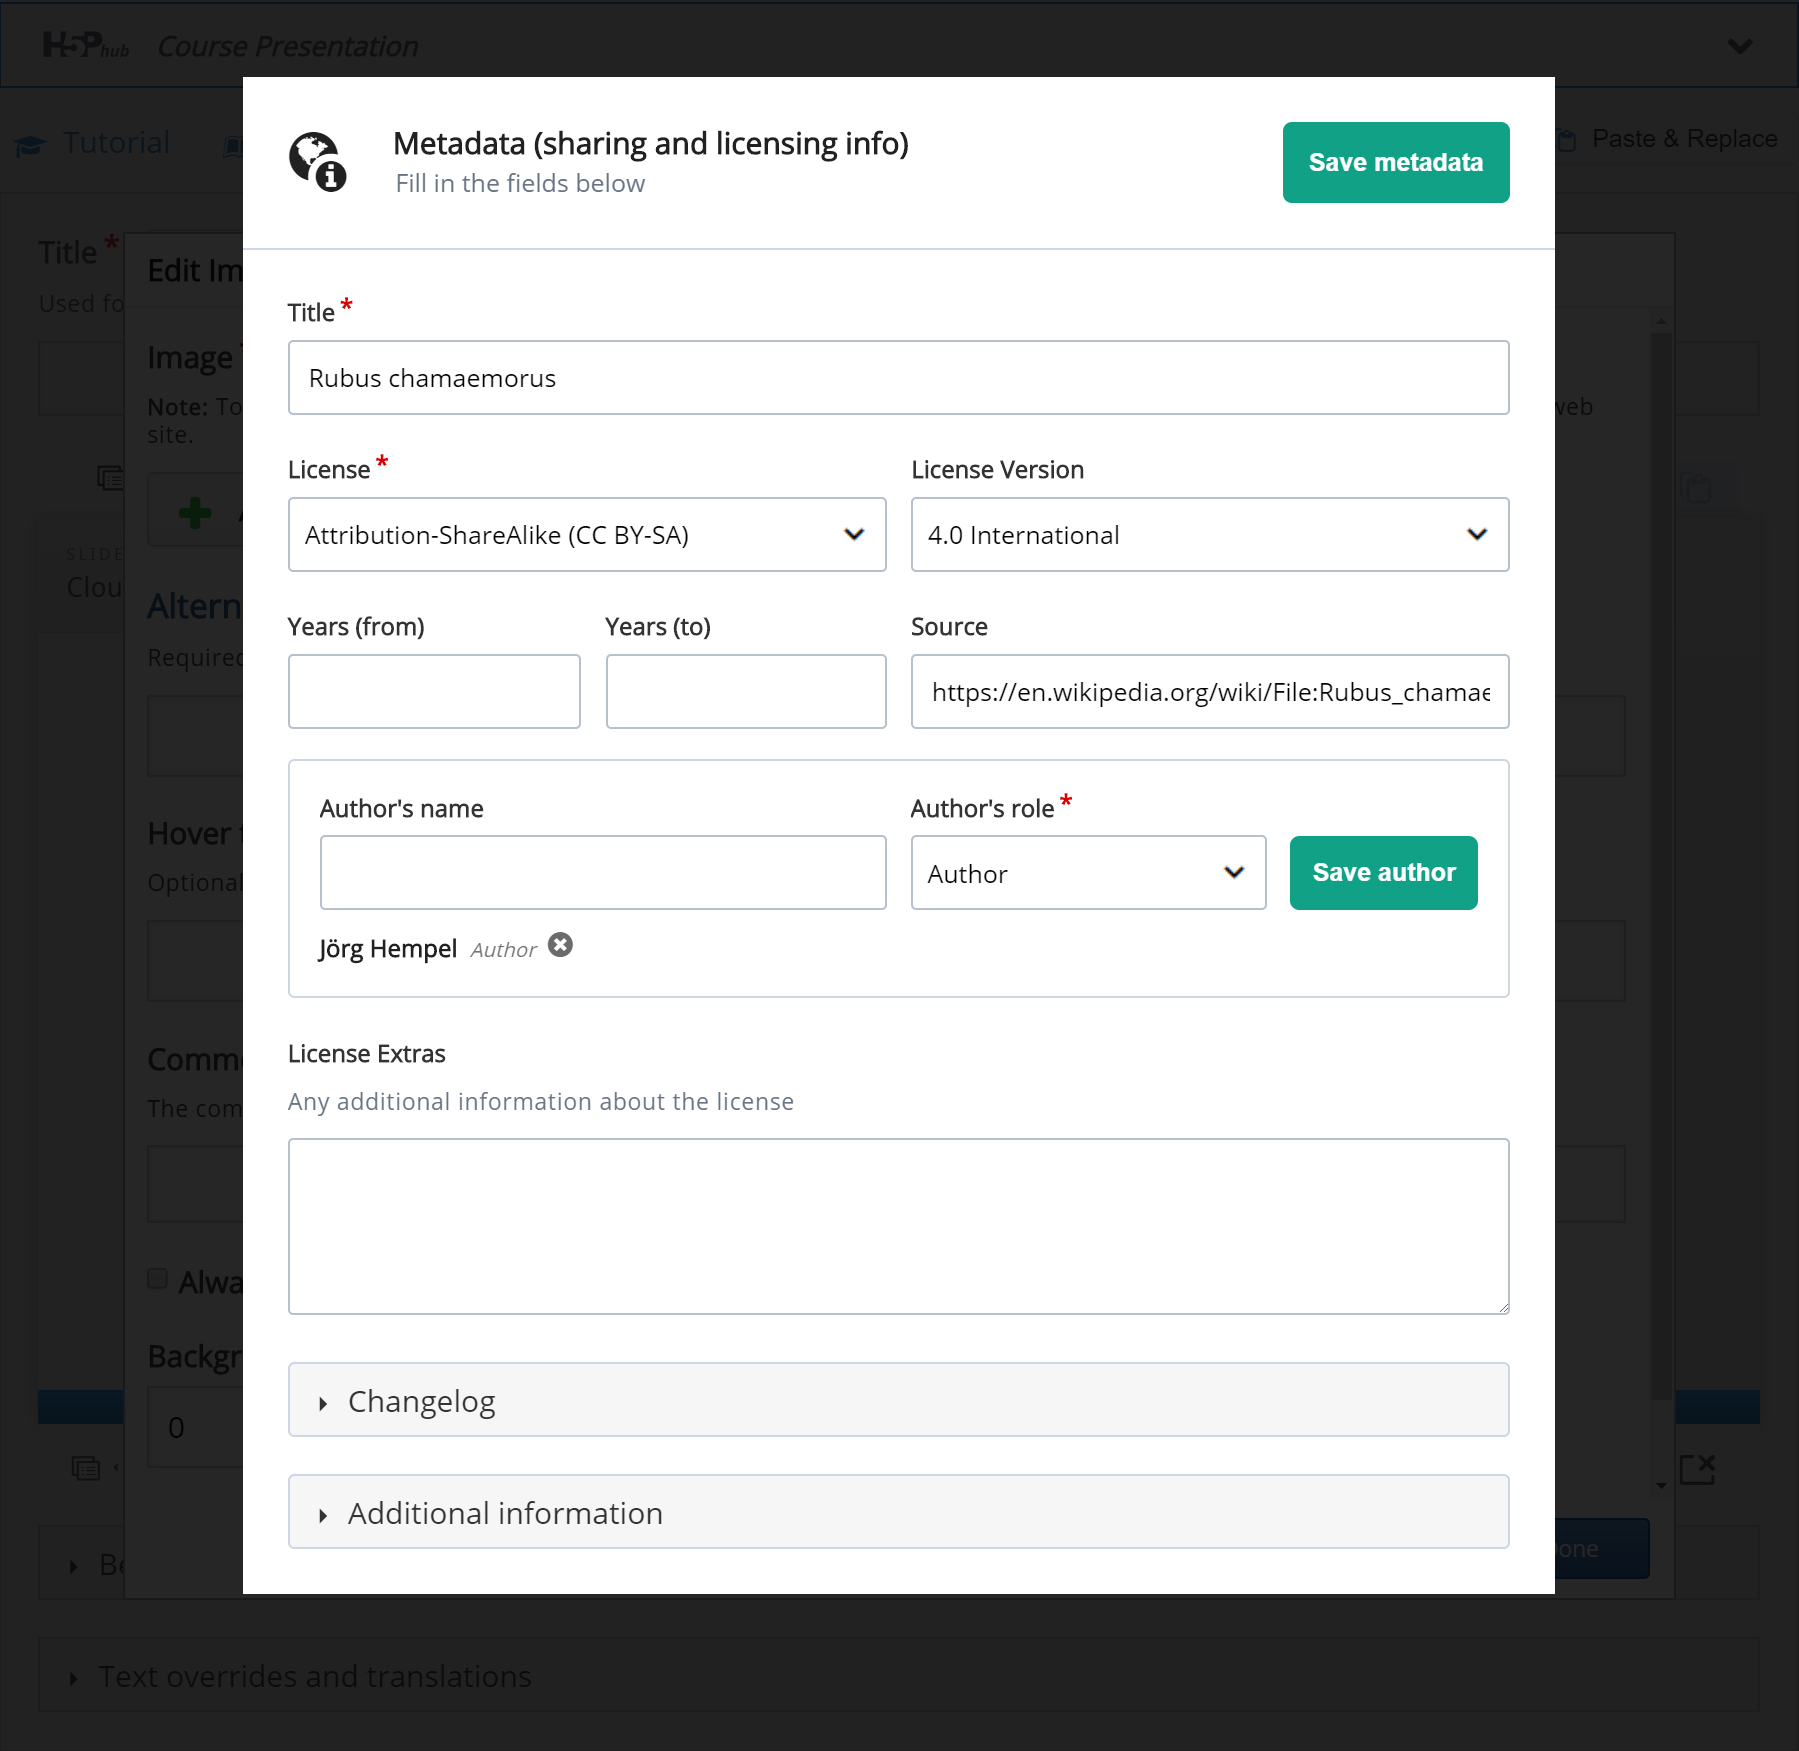
Finally, we have to add an Alternative text and a Hover text. The Alternative text is used to describe the image as an alternative to being displayed. The Hover text will show up on devices using a mouse when the cursor hovers over the image.
Alternative text: Picture of a Cloudberry flower
Hover text: Cloudberry flower
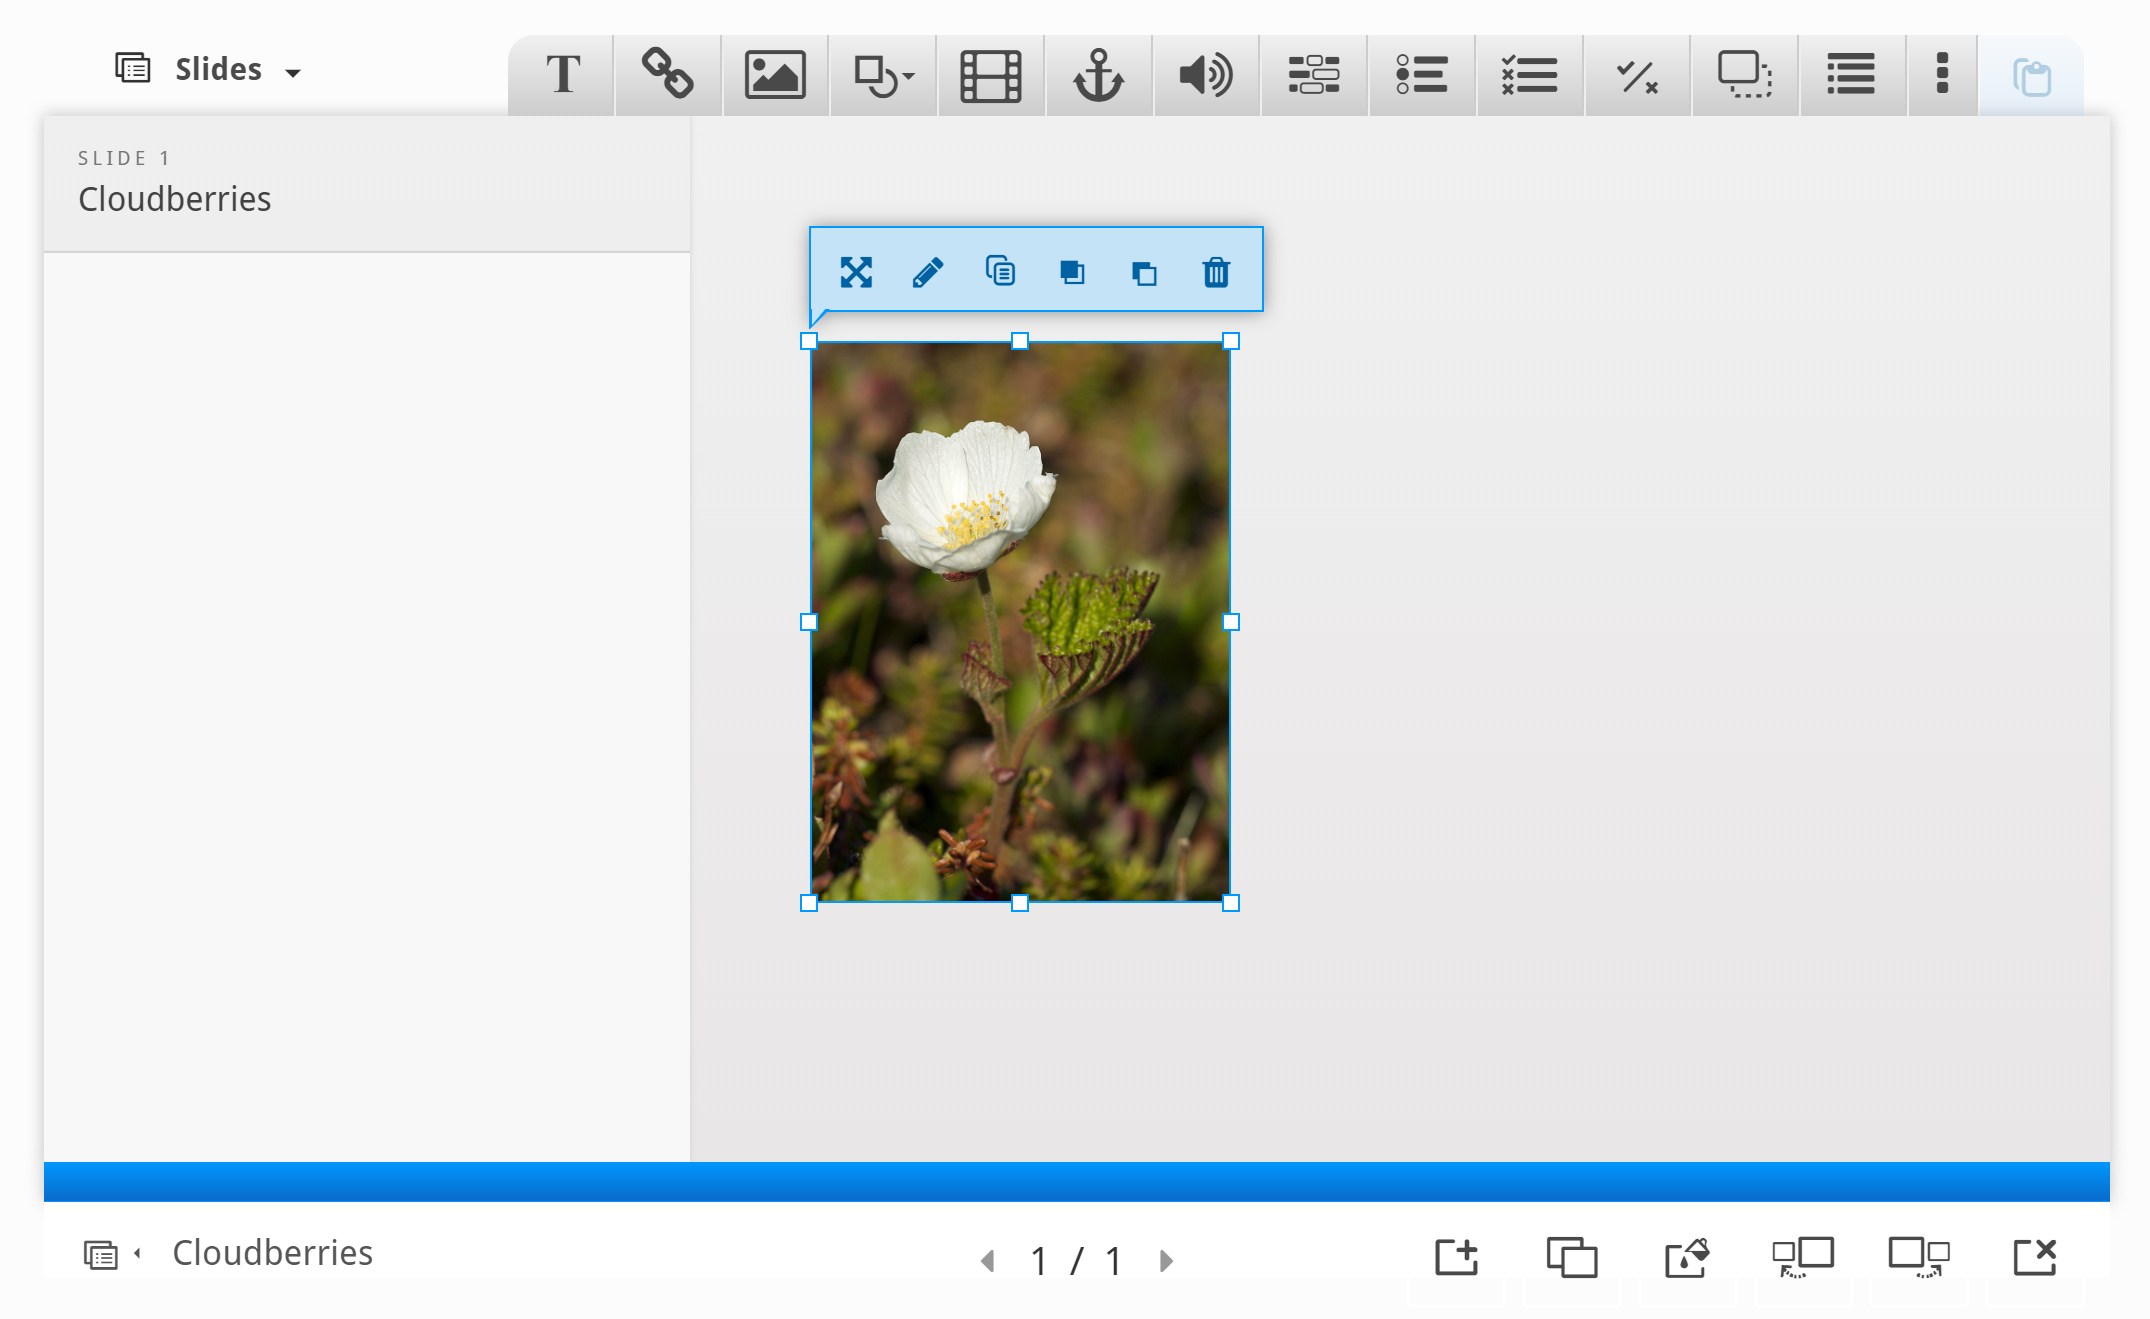
You should now have something like this:
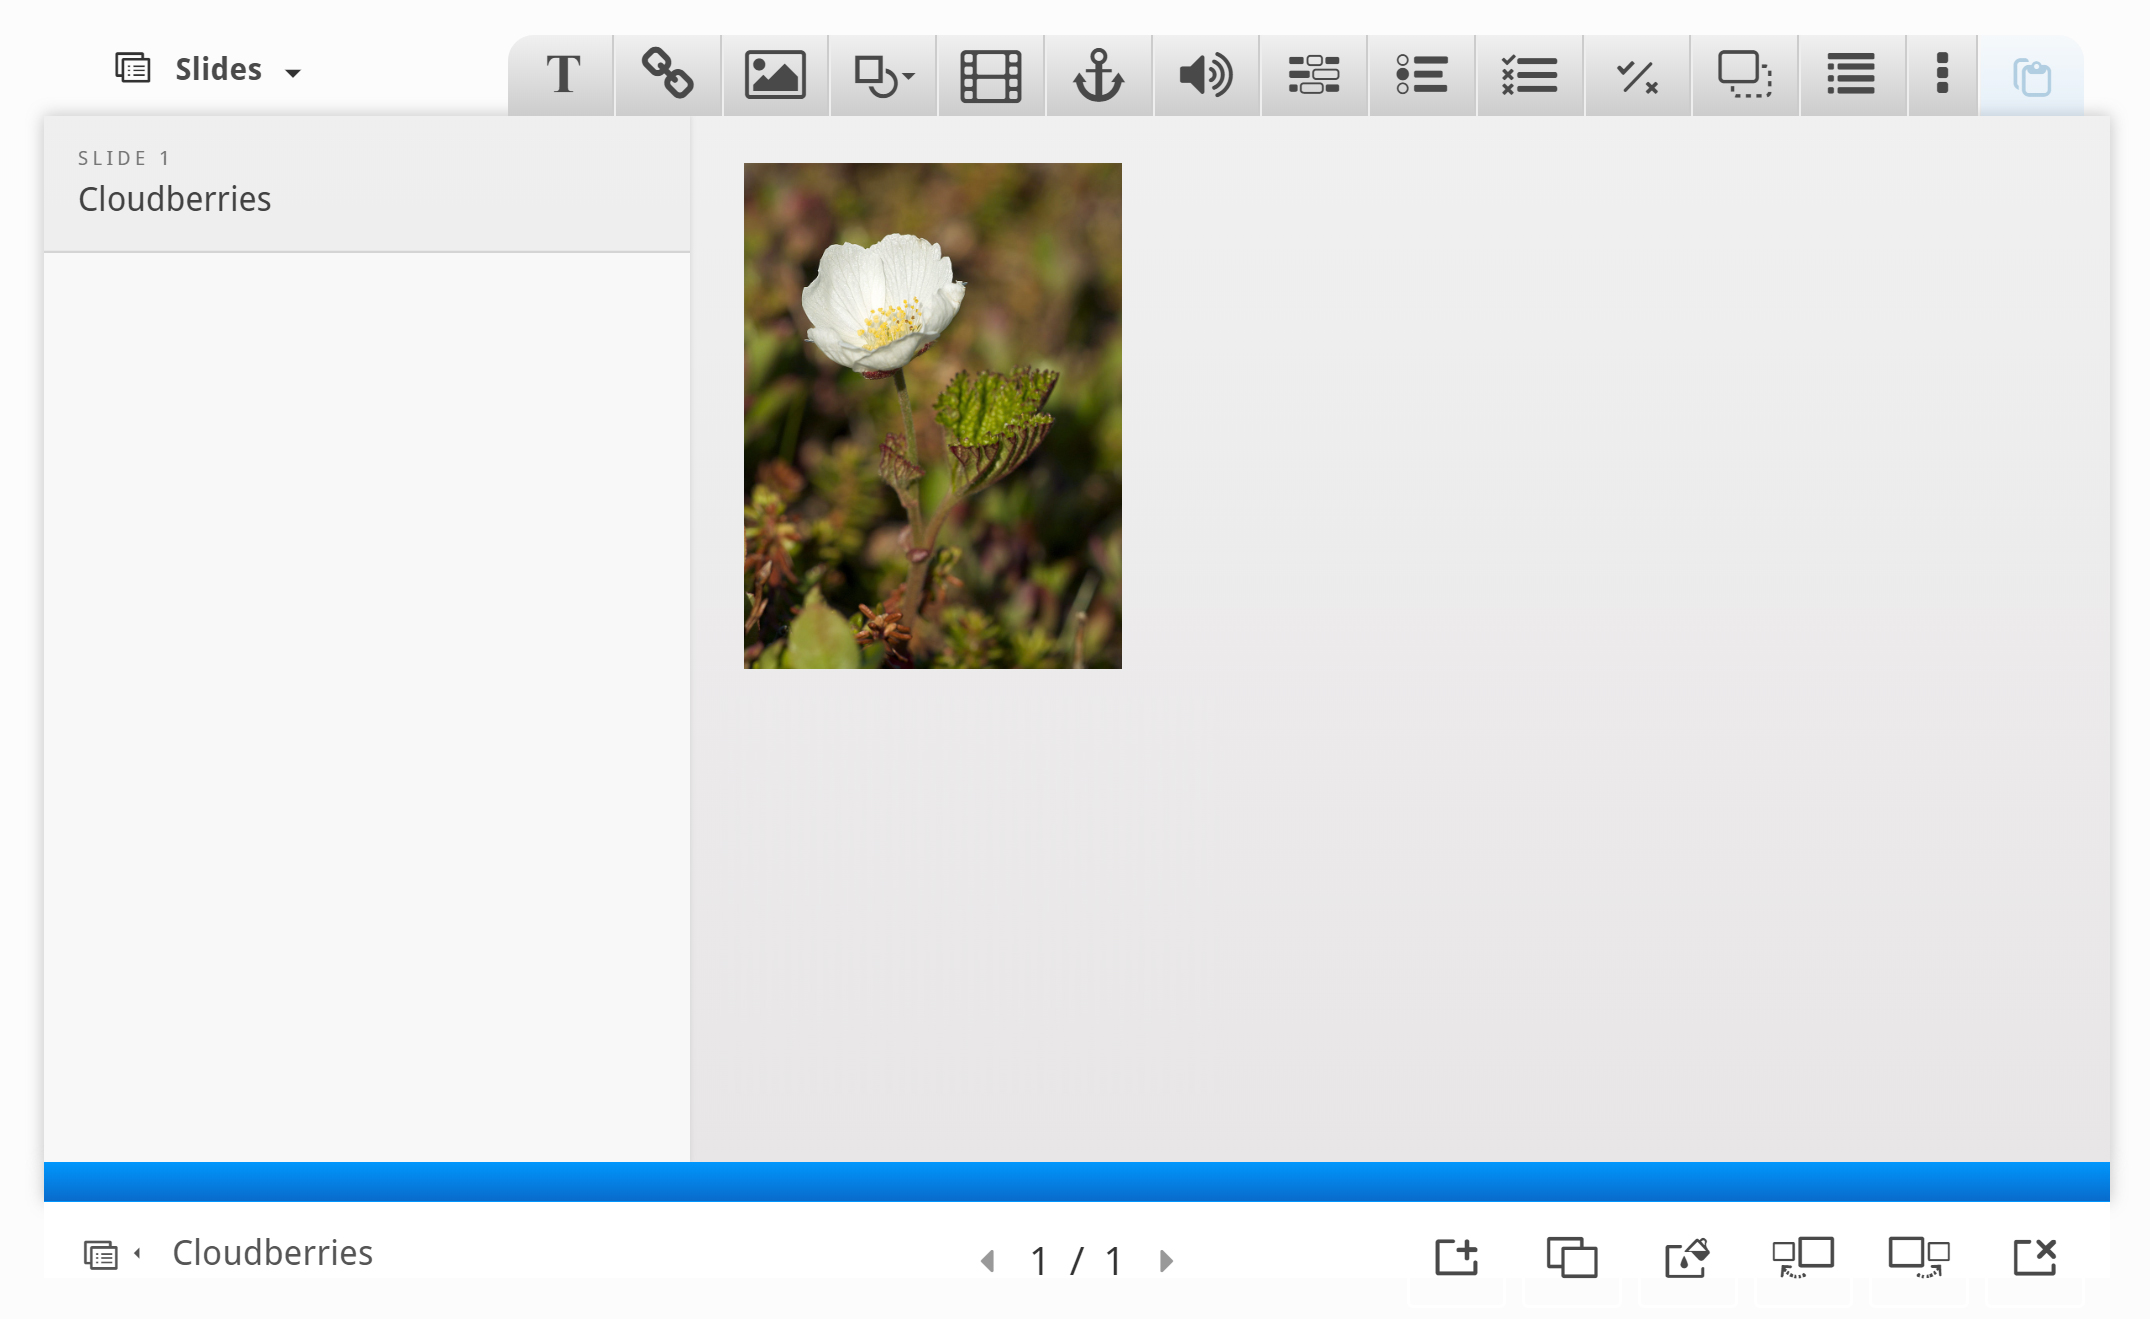
Resize the picture by pulling in the lower right corner of the image. Make the image slightly smaller in size. You can move the picture by using drag and drop. Place it in the top left corner, so you get something like this:
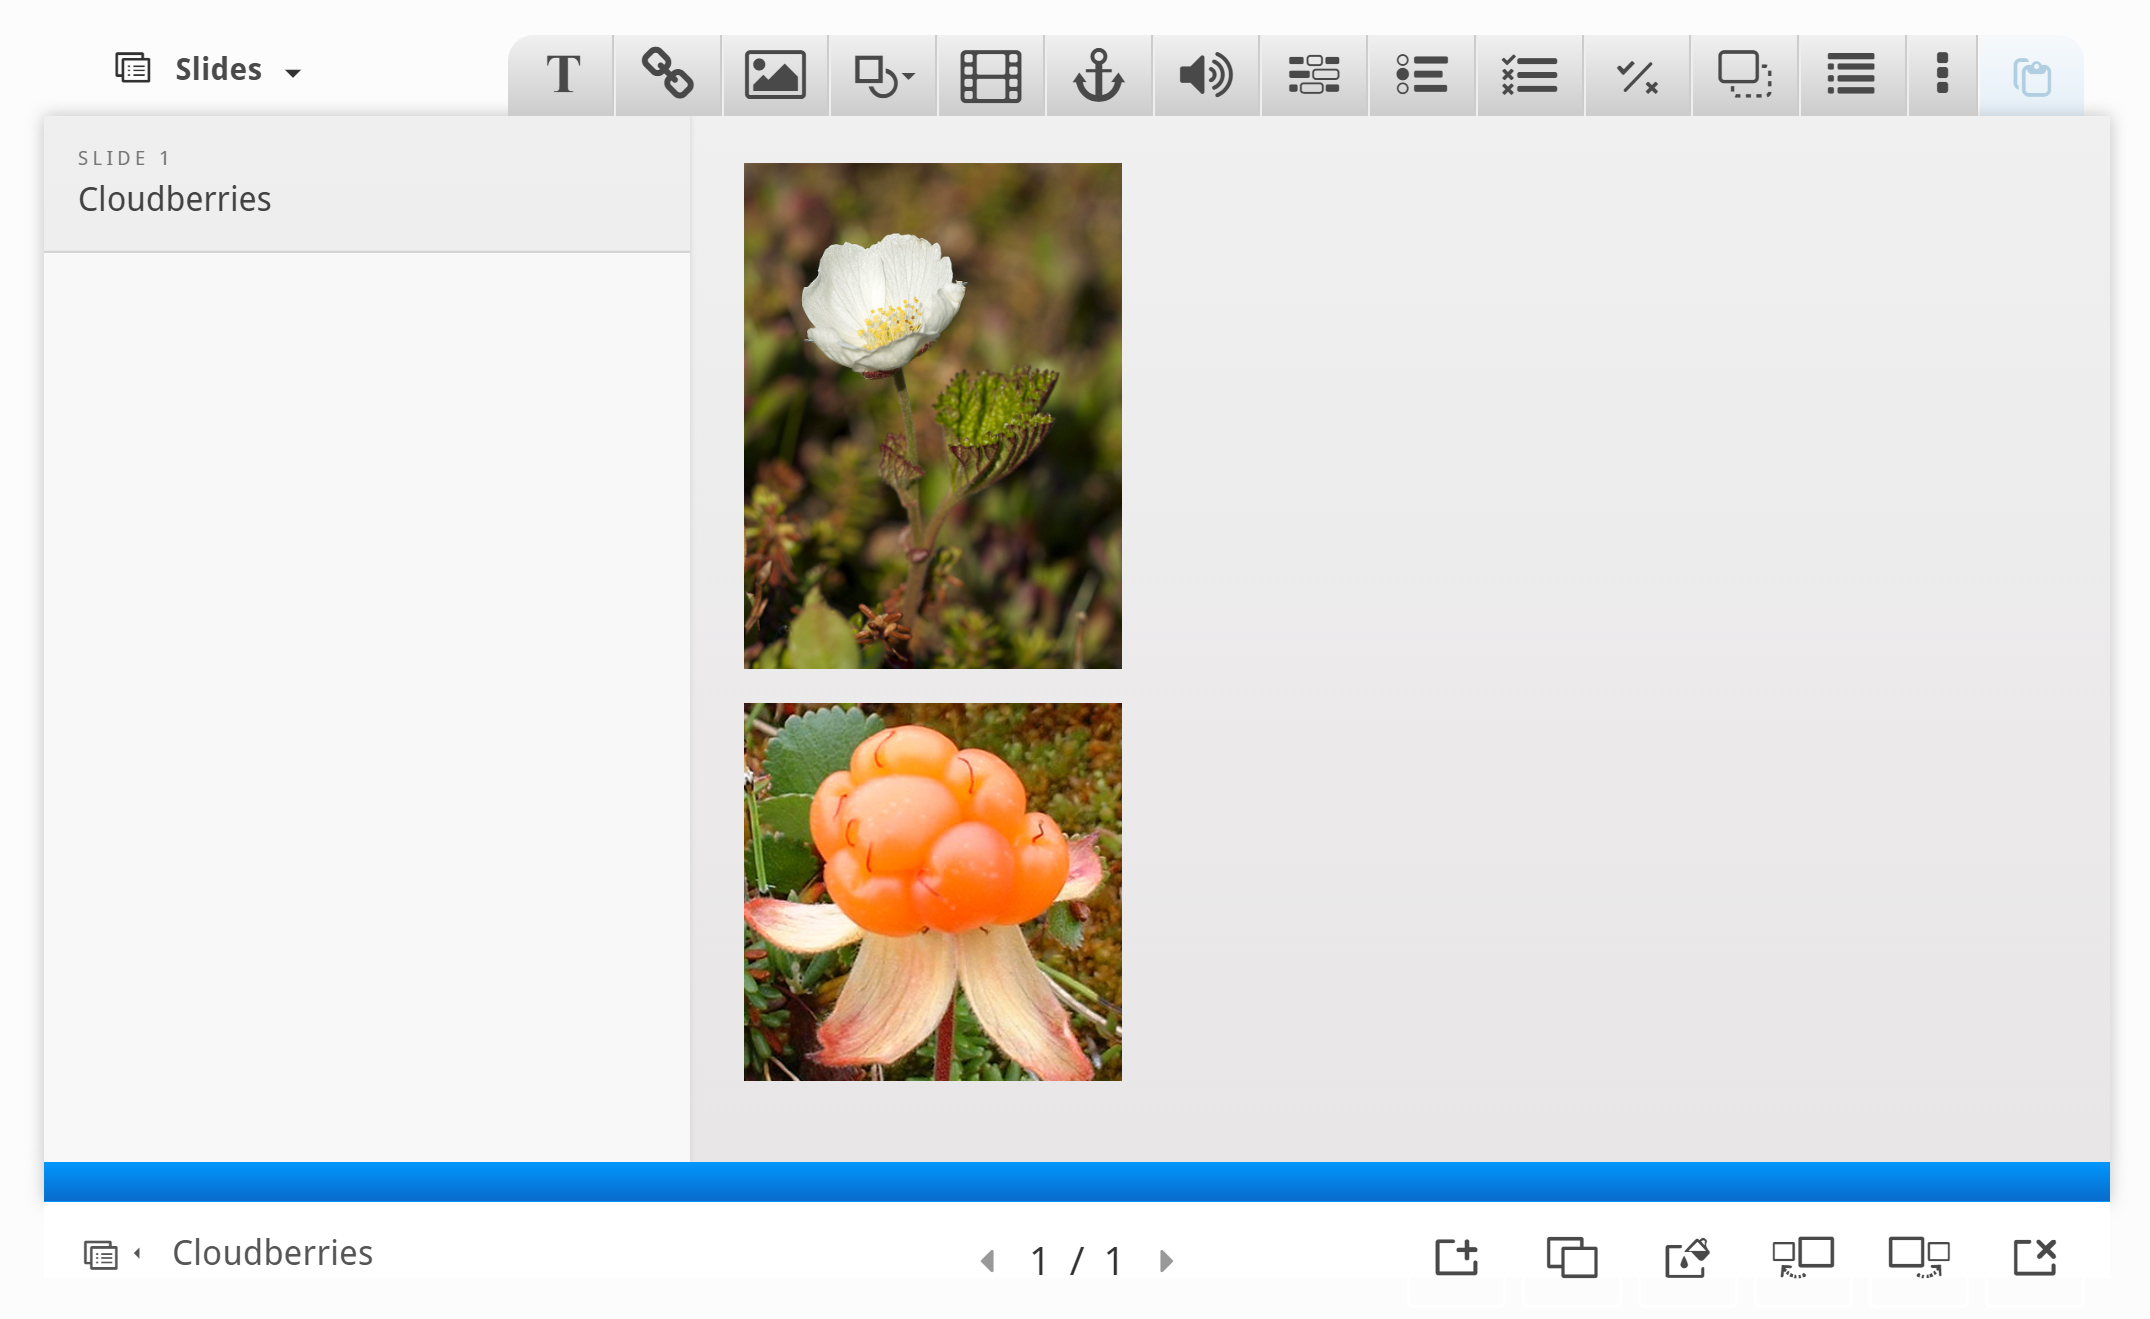
Now, add a second picture. This time, we'll use the cloudberry picture and place it beneath the cloudberry flower picture. Use the same procedure as above.
You should now have something like this:
To finish slide 1, we'll add the following text, which is paraphrased from the Wikipedia article:
- The Rubus chamaemorus is a herb producing amber-colored edible fruit similar to the raspberry or blackberry.
- The cloudberry grows to 10–25 cm high.
- The leaves alternate between having 5 and 7 soft, handlike lobes on straight, branchless stalks.
- After pollination, the white flowers form raspberry-sized berries.
- Each fruit is initially pale red, ripening into an amber color in early autumn.
Use the Text tool ![]() to add a block of text to the slide. Once you have dropped the text box, a dialog will appear. Insert the text above in the Edit text dialog:
to add a block of text to the slide. Once you have dropped the text box, a dialog will appear. Insert the text above in the Edit text dialog:
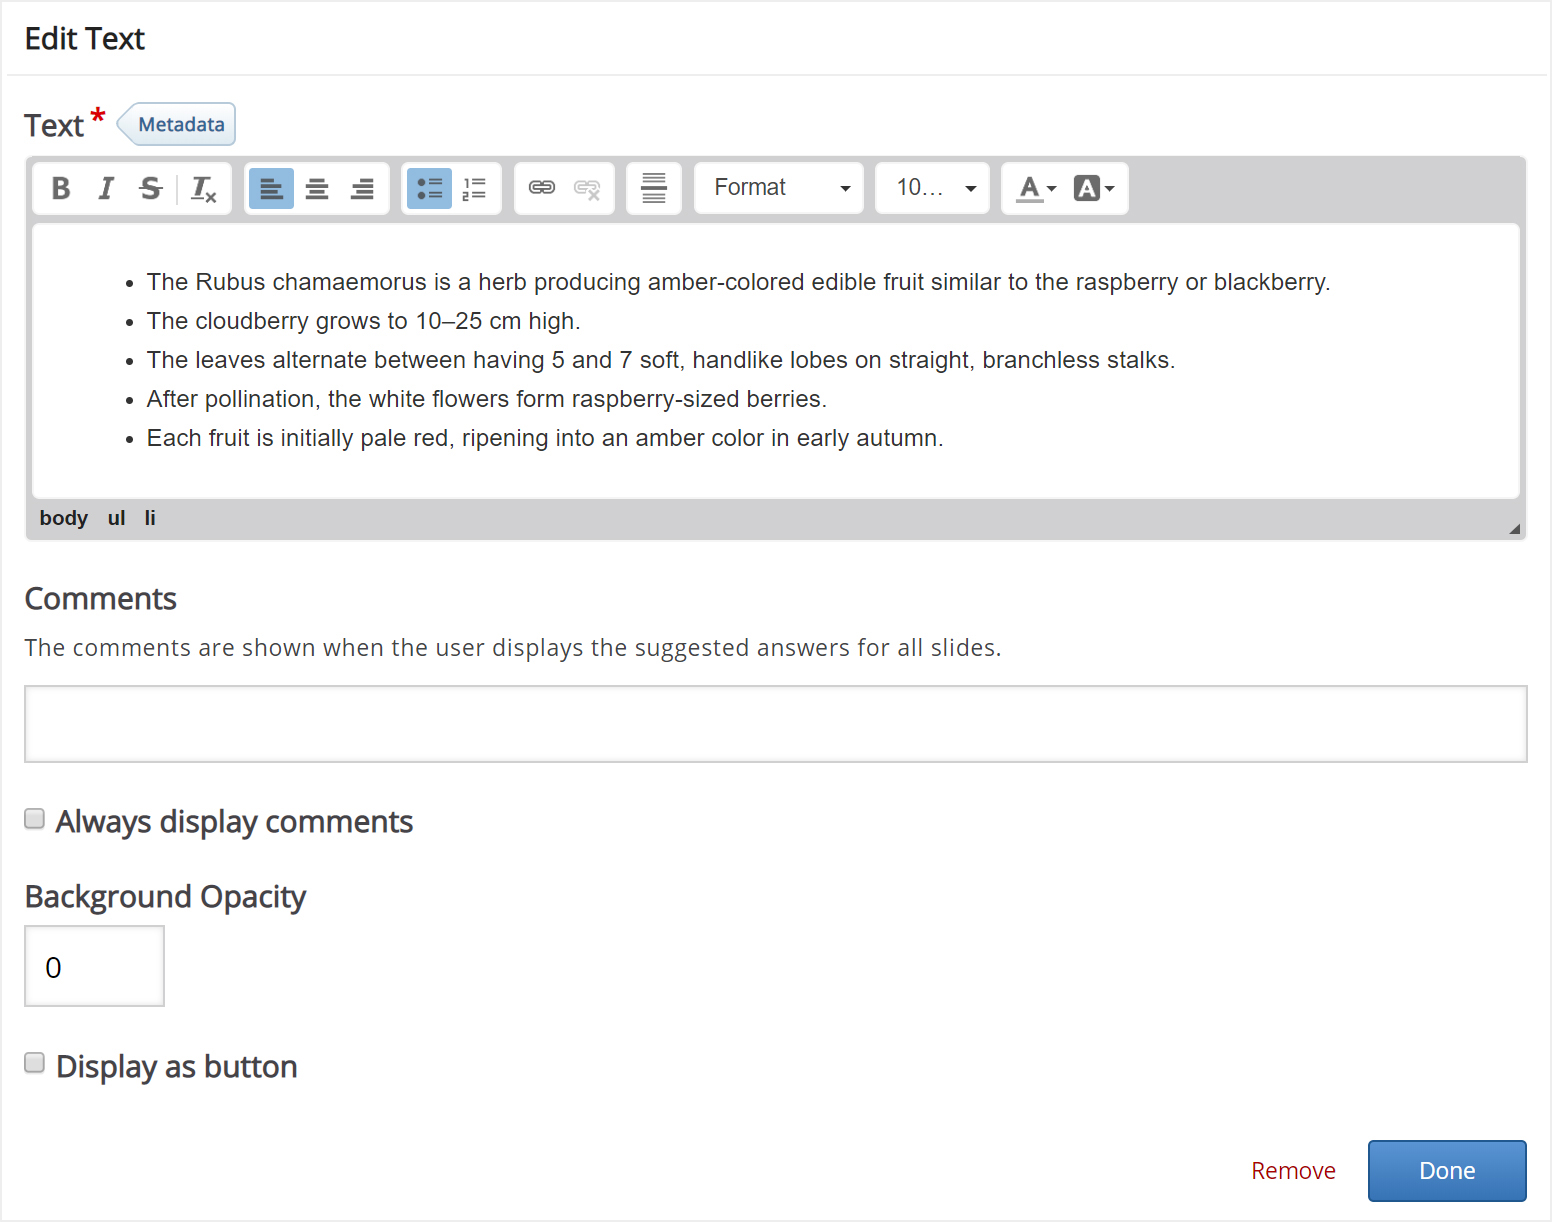
Leave the other fields blank and press Done.
You can place and resize the text block in the same way as images.
Now, position and size the text block so that you end up with something like this:
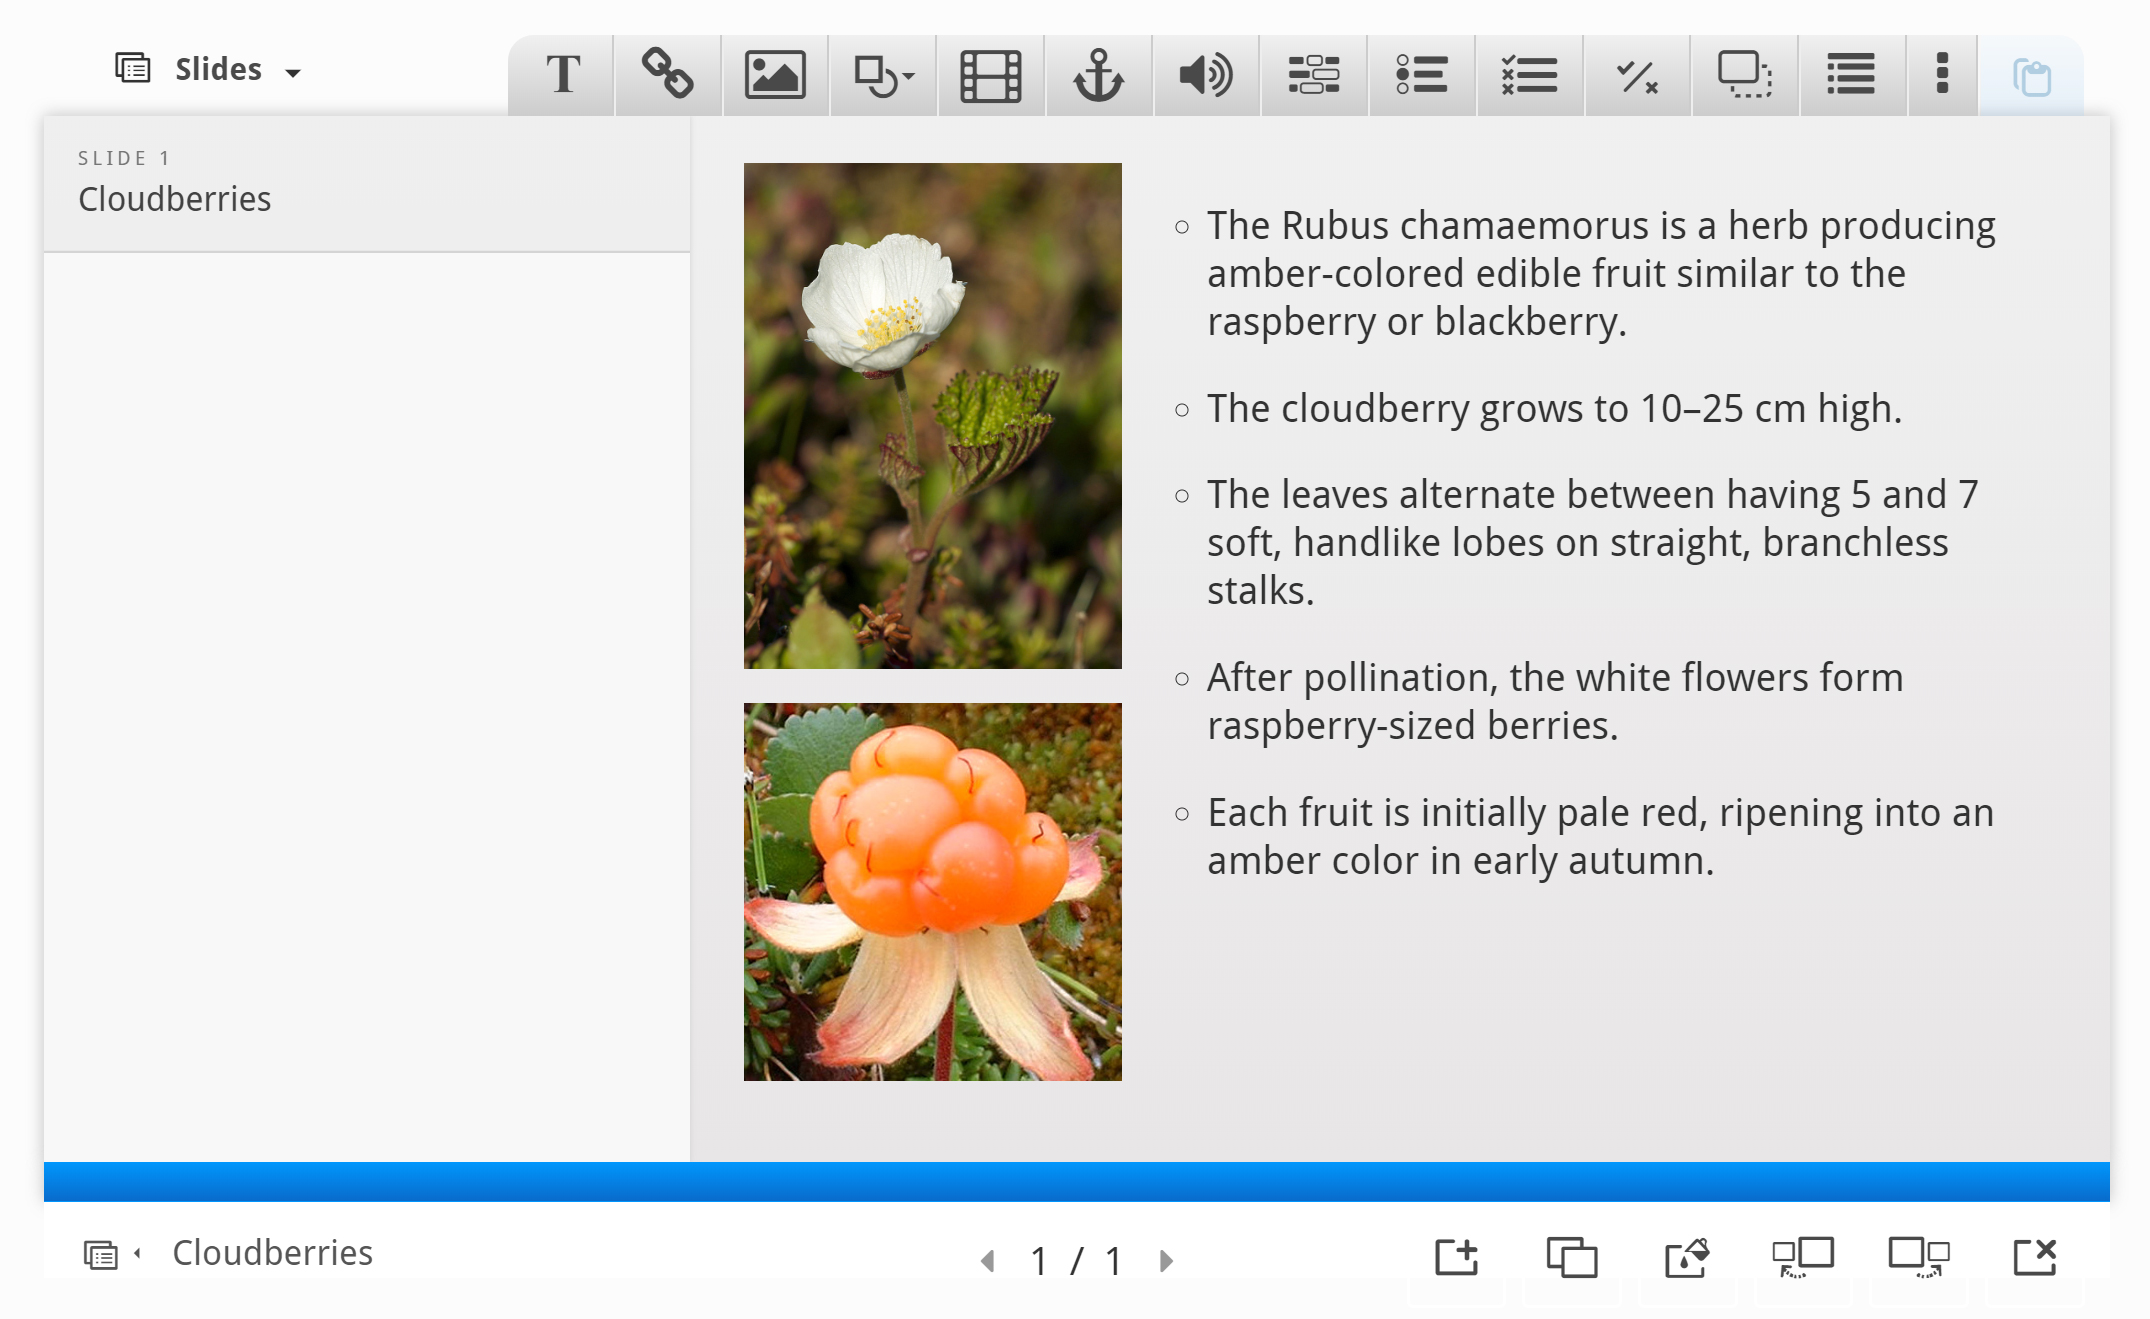
We have now finished slide 1.
Step 5: Slide 2
Press the  button in the lower right corner of the editor to add another slide.
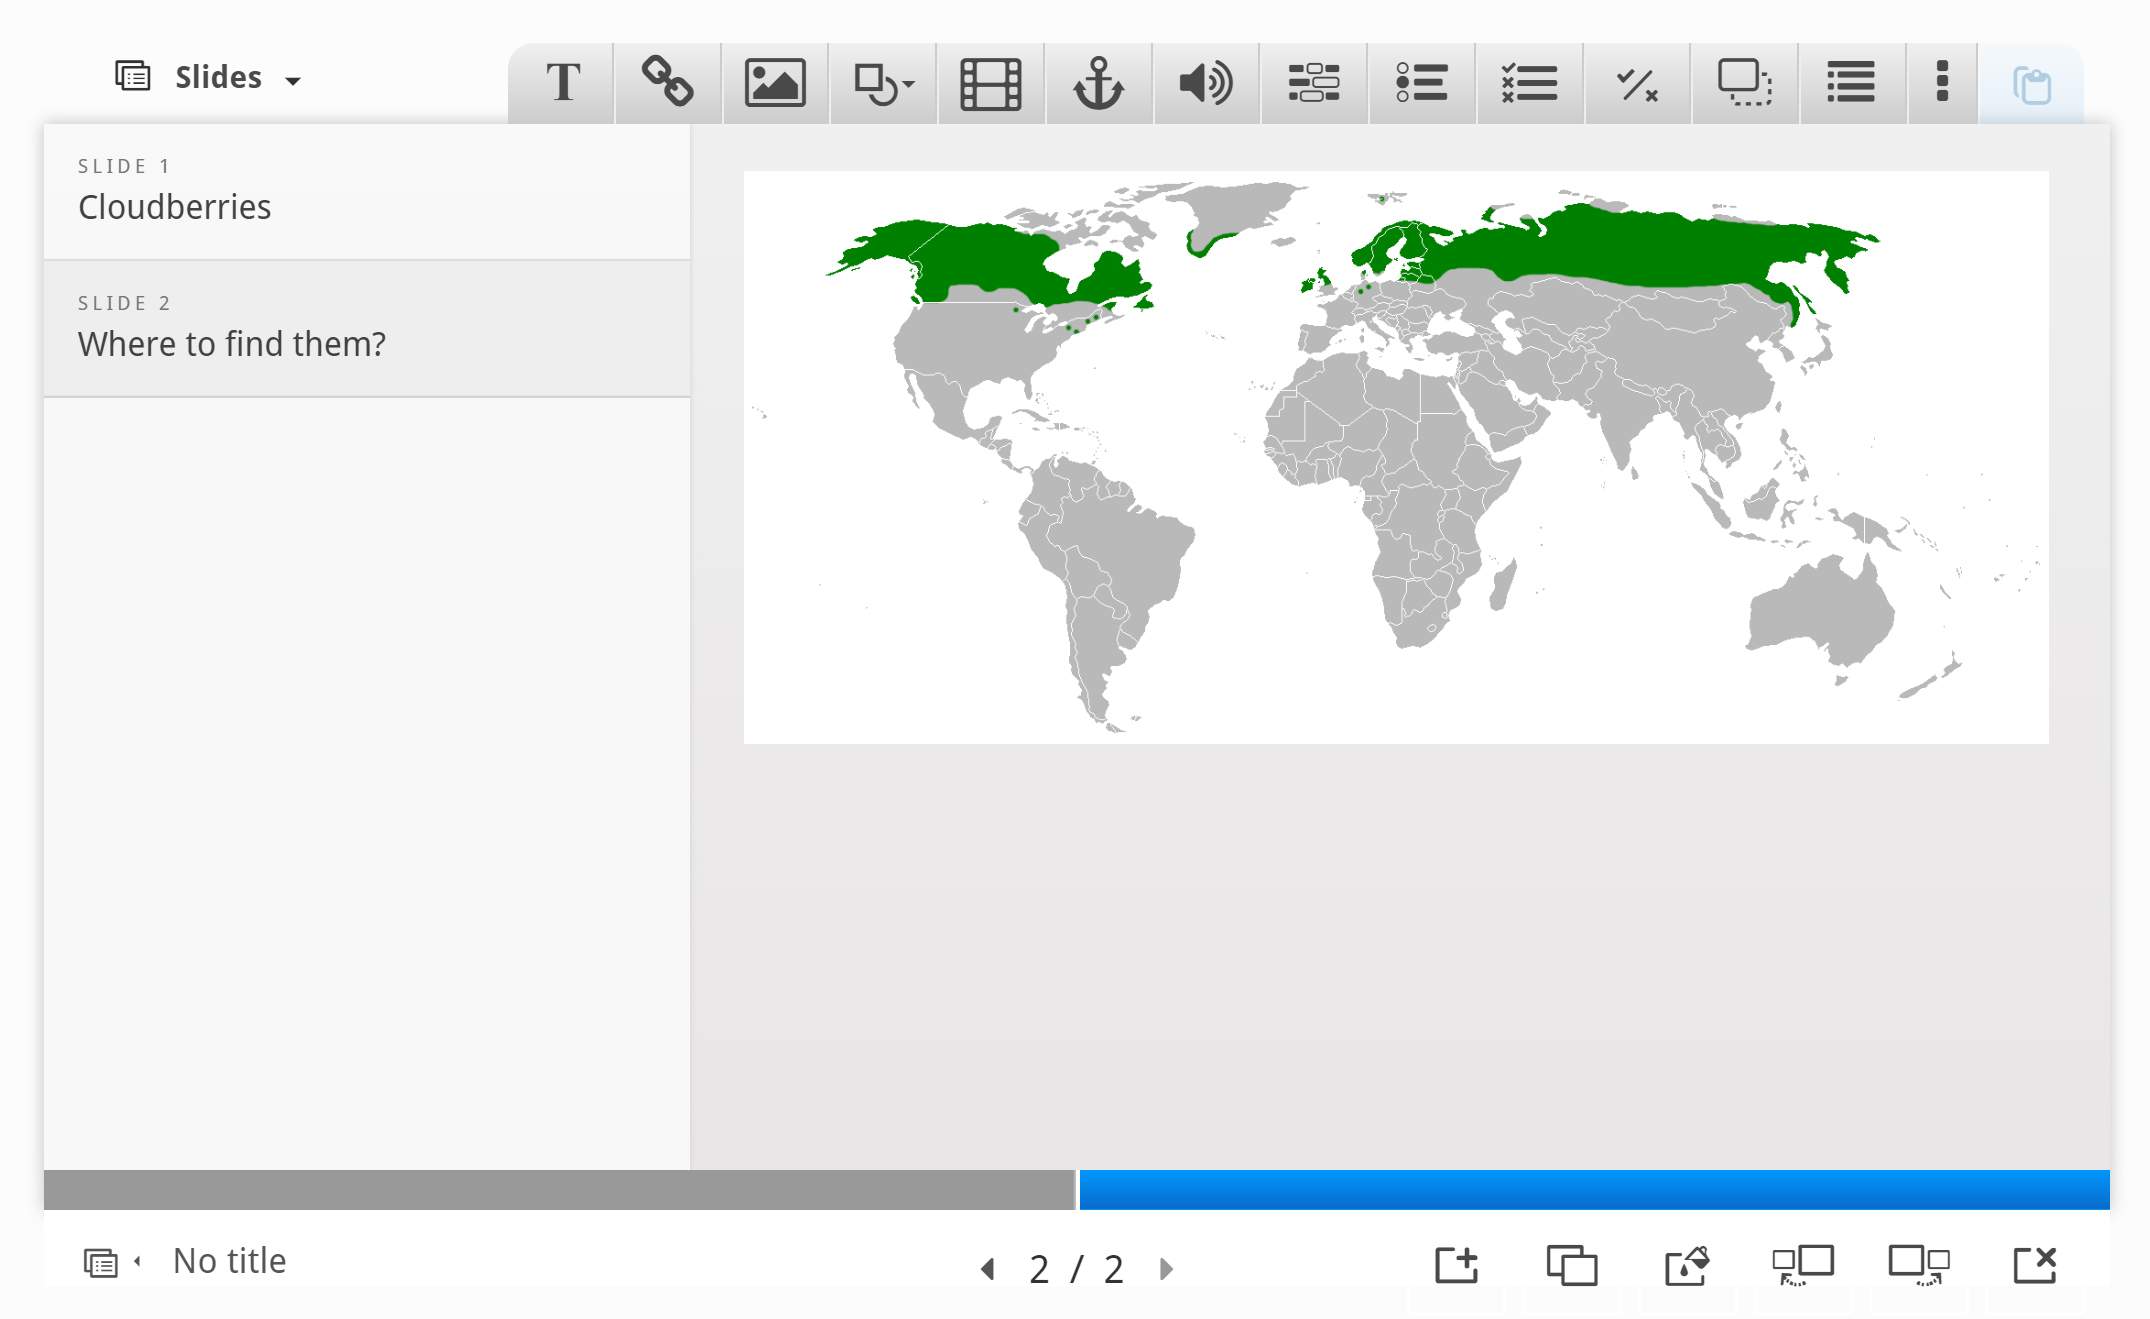
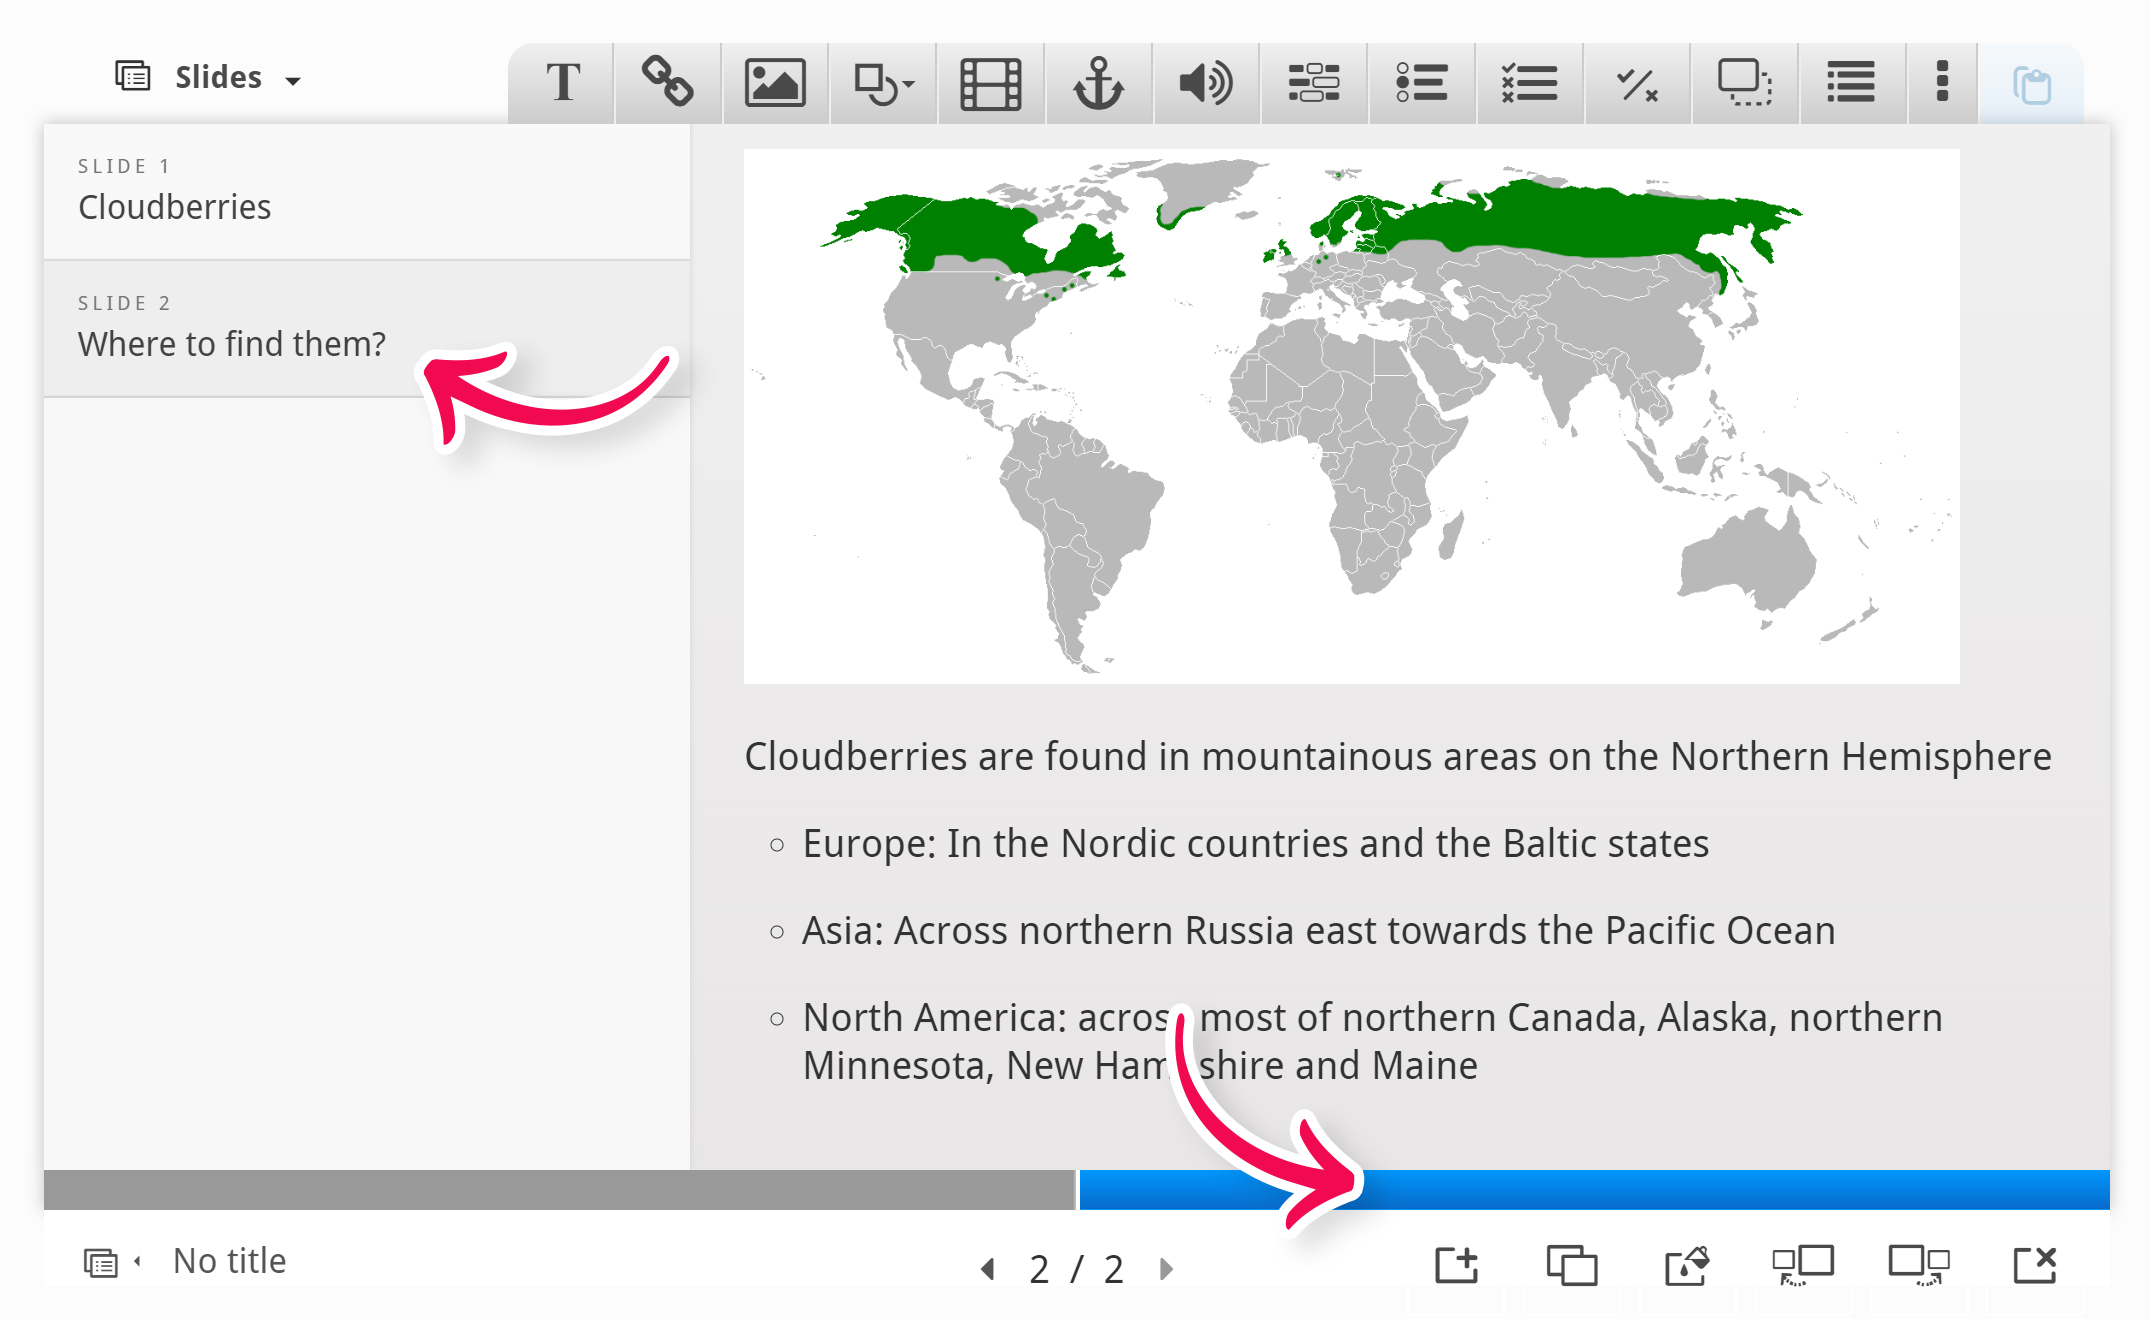
Slide 2 will contain information about where Cloudberries can be found. Add the slide title Where to find them? in the slides panel.
We'll use the map picture from Wikipedia to show where Cloudberries grow in the wild. We add the picture by using the ![]() button in the top toolbar. Drag the picture onto the slide, upload the picture and add license information. Press Done, then resize the picture so you have something like this:
button in the top toolbar. Drag the picture onto the slide, upload the picture and add license information. Press Done, then resize the picture so you have something like this:
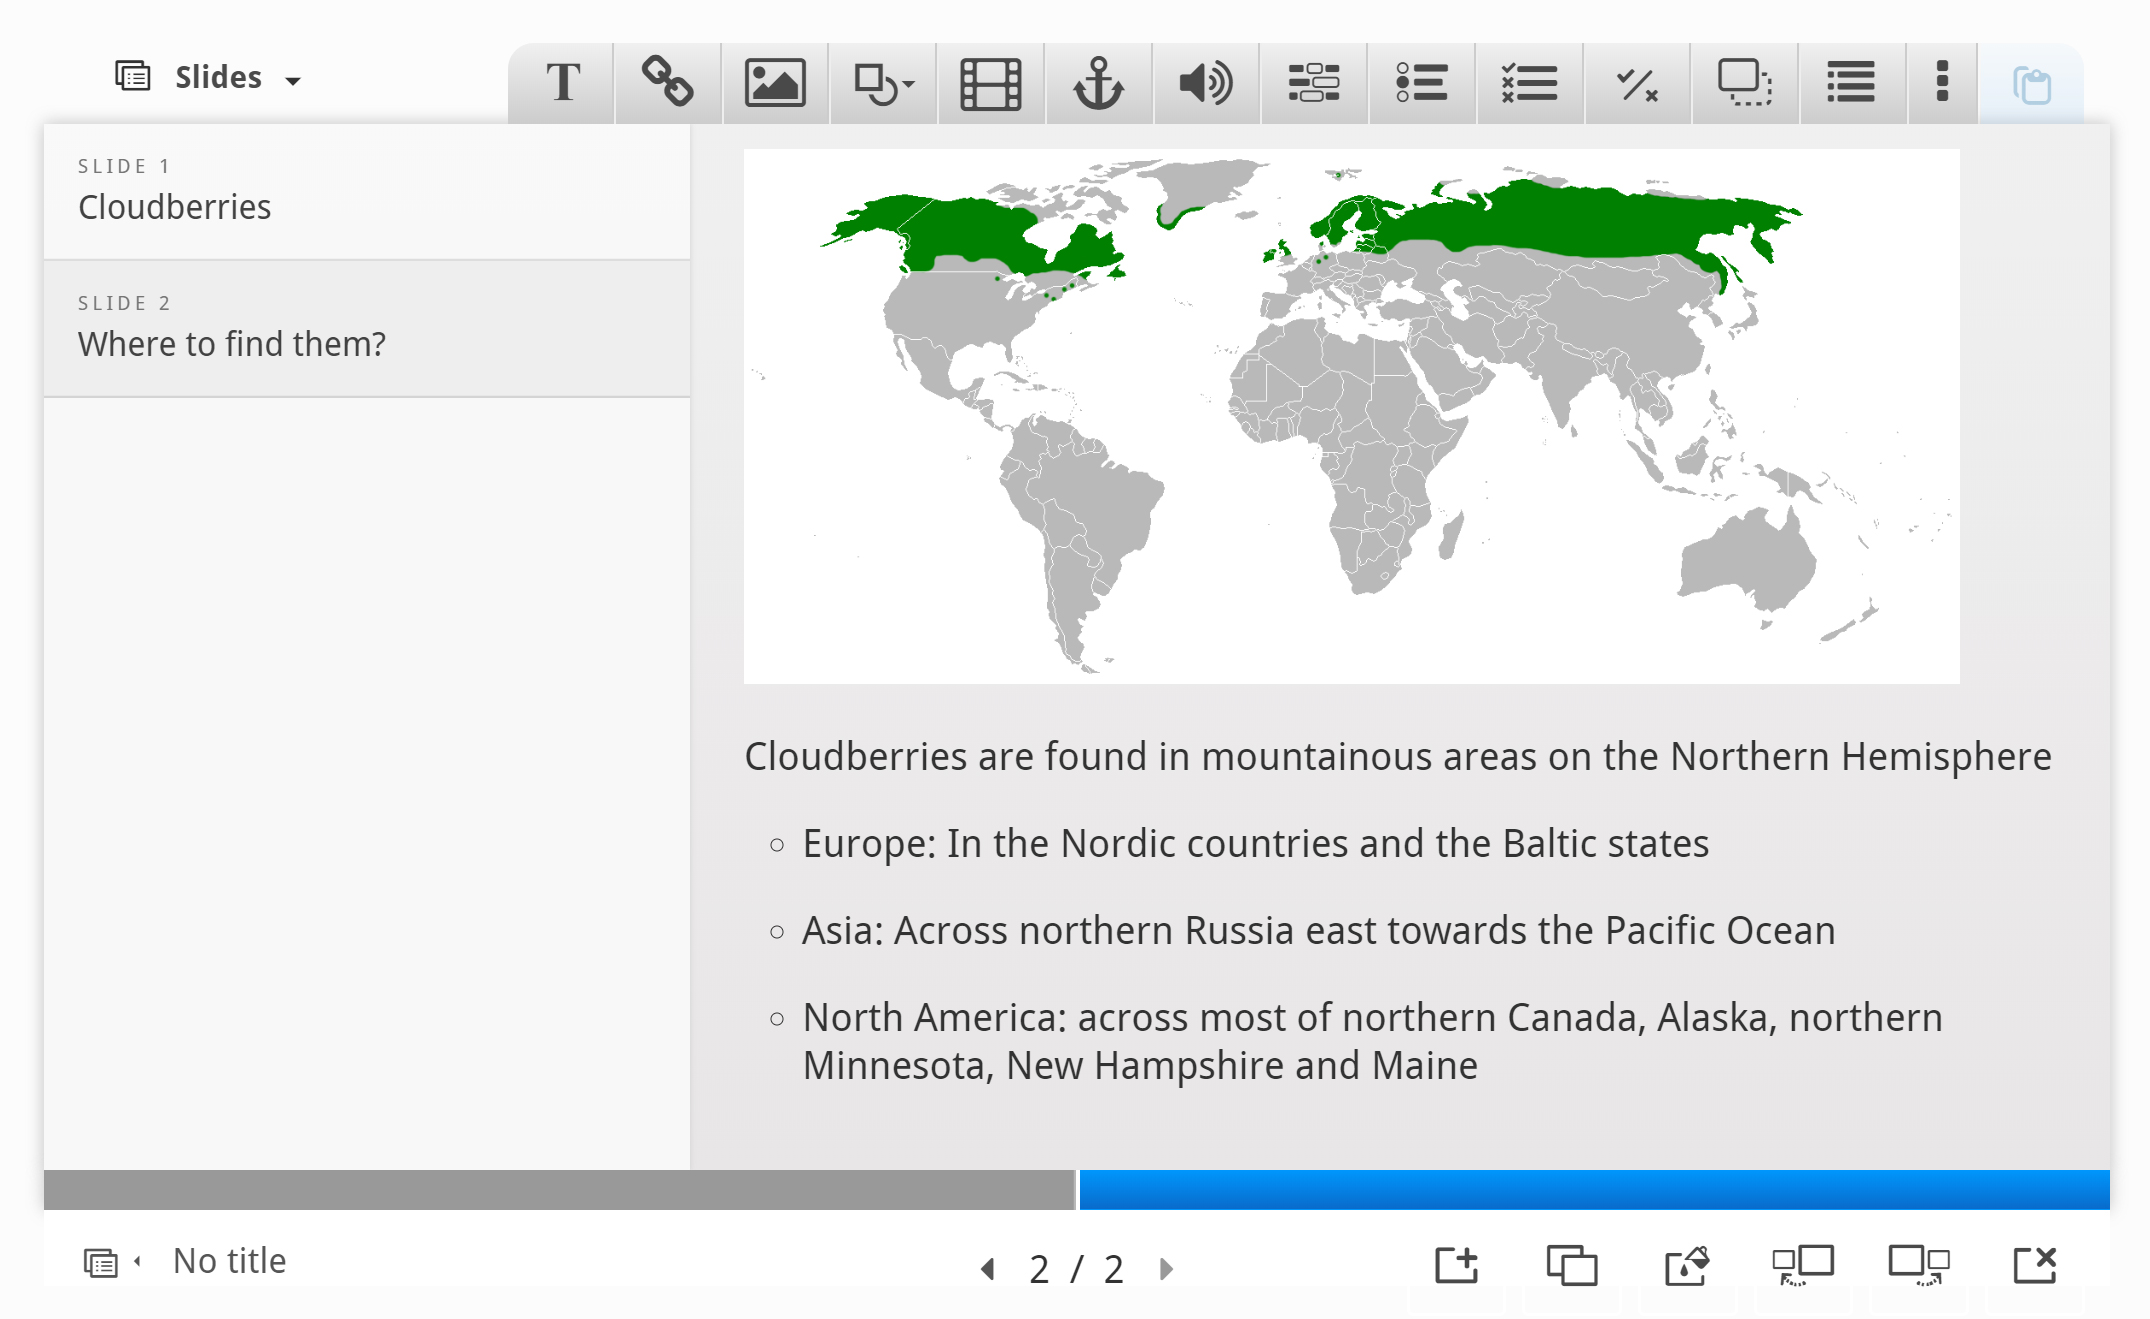
To finish slide 2, we'll add the following text, which is also paraphrased from the Wikipedia article:
Cloudberries are found in mountainous areas on the Northern Hemisphere
- Europe: In the Nordic countries and the Baltic states
- Asia: Across northern Russia east towards the Pacific Ocean
- North America: across most of northern Canada, Alaska, northern Minnesota, New Hampshire and Maine
As on slide 1, use the Text tool ![]() to add a text box to the slide. Once you have dropped the text box, a dialog will appear. Insert the text above in the Edit text dialog:
to add a text box to the slide. Once you have dropped the text box, a dialog will appear. Insert the text above in the Edit text dialog:
You can navigate between slides by pressing the slide titles in the slides panel or by using the navigation bar.
Step 6: Slide 3
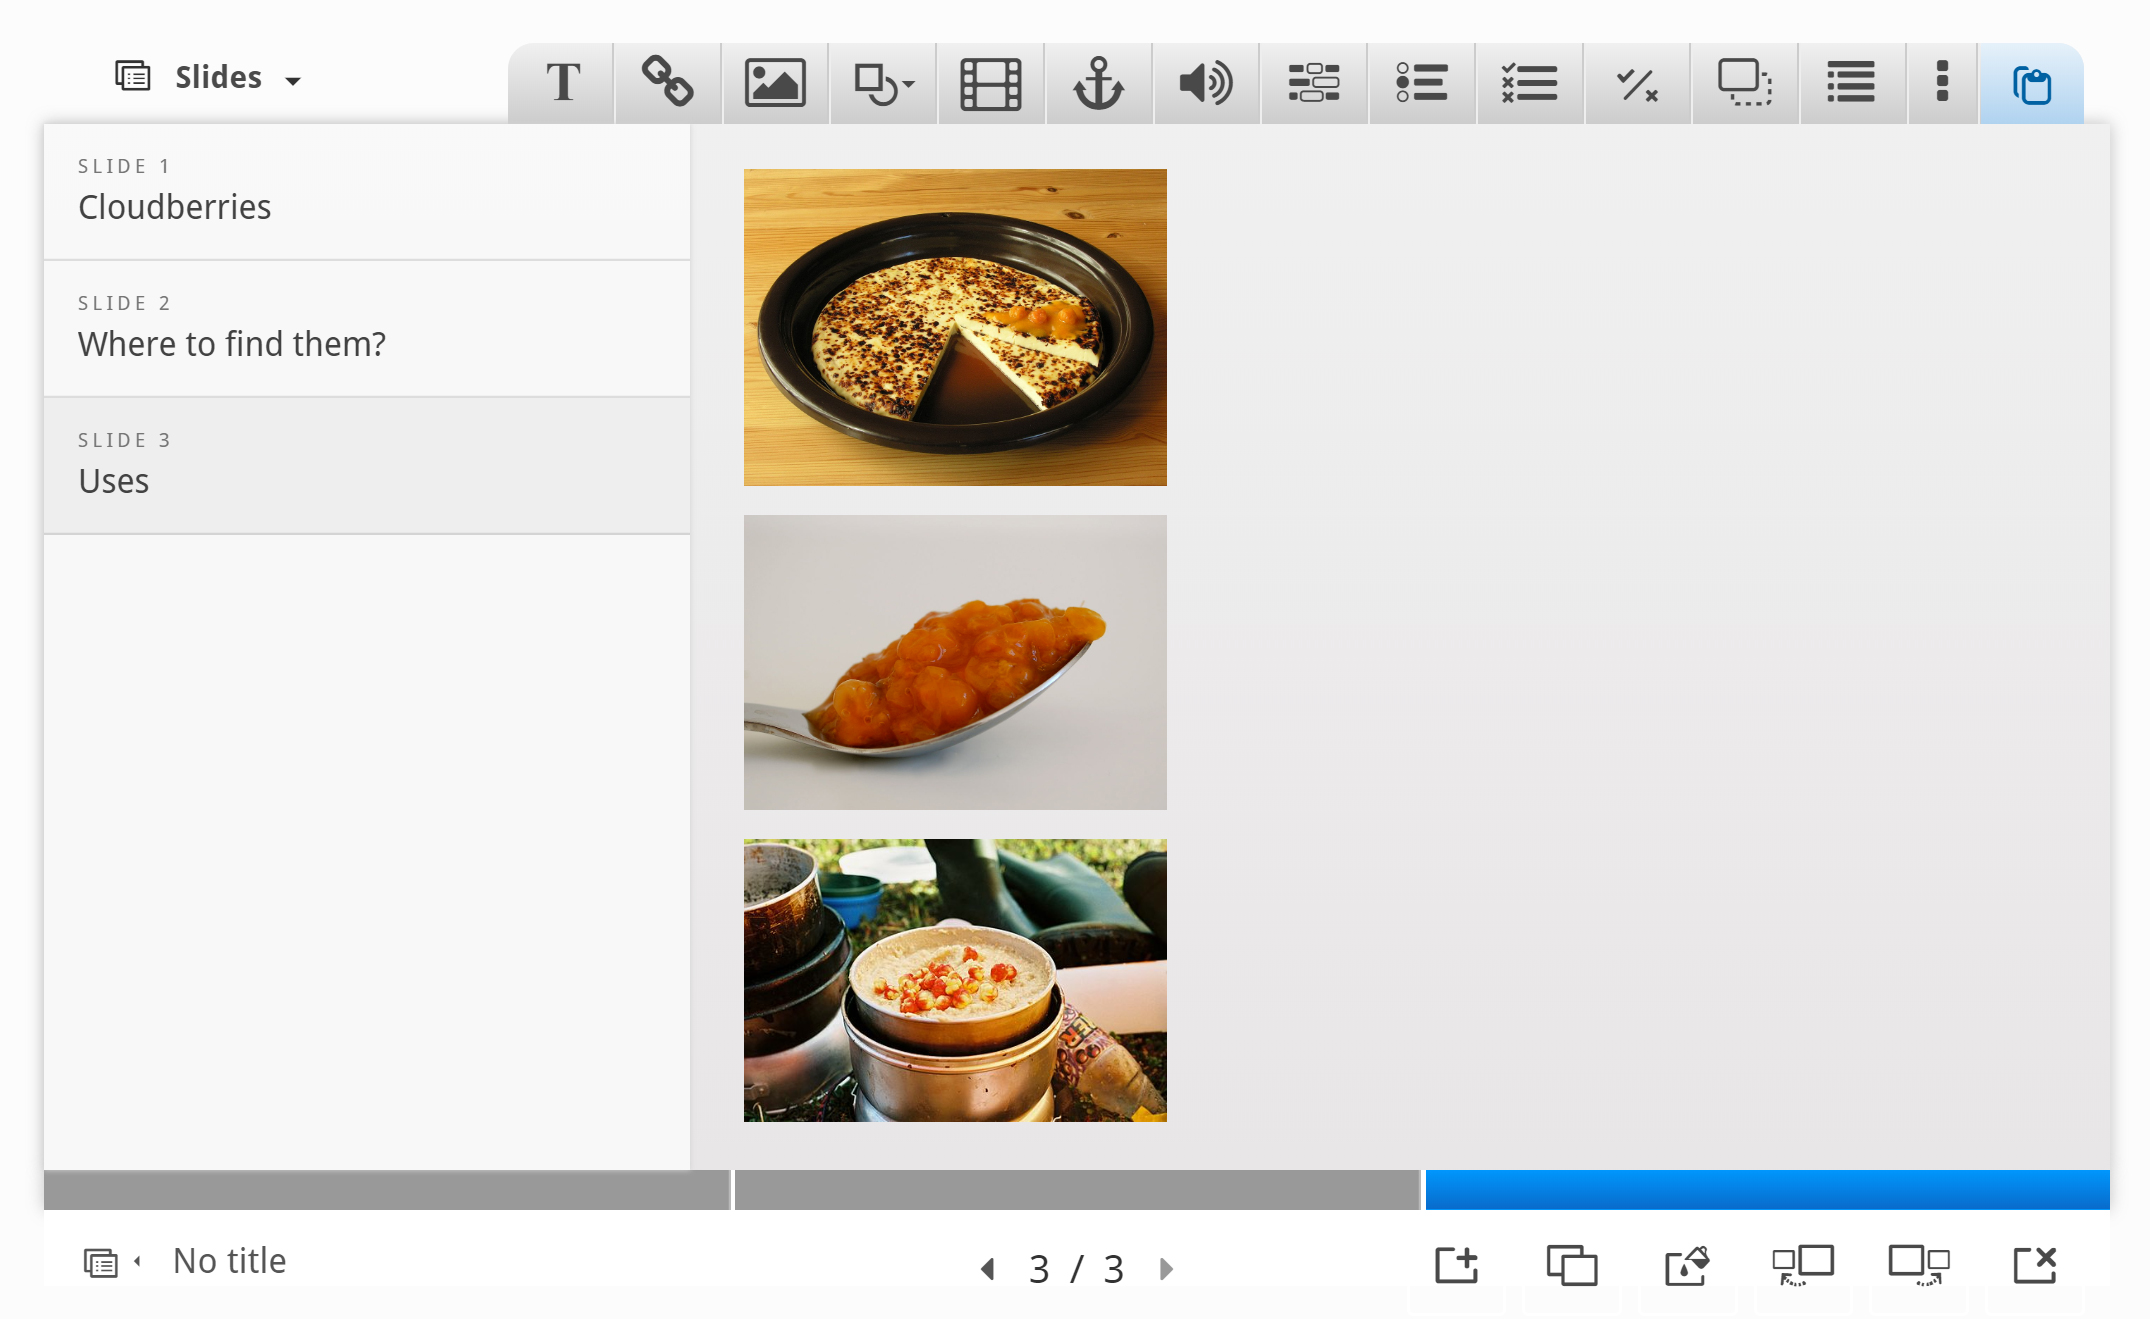
Press the button to add the third slide. Slide 3 will describe various uses of the cloudberry. Add the slide title Uses in the slides panel.
Again, we'll use text and images to deliver our message. In addition, we'll add a link to a website where the learner can find recipes using cloudberries.
Here are the links to the Wikimedia Commons pictures we'll use:
We add the pictures by using the ![]() button in the top toolbar. As on slide 1, we'll place the pictures in a column on the left side of the slide. Insert the three pictures, add the appropriate license information, place and resize them so you have something like this:
button in the top toolbar. As on slide 1, we'll place the pictures in a column on the left side of the slide. Insert the three pictures, add the appropriate license information, place and resize them so you have something like this:
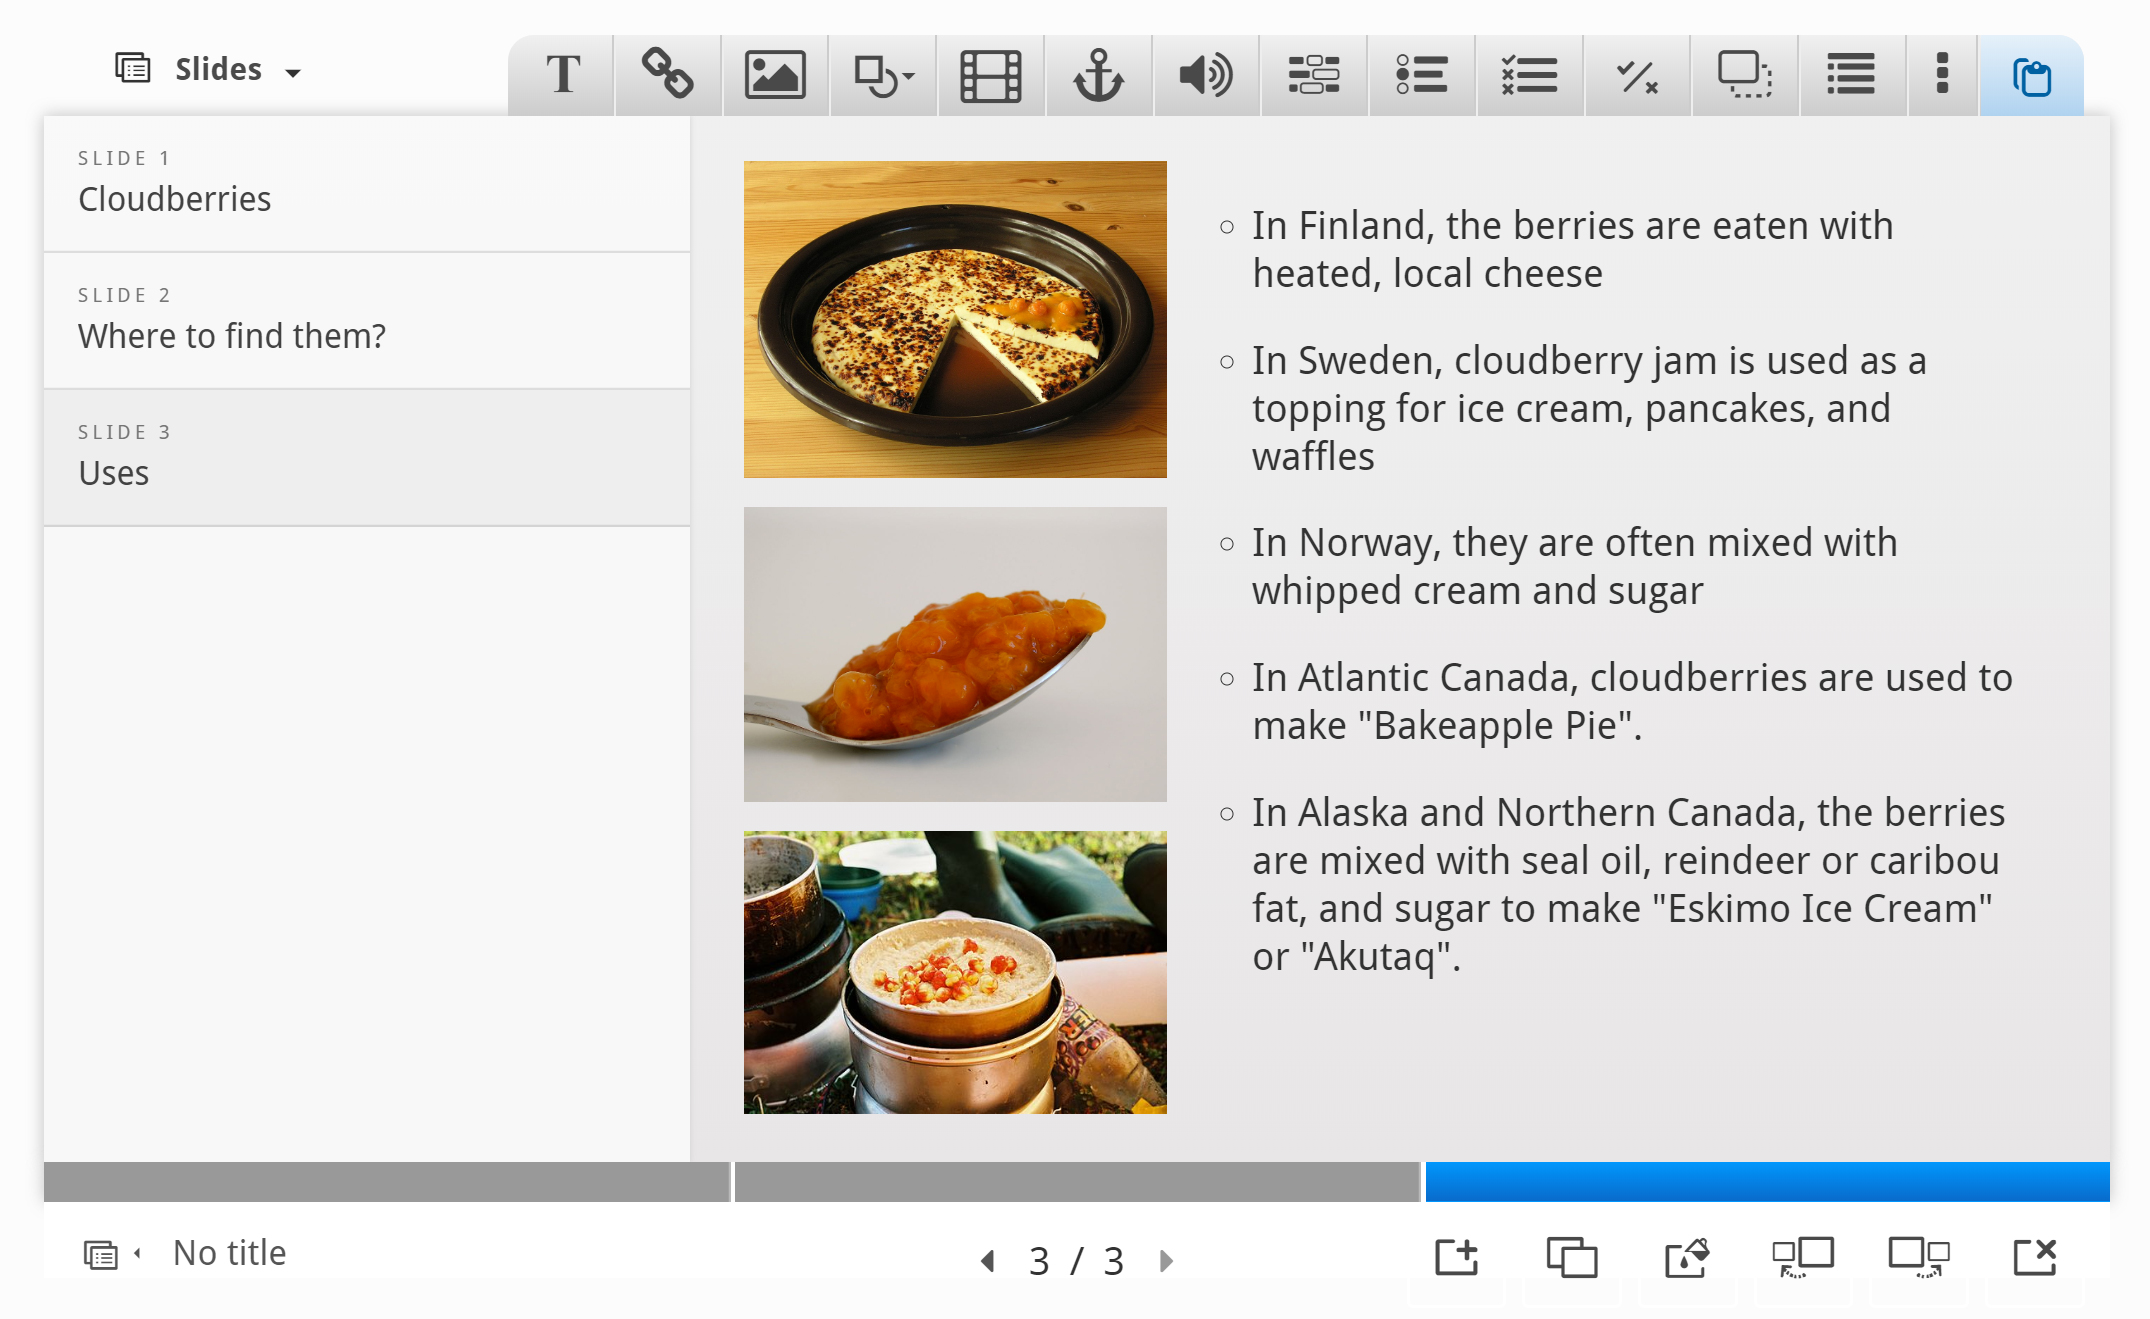
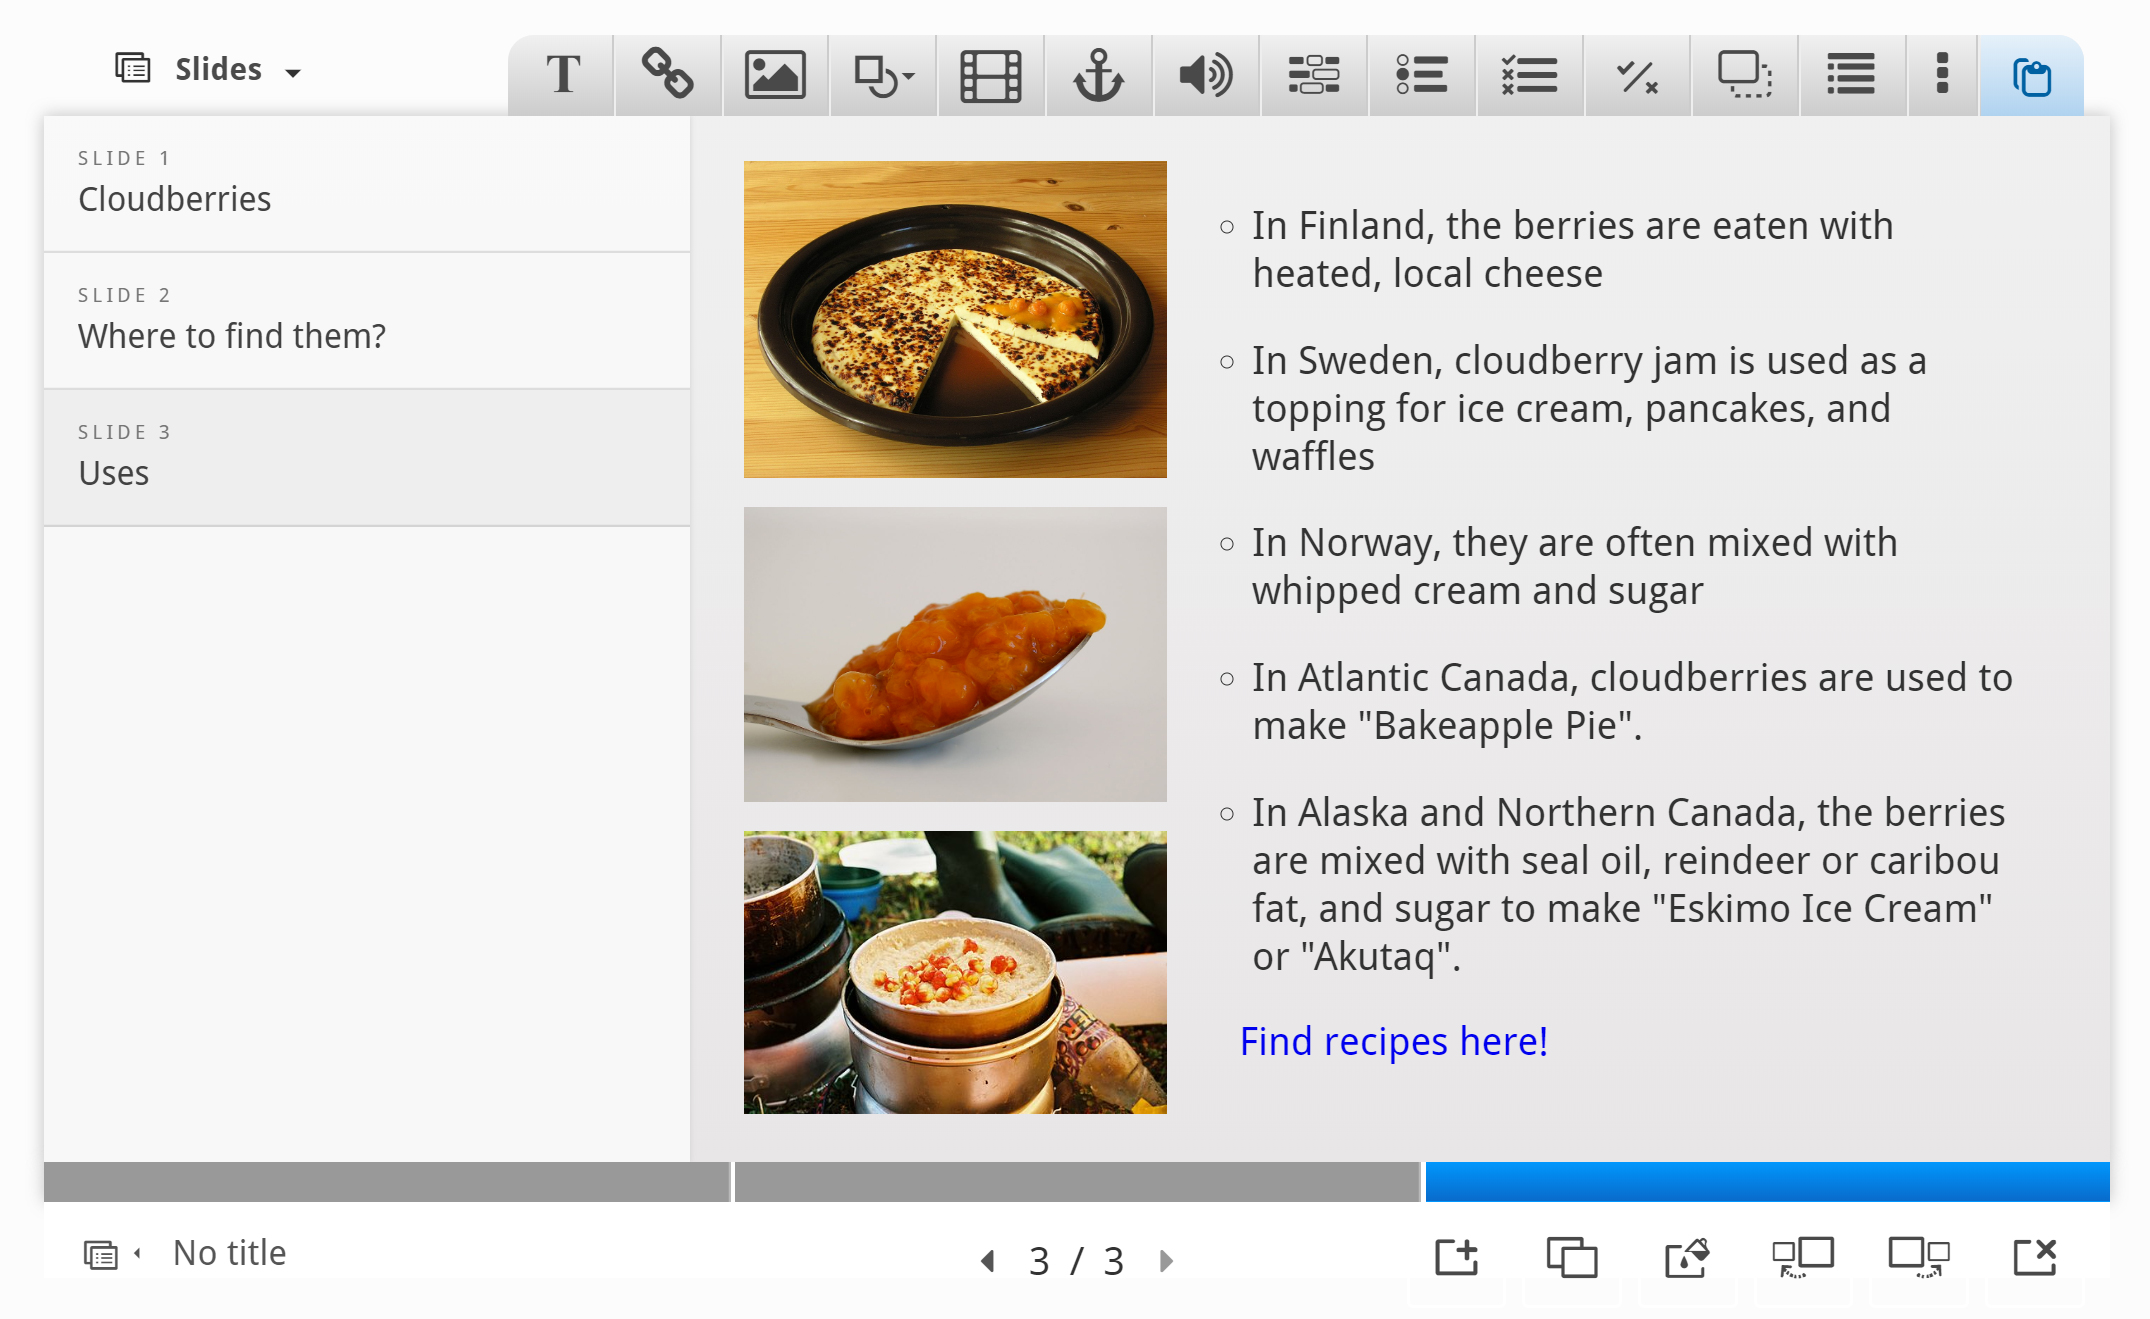
The text we'll use, is again paraphrased from the Wikipedia article:
- In Finland, the berries are eaten with heated, local cheese
- In Sweden, cloudberry jam is used as a topping for ice cream, pancakes, and waffles
- In Norway, they are often mixed with whipped cream and sugar
- In Atlantic Canada, cloudberries are used to make "Bakeapple Pie".
- In Alaska and Northern Canada, the berries are mixed with seal oil, reindeer or caribou fat, and sugar to make "Eskimo Ice Cream" or "Akutaq".
Use the Text tool ![]() to add a block of text to the slide. Once you have dropped the text box, a dialog will appear. Insert the text above in the Edit text dialog. Press Done when you're finished. You should now have something like this:
to add a block of text to the slide. Once you have dropped the text box, a dialog will appear. Insert the text above in the Edit text dialog. Press Done when you're finished. You should now have something like this:
Finally, we'll add a link. Use the ![]() button on the toolbar and place the link onto the slide.
button on the toolbar and place the link onto the slide.
We can find a selection of Cloudberry desserts on yummly.com. Here's the URL: http://www.yummly.com/recipes/cloudberry-dessert
Use the link text Cloudberry dessert recipes.
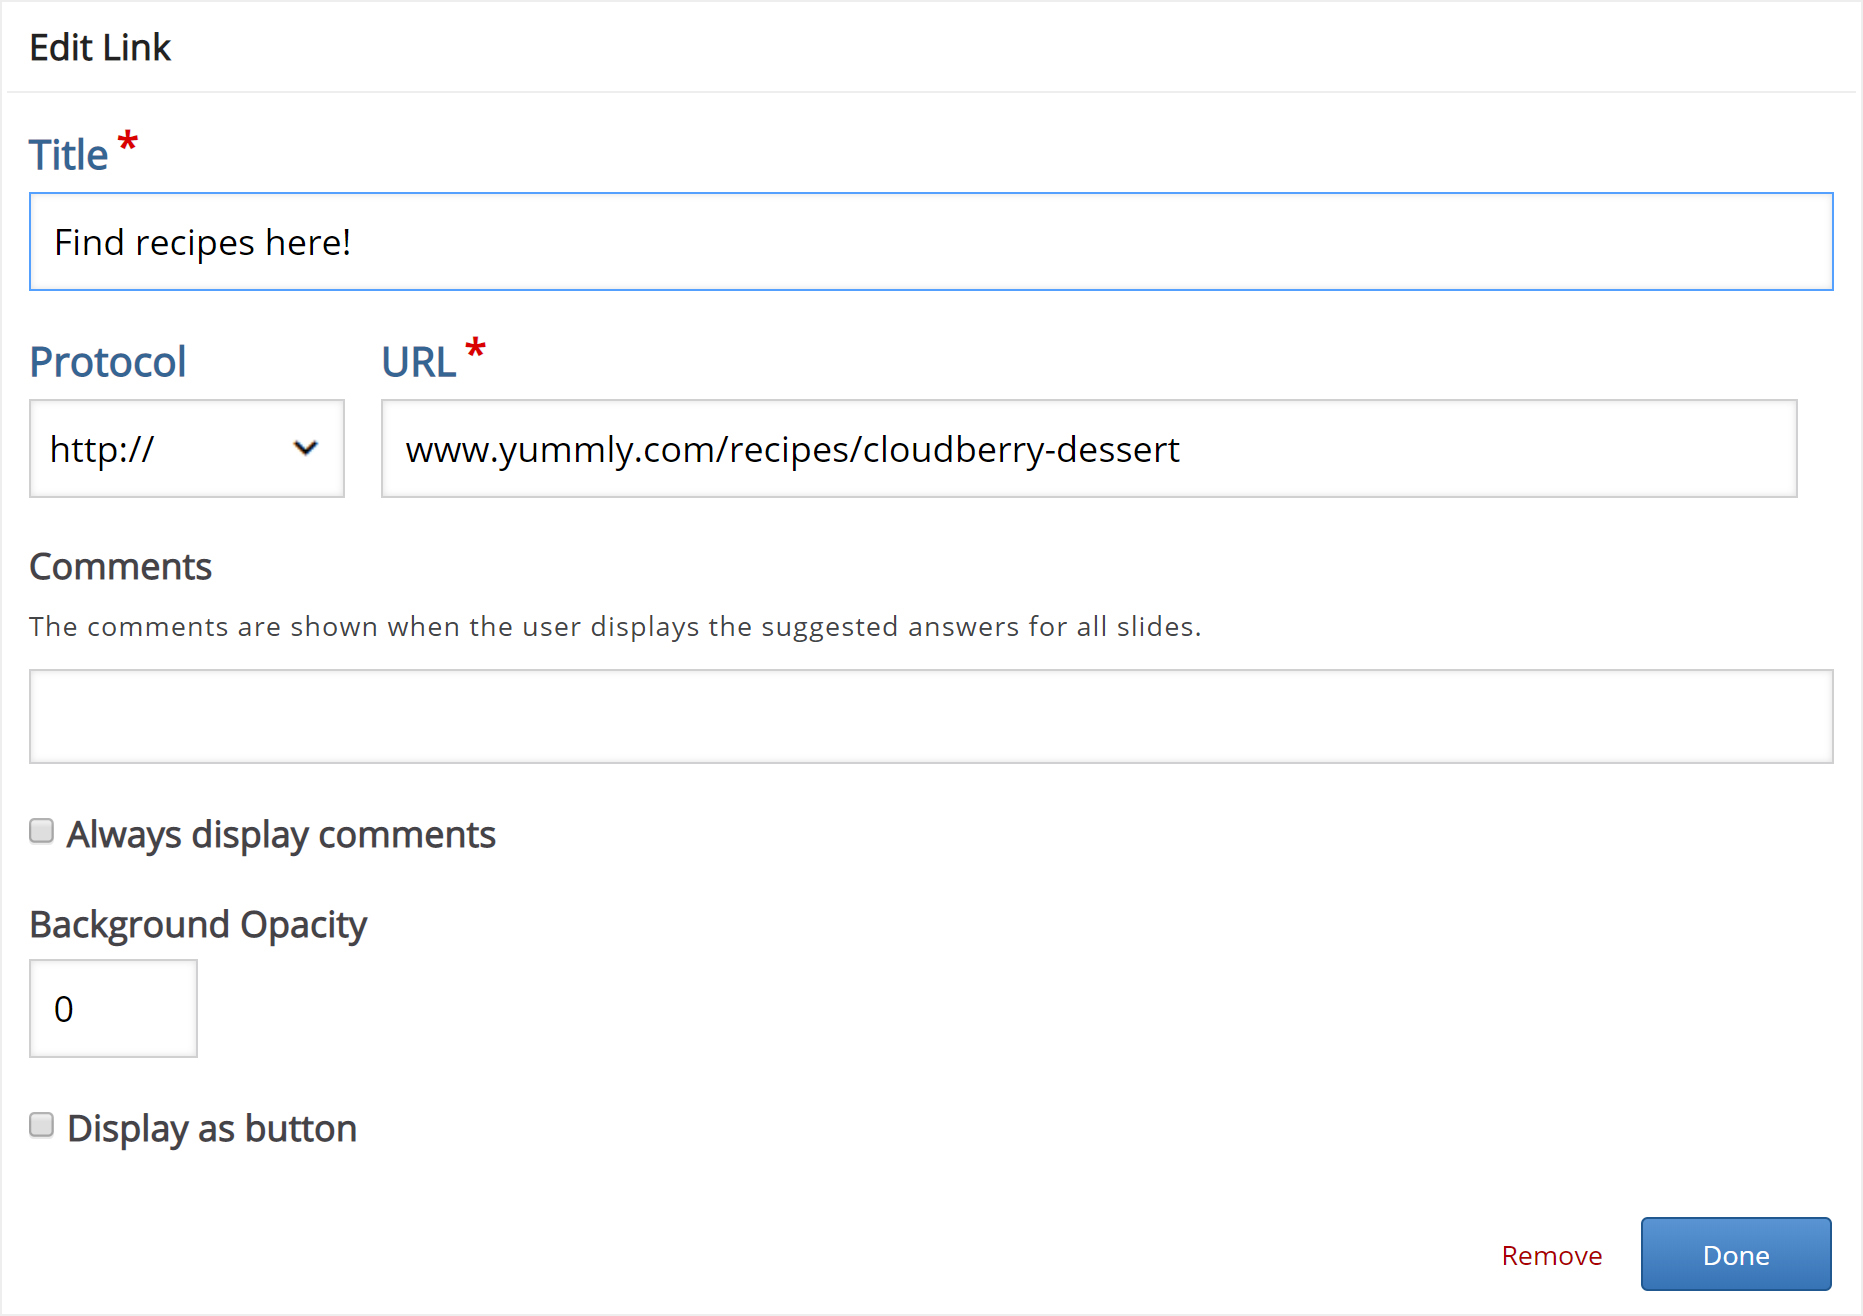
Press Done. then resize and place the link box so you have something like this:
We're now finished with slide 3. Finally, we'll add a Summary to finish the Course presentation.
Step 7: Slide 4
Press the button to add a fourth and final slide. Add the slide title Summary in the slides panel.
The Summary will allow the learner to make an interactive summary of the most important aspects of the previous three slides.
On the toolbar, press the ![]() button and drag a summary onto the slide. Creating a Summary is covered in this tutorial.
button and drag a summary onto the slide. Creating a Summary is covered in this tutorial.
Once you have dropped the Summary, the editor will appear.
Now we'll add statements to the Summary. Press the Add statements button to add two more statement groups.
In the Summary editor, the top statement in a statement group is always the correct one.
Introduction text:
Choose the correct statement about Cloudberries.
Statement group 1:
- Cloudberries are similar in shape and size to raspberries and blackberries.
- Cloudberries are similar in shape and size to blueberries and redcurrants.
- Cloudberries are similar in shape and size to strawberries.
Statement group 2:
- Cloudberries are found in the Northern Hemisphere.
- Cloudberries are found in the Southern Hemisphere.
Statement group 3:
- In Atlantic Canada, cloudberries are often used to make "Bakeapple pie".
- In Atlantic Canada, cloudberries are mainly eaten with a heated local cheese.
- In Atlantic Canada, cloudberries are mainly eaten with a heated local cheese.
Press Done when you have added the statements. Then position and resize the Summary so you'll have something like this:

Step 8: Finishing up
At the bottom of the editor, you'll find the Enable show solution buttons option. In this context, the option does not have any effect.
Save the node/article to view your finished Course presentation.
You should now have the same result as the example on top of the page.
Feel free to leave any comments or suggestions on how to improve this tutorial.
Comments
BV52
Mon, 05/18/2020 - 21:31
Permalink
Hi fqantonio,Would you mind
Hi fqantonio,
Would you mind providing more details like:
-BV
fqantonio
Wed, 05/27/2020 - 12:05
Permalink
Hello, thank you for your
Hello, thank you for your reply. It was a failure response in the activity embeded iframe. I couldn't use it because it is not possible to remove the file inside that is provoquing this error. Best. António
fjllorente
Thu, 05/28/2020 - 13:48
Permalink
Curso presentación global
4. Add content type like Image hotspot, timeline, iframe embedder, picture slider etc. to presentation
Felicito la creación de esta herramienta. Me gustaría ver que "Presentación de curso" conectara con la mayoria de elementos. Espero paciente esa mejora. Gracias por vuestro gran trabajo
LUISA ANASI
Thu, 05/28/2020 - 21:07
Permalink
question
Hi ! I want to know how to apply drag and drop please!
BV52
Fri, 05/29/2020 - 18:23
Permalink
Hi Luisa,you can check the
Hi Luisa,
you can check the tutorial for Drag and Drop. You can also check this short video.
-BV
Clem11
Mon, 06/15/2020 - 09:39
Permalink
Hi! Great activity!Yet, I
Hi! Great activity!
Yet, I have a problem concerning the feedback. I wanted to add a "fill in the blanks" and "multiple choice" activity. I chose not to allow the participant to immediately check his/her answer, yet, it still doesn't work anyway. I'd like the participant to access his/her results only at the end of the course presentation. Is this possible?
Thank you very much for your help!
BV52
Mon, 06/15/2020 - 21:38
Permalink
Hi Clem11,I'm afraid this is
Hi Clem11,
I'm afraid this is not possible. If you are talking about the option "Automatically check answers after input" this is for checking the asnwers after the user types an answer or in Multiple choice chooses an answer.
-BV
MARÍA FERNANDA ...
Fri, 08/14/2020 - 00:10
Permalink
Desapareció eI cono de audio
Hace un tiempo que desapareció el ícono de audio de estaba como opción, realmente me resultada super útil para ampliar mis presentaciones con explicaciones. Se pueden incluir audio propio de otro modo? espero su respuesta, será de mucha ayuda! Gracias!!
BV52
Fri, 08/14/2020 - 18:17
Permalink
Hi Maria,To provide a best
Hi Maria,
To provide a best possible experience for new users and to ensure that people use H5P.org only for trying out H5P (we've had more traffic than our server can handle lately, ref also the warnings when you create content, embed content and view the content) we are experimenting with which content types should be available here.
Check the getting started page for information on how you can use all the content types and use H5P for real. We unfortunately are not able to provide free hosting, only free software :) Hopefully you'll consider supporting the H5P Core Team by using H5P.com.
-BV
DavidIALF
Tue, 09/15/2020 - 04:55
Permalink
I don't want a summary slide
I sometimes create course presentations (using my office H5P.com account) to embed in our LMS for use during lessons, but I want to discuss the students' responses as a class, so I don't need or want the final summary slide. In any case, as I often use exportable text areas for students to type their ideas, there is no "correct answer". At present, I tell my students to ignore the final slide as it is an H5P bug, but is there any way to get rid of it?
BV52
Tue, 09/15/2020 - 18:19
Permalink
Hi David,You can place a
Hi David,
You can place a check on the "Hide Summary Slide" in the "Behaviour Settings". Please note that hiding the summary slide disables the sending of scores, printing, exporting text among other things.
-BV
DavidIALF
Wed, 09/16/2020 - 03:18
Permalink
HI BV,Thanks for the response
HI BV,
Thanks for the response, but checking the "Hide Summary Slide" has no effect. That's why I described it as a bug.
David
DavidIALF
Wed, 09/16/2020 - 13:17
Permalink
"Hide Summary Slide" problem
HI,
Thanks for your respose. Unfortunately checking "Hide Summary Slide" has no effect, which is why I described the problem as a bug.
DavidIALF
Wed, 09/16/2020 - 04:22
Permalink
Hi BV,Thanks for your
Hi BV,
Thanks for your repsonse, but checking the "Hide Summary Slide" has no effect, which is why I describe it as a bug.
David
BV52
Wed, 09/16/2020 - 19:33
Permalink
Hi David,Does this happen to
Hi David,
Does this happen to all your Course Presentations?
-BV
DavidIALF
Thu, 09/17/2020 - 04:57
Permalink
Yes, it does
Hi BV,
I have some older presentations that do not have a summary slide because checking the box worked. However, every new presentation has it. see: https://h5p.org/node/1018093
David
BV52
Thu, 09/17/2020 - 18:36
Permalink
Hi David,Thank you for the
Hi David,
Thank you for the information and sample content. I created a bug report for this issue.
-BV
DavidIALF
Fri, 09/18/2020 - 04:28
Permalink
Thank you
Thanks for reporting the issue.
Incidentally, hiding the summary slide does not work with any content (except images or sound files) in the course presentation. My use of exportable text areas was an attempt to avoid this issue as I assumed that if there was no 'correct answer', which there would be if the presentation contained a gap fill activitity, for example, there would be no summary slide generated. Alas...
David
DavidIALF
Sat, 08/28/2021 - 06:40
Permalink
Bug not fixed
Hi,
So more than a year has passed and this bug has not been fixed. In all that time, I have been forced to explain to hundreds of students that there is a bug in H5P. I presume this is not a problem for the the H5P organisation.
As usual with this kind of shortcoming in H5P, we will try to decelop our own software solution.
zabelle_motte
Mon, 08/16/2021 - 09:53
Permalink
Fixe the bug !
Hello David,
If you have time to develop, it would be better to find how to fix this bug ;-)
Or have at least some clues to help developpers to solve the problem.
H5P is a so beautiful bundel of javascript libraries to create online interactive activities that is fully open source.
You can analyze the code and propose solutions or new activities.
It would be much more constructive ...
Kisses
Zabelle
wmachado
Sat, 09/26/2020 - 05:20
Permalink
Grades Updating/Deleting
Hello.
I use a lot of h5p activities in my course and love it. But as I integrate quiz within content presentation (course presentation, interactive video, etc.), students review the h5p content over and over again in order to accomplish their final tasks. So, even if one student gets a good grade for the first time he/she gets into the activity, he/she will be graded 0 if the next times he/she gets into it again, doesn't do the questions all over again. Is there any way to prevent it? I get a lot of concerns about it from the class. (I'm using it in a moodle ambient).
Thank you very much
BV52
Mon, 09/28/2020 - 18:50
Permalink
Hi wmachado,I'm afraid this
Hi wmachado,
I'm afraid this feature is not available within the H5P contents unless someone from the community creates something that captures only the best or first attempts from the students.
-BV
Diane4000
Tue, 02/16/2021 - 21:14
Permalink
Add captions option for audio files?
Hello, I'm not sure if I am missing something but if you add an audio file to a course presentation slide, there does not seem to be an option to add a captions file (like a .vtt, which you can add for a video file). If this is the case, I would like to strongly recommend this option to be added as currently audio files in course presentation would not be accessible to anyone with a hearing impairment.
You should also list this detail/cautinary note to this page as "course presentation" is listed as an accesssible content typebut withoutu text captions for an audio file embedded in a slide, this is not truly the case.
Thank you!
BV52
Wed, 02/17/2021 - 17:16
Permalink
Hi Diane,Thank you for
Hi Diane,
Thank you for pointing this out. I will reach out to the H5P core team regarding this.
-BV
BV52
Thu, 02/18/2021 - 17:11
Permalink
Hi Diane,The H5P core team
Hi Diane,
The H5P core team mentioned that the Audio player uses the native audio player of browsers and these does not support adding a VTT file. They suggested that for this case since you are using it in Course Presentation to add a "text" near the audio player.
-BV
robertmaran
Sat, 02/20/2021 - 02:22
Permalink
course presentation
Is it possible to add a "suspend and resume" button to "course presentation"? I ask this because in a course presentation that is long and contains many questions, a student may run out of time, and if they abandon the course presentation midway and come back at a later time, they will be forced to start from the beginning again. Having the option to resume where they left off would be a useful feature, I would think...
Thanks
Robert
BV52
Sat, 02/20/2021 - 03:44
Permalink
Hi Robert,Where are you
Hi Robert,
Where are you creating your content. If you are using the plugin for Drupal, Wordpress or Moodle there is an option called "save content state" that lets students come back to where they left off.
-BV
robertmaran
Mon, 02/22/2021 - 01:20
Permalink
course presentation
Hello BV52
Thanks for that information... I do use moodle and will check out that "save content state". However, I also would like to use H5P "course presentation" so it can be used also on LMS's other than the ones you mention. ( The LMS at one institution that I work at uses "webclass" LMS, but it not a well-known one, but it is SCORM- compliant.)
Robert
BV52
Mon, 02/22/2021 - 17:31
Permalink
Hi Robert,There are other
Hi Robert,
There are other "unofficial" plugins out there for other LMS/CMS. When I say unofficial it only means that the H5P core team did not create nor have tested them. I'm not sure though if webclass have an H5P plugin. If it does you might want to check if it has the same feature, if not either you can create it or reach out to the developers to create the feature. If not and if webclass supports LTI 1.1 or LTI 1.3 you can use H5P.com, however the save content state has not been created. It is on the roadmap for H5P.com but the developers of H5P.com has not started on its development.
-BV
Dean0104
Thu, 03/04/2021 - 11:25
Permalink
Survey Questions
Hi
I'm using the Course Presentation for the first time and I'm trying to add a survey question where any of the answers would be correct i.e What is your gender? I cant seem to be able to do this. Is it possible?
Kind Regards Dean
BV52
Thu, 03/04/2021 - 17:25
Permalink
Multiple Choice
Hi Dean,
Multiple Choice Question can be configured to have all the answers to be correct. It can also work as a 'survey' if you set the behavioural settings as follows:
Enable 'Give one point for the whole task'
Pass Percentage is set to 0.
-BV
TNABDG
Mon, 05/17/2021 - 18:11
Permalink
Accessibility issues: text does not reflow or change spacing
One of our Moodle courses has undergone an expert accessibility audit. The audit raised the following two issues with the H5P course presentation format: (1) User defined text spacing does not change the appearance of the text in the slides. (2) When the slide’s content is viewed at low resolution 320 x 256, the content does not reflow and the text shrinks to the point of obscurity (too small for people with visual impairments) instead of remaining the same size and reflowing to fit the screen. Could you address these issues? Many thanks.
Diana Araujo Soares
Fri, 05/07/2021 - 06:40
Permalink
Configurei errado uma
Configurei errado uma apresentação e sumiu a barra de navegações no modo visualizar! Tentei editar e desmarcar a seleção mas não consigo!! Consigo reverter sem perder meu trabalho??
BV52
Fri, 05/07/2021 - 18:30
Permalink
Hi Diana,I'm sorry, once
Hi Diana,
I'm sorry, once surface mode has been enabled it cannot be disabled.
-BV
TNABDG
Fri, 06/11/2021 - 12:24
Permalink
Accessibility
HI, I would be grateful for a reply to the two accessibility issues I raised in May: https://h5p.org/comment/41413#comment-41413
Thank you.
PhilipA
Thu, 06/17/2021 - 11:42
Permalink
Centering Text box on slide
Firstly, thank you to everyone involved in delivering this wonderful product. I would like to know if there is a way to centre a text box and or image on the slide. I note the transformation tool has what appears to be coordinates that chance as you move the image around the slide but I am not sure what they mean.
PhilipA
Thu, 06/17/2021 - 11:45
Permalink
Centering Text box on slide
Firstly, thank you to everyone involved in delivering this wonderful product. I would like to know if there is a way to centre a text box and or image on the slide. I note the transformation tool has what appears to be coordinates that chance as you move the image around the slide but I am not sure what they mean.
BV52
Thu, 06/17/2021 - 19:03
Permalink
Hi PhilipA,I'm afraid there
Hi PhilipA,
I'm afraid there is no feature of centering objects inside the slides of Course Presentation.
-BV
christinece
Tue, 07/27/2021 - 14:24
Permalink
Exportable text area
Hi there, I'm using an exportable text area element in a course presentation, where the students type their answer to a question. I've put the correct answers in the comments, but the comments don't become visible in answer mode. Where are they supposed to be displayed? I do not want the comments to be always visible, but at this point that seems to be the only way to make the answers available to the user. Is this a bug, or am I missing something?
telugu
Sat, 07/31/2021 - 15:21
Permalink
Can we add audio from soundcloud
Hi,
As we can give a url for audio, can we add audio from soundcloud?
telugu
Sun, 08/01/2021 - 06:39
Permalink
Adding Sound
Hi,
I am trying to add Sound using add sound option. We have two options, to upload or to use URL. I can upload but when I try to use URL (from Sound Cloud) it says your browser does not support. How do I use the URL feature?
Please help me and guide me on this.
BV52
Tue, 08/03/2021 - 18:59
Permalink
Hi telugu,Would you happen to
Hi telugu,
Would you happen to have a sample URL?
-BV
SoNear
Sat, 09/04/2021 - 12:57
Permalink
import an existing H5p interactive video in a course presentatio
Hello, is it possible to import in a course presentation an existing H5P interactive video ?
thank you
BV52
Mon, 09/06/2021 - 18:45
Permalink
Hi SoNear,Yes this is
Hi SoNear,
Yes this is possible you can check this documentation on steps on how to copy/paste contents.Since the documentation only provides instructions for generic content types the paste option is different for Course Presentation. The button is the right most icon in the content picker.
-BV
matthewbrown
Tue, 10/19/2021 - 18:14
Permalink
Issue with videos
Hello
I have multiple slides with videos via Panopto. I find that when moving between slides, sometimes audio from a different slide is still playing. Particularly this happens when going back to a previous slide. I can provide an example if it would help explain.
Can you advise on a solution?
Thanks
matthewbrown
Tue, 10/19/2021 - 18:15
Permalink
Issue with videos
Hello
I have multiple slides with videos from Panopto. I find that when moving between slides, sometimes audio from a different slide is still playing. Particularly this happens when going back to a previous slide. I can provide an example if it would help explain.
Can you advise on a solution?
Thanks
BV52
Tue, 10/19/2021 - 19:55
Permalink
Hi Matthew,It would help if
Hi Matthew,
It would help if you can provide a sample content so that we can test the issue.
-BV
matthewbrown
Tue, 10/19/2021 - 19:59
Permalink
Sample content
https://bpp.h5p.com/content/1291461031216628967
BV52
Tue, 10/19/2021 - 20:26
Permalink
Hi Matthew,Thank you for the
Hi Matthew,
Thank you for the video. I filed a bug report here, I've also reported this directly to the developers of H5P.com.
-BV
BV52
Wed, 10/20/2021 - 18:16
Permalink
Hi Matthew,Just an update
Hi Matthew,
Just an update from the developers "The problem here is that there are two videos on slide 2 and 3, but the second video is not visible (zero height). I am not sure how this happened, but I’ll close this issue, since the solution will be to remove the second invisible video". It was also suggested that you reach out to H5P.com support directly through the contact form. Once we recieve the message I will send it to the developers.
-BV
Pages