Multiple Choice Question Tutorial
The Multiple Choice content type is your staple multiple choice quizzing tool. Multiple Choice can be used to test the learner's level of knowledge on a given topic.
In this tutorial you will learn:
- When to use Multiple Choice questions
- How to create a Multiple Choice question
Click the "Get started" button to explore all of the possible ways to use H5P!
Example
Here's the Mulitple Choice question we'll create in this tutorial:
When to use Multiple Choice questions
Multiple Choice questions can be used for testing well-defined skills related to a certain topic. Mulitple Choice questions can be an effective assesment tool when thay are created properly and the learner is given immediate feedback on own performance. The H5P Multiple Choice questions can have a single or multiple correct options per question.
Multiple Choice questions can be used stand-alone or they can be used in Question sets, Interactive videos or Presentations. Either way, they are created in the same way.
Step 1: Topic
Let's say you have a text about Blackcurrants that you want to create a Multiple Choice question about. The example text below is pasted from Wiktionary:
Blackcurrant
A shrub, Ribes nigrum, that produces small, very dark purple, edible berries.
Step 2: Creating a Multiple Choice question
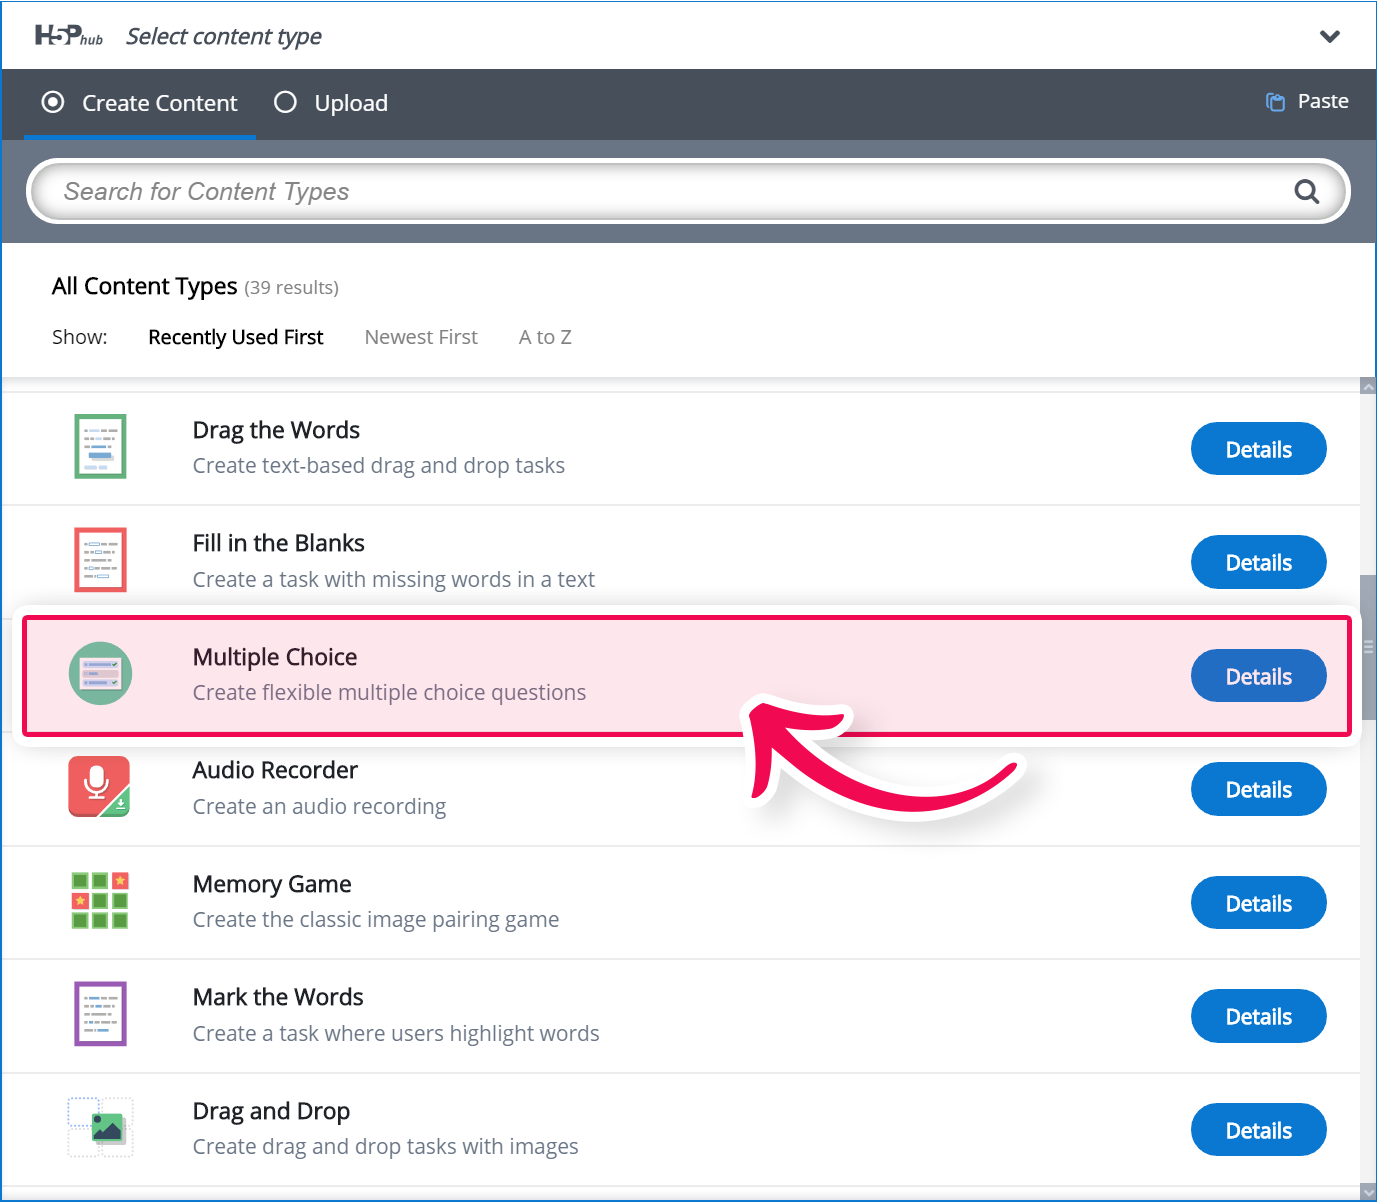
Select the New content option and choose Multiple Choice from the list of Content types:
Step 3: Multiple Choice question editor
The Multiple Choice question editor should now appear. The editor should look something like this:
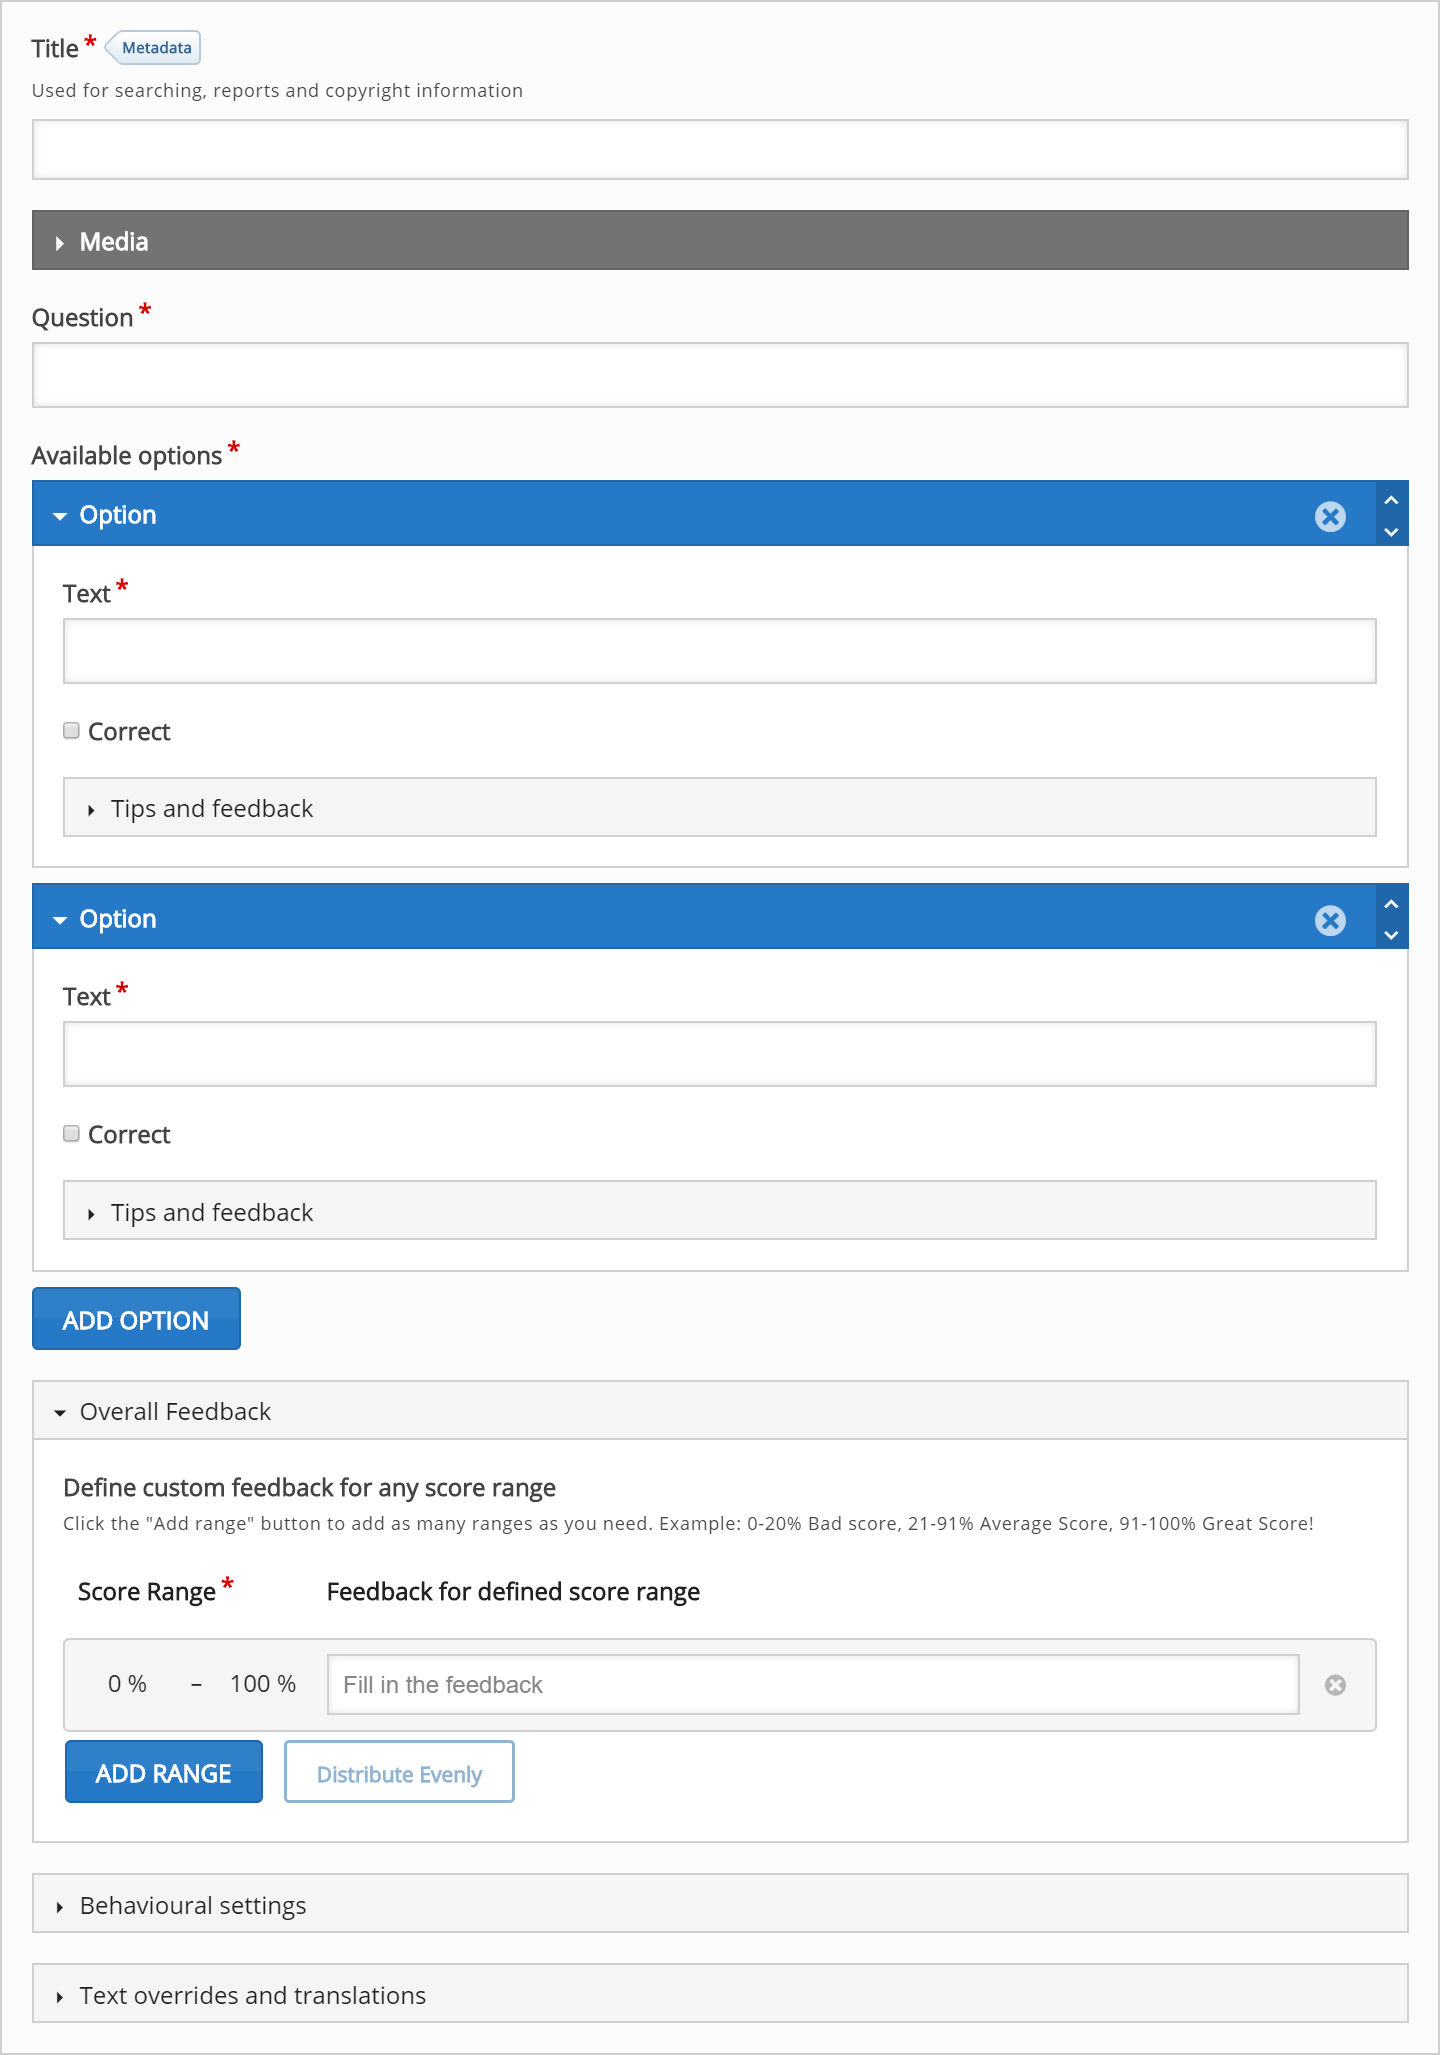 In this tutorial, we'll focus on creating the Multiple Choice question content using the above example.
The Multiple Choice question content type consists of a question and a set of options. The Question is used to introduce the problem to be solved, and the Options are the possible answers the learner can choose from.
Step 4: Media
Under Media, you can add image or video files relevant to the question.
You will have something like this in the editor: Video:
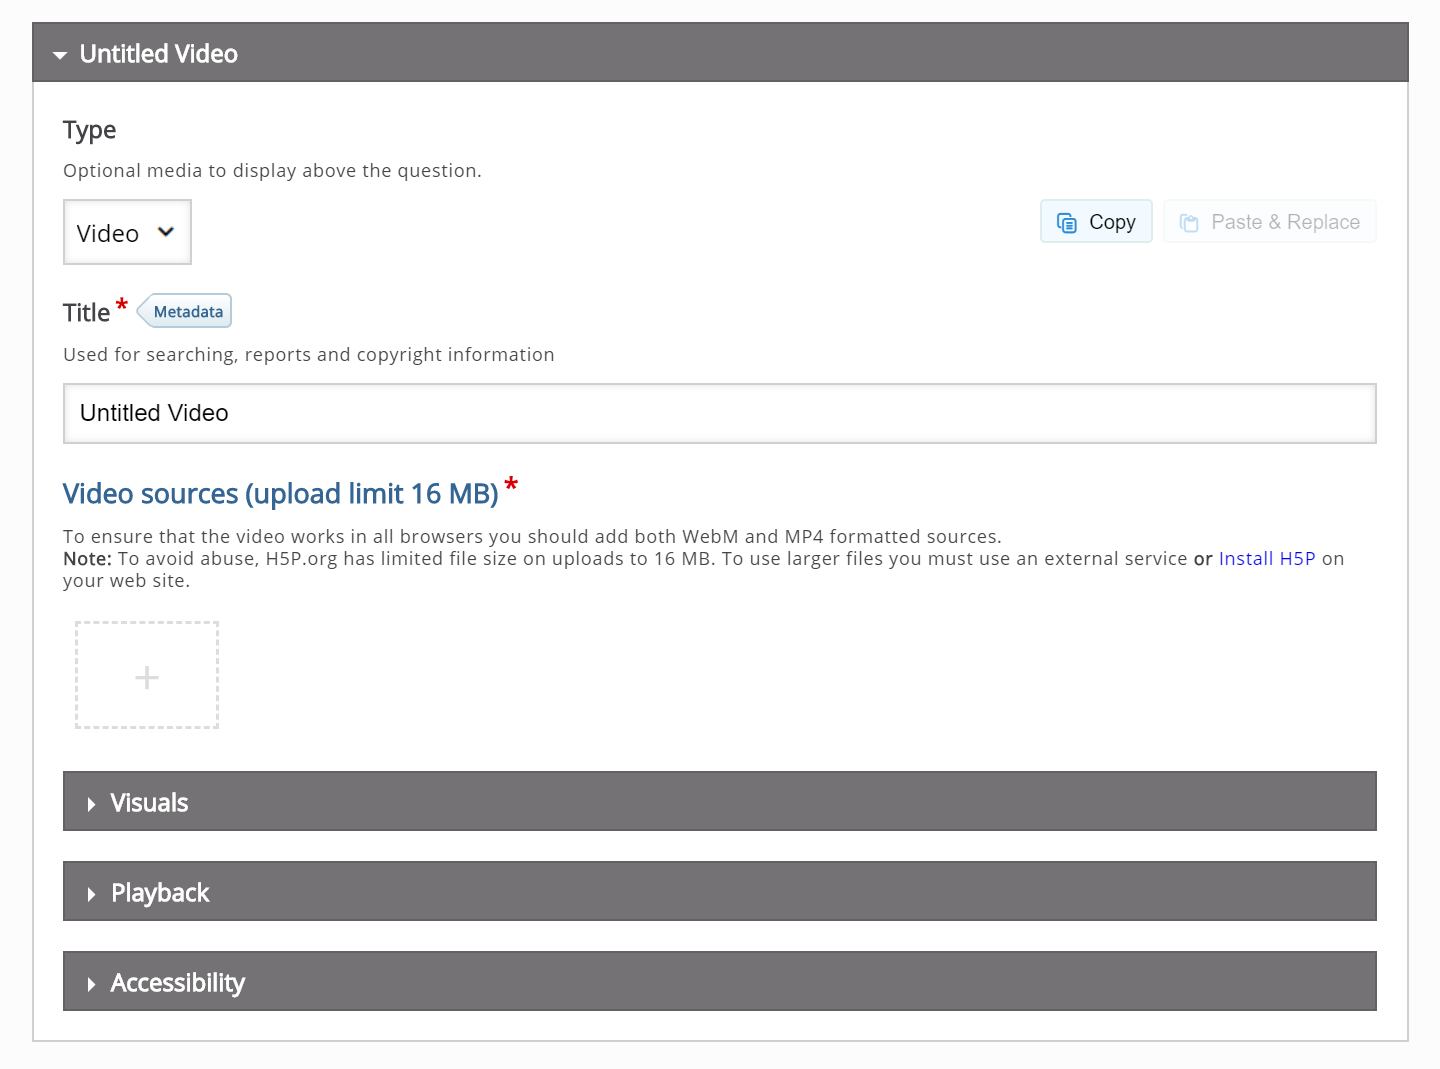 Image:
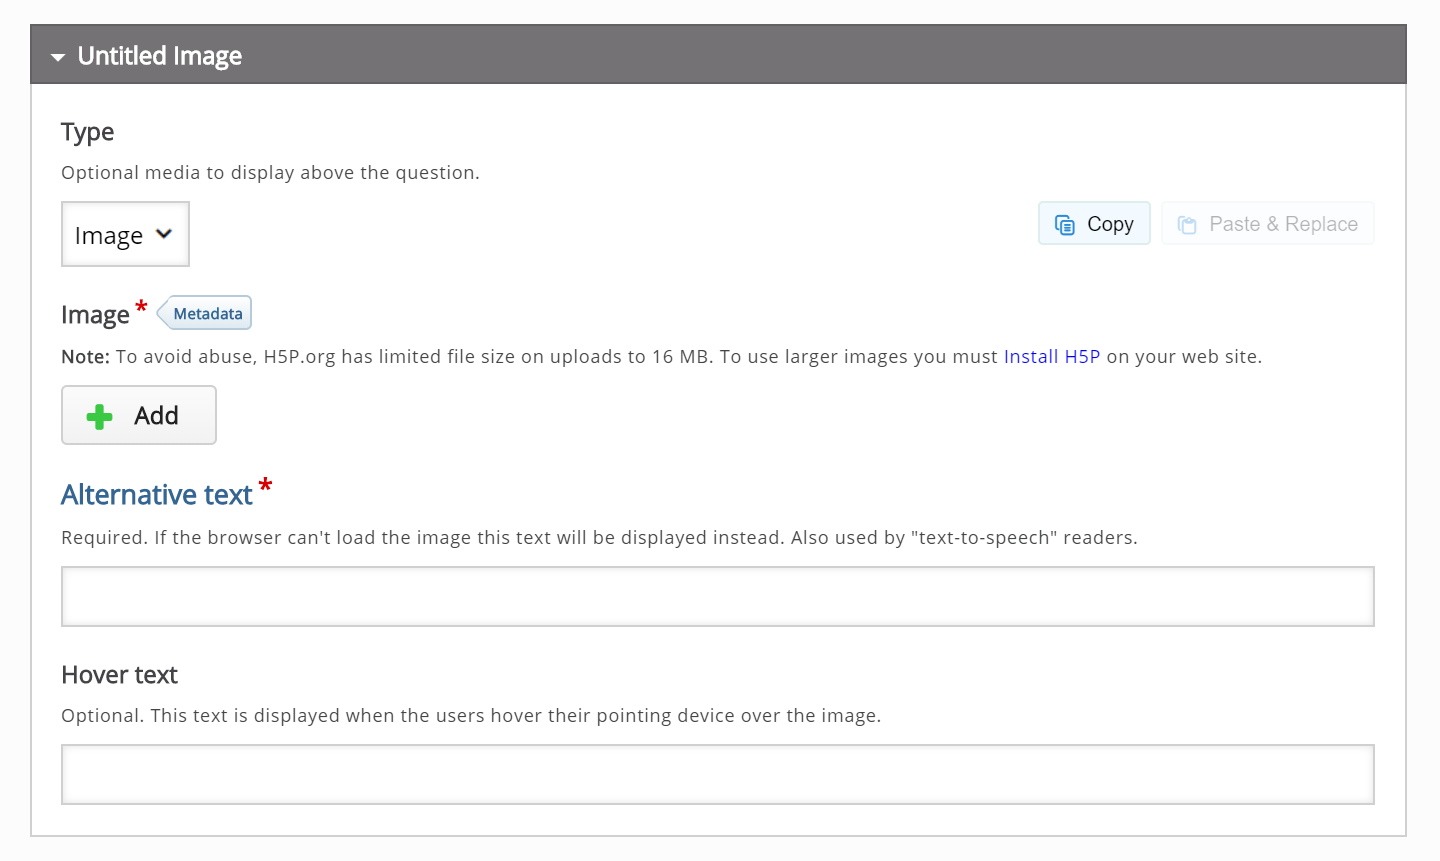
We are now going to select the media as Image from the dropdown as in the example. Insert the following image under the Image field: 
This picture by Karen Jackson was found on Flickr and is licensed with the Creative Commons Attribution-NoDerivatives license.
Your editor should now look like this: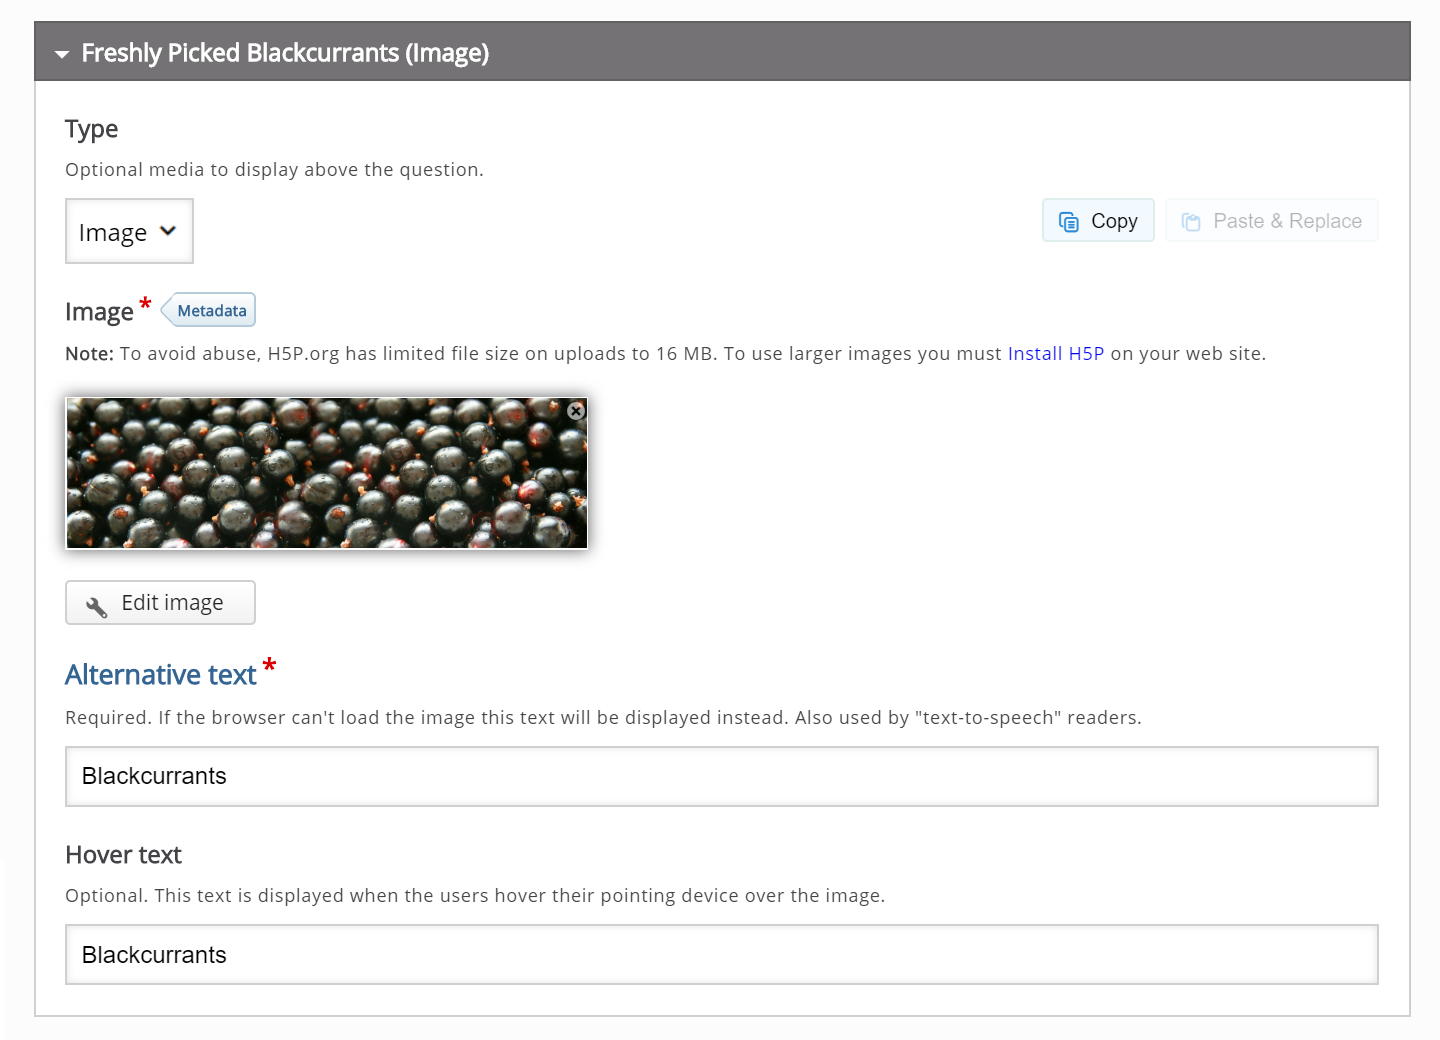
Use pictures that are similar in size to ensure a smooth user experience for the learner.
Step 5: Question
We'll add a simple Question related to the example text about Blackcurrants for the learner to solve. Type the following text in the field labeled Question in the top of the editor:
What color does the blackcurrant berry actually have?
Your editor should now look similar to this: 
Step 6: Available options
Under Available options, we add the answering options the learner can choose from. Two empty available options are listed by default since we usually need at least one correct and one incorrect answering option.
In this tutorial, we'll use three answering options related to the question about what color the blackcurrant berry actually has:
- Very dark purple
- Dark blue
- Black
Type in Very dark purple in the field labeled Text under the top Option and check the Correct checkbox as this is the correct answering option.
You should now have something like this: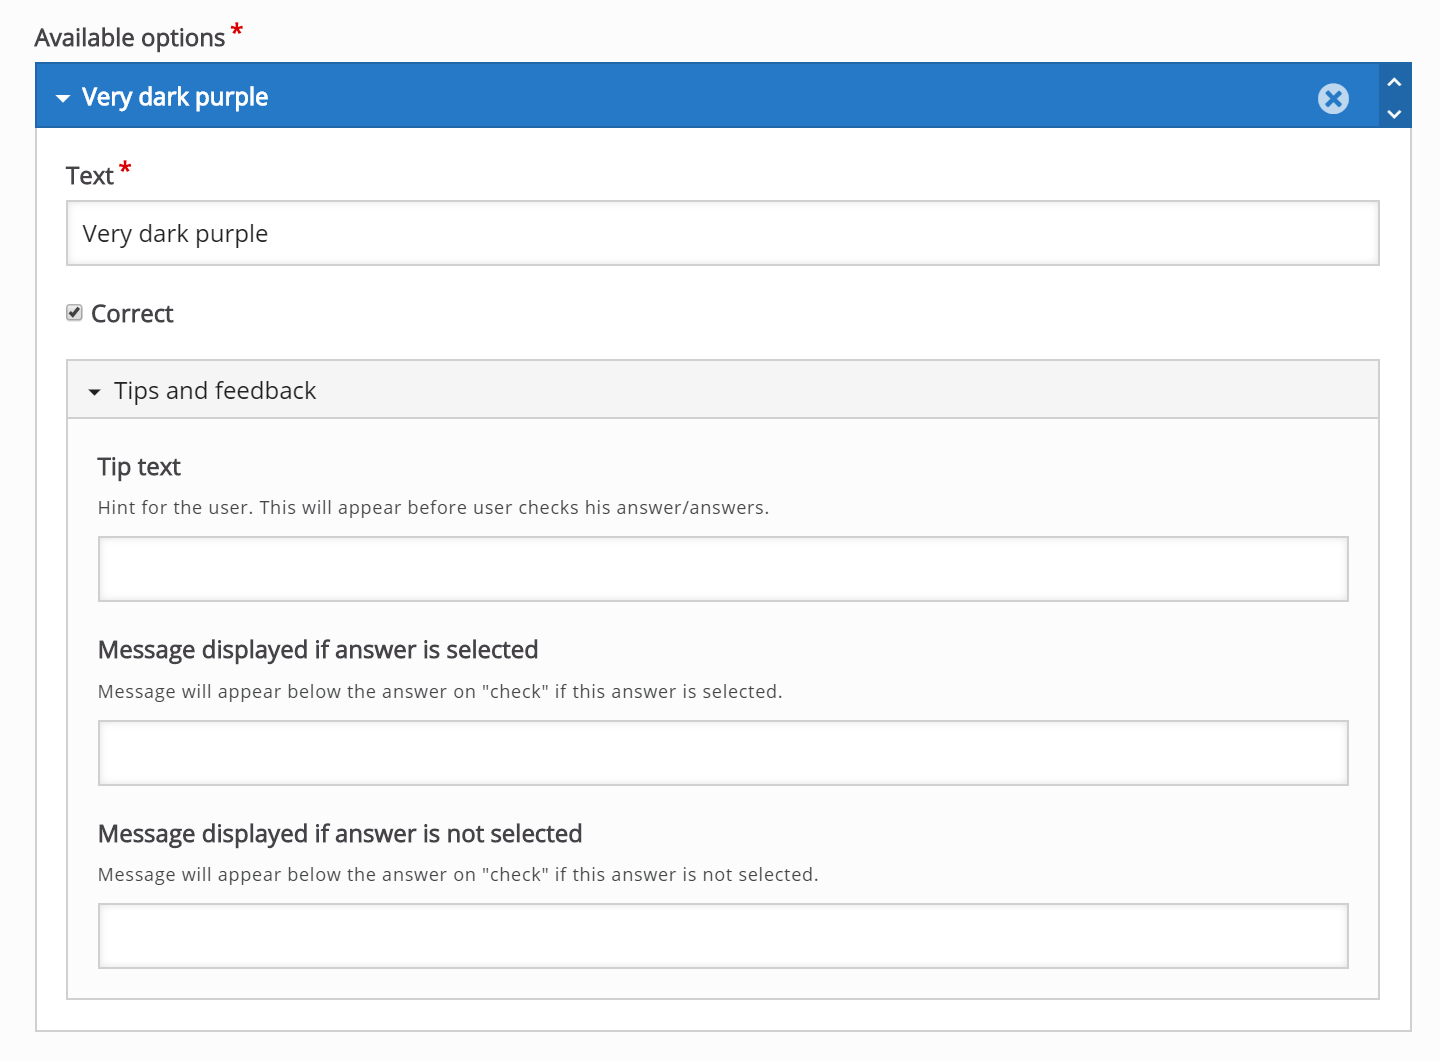
Move on to the second and bottom Option, and type in Blue in the text field labeled Text. Leave the Correct checkbox unchecked as this an incorrect answering option.
We want to add a third answering option. Currently, we only have two available options, so we'll have to add another one by pressing the Add option button below the two currently available options:
Another Option will be added after you press Add option. In the third and now bottom Option, type in Black in the text field labeled Text. Leave the Correct checkbox unchecked as this a second incorrect answering option.
We are now done with adding answering options.
You can add as many answering options as you want. You remove answering options by pressing the
button in the top right corner of the Option. You change the order of the answering options by pulling the
button in the top left corner of the Option.
Step 7: Question Type under Behavioral Settings
User can select one of the following question type in Multiple Choice present under Behavioral Settings
- Automatic
- Multiple Choice (Checkboxes)
- Single Choice (Radio Buttons)
Automatic:
By default, the question type 'Automatic' is selected. If you have multiple correct options, then it will behave like Multiple choice and checkboxes will be displayed automatically. If you have one correct option, then it will behave like Single Choice and radio buttons will be displayed automatically.
Multiple Choice:
You can select the question type 'Multiple Choice' from the drop-down if you have multiple correct options and checkboxes will be displayed
Single Choice:
You can select the question type 'Single Choice' from the drop-down if you have a single correct option and radio buttons will be displayed.
You will have something like this in the editor:  In this case, we only want to use a single correct answer, so we'll keep the default question type as 'Automatic' from the drop-down present under Behavior Settings. The Give one point for the whole task is more relevant when Multiple Choice questions are used in Question sets, Interactive videos or Presentations, so we're not concerned whether this is checked or not for now.
Check the Randomize answers checkbox to make the answering options display in an arbitrary order.
Your editor should now look similar to this: 
Step 8: Feedback
This is an optional step and you can skip to Step 9 to finish up.
Multiple Choice allows the learner to get feedback on selected answering options. This might be useful to provide the learner with pointers on what to study more after selecting a certain answering option.
For each option, we'll add some feedback to the learner.
In the first and correct Option, we type in the text You selected the correct option, well done in the Chosen feedback field. In the Not chosen feedback field, type in the text Read the text about blackcurrants one more time.
In the second and incorrect Option, we type in the text Read the text about blackcurrants one more time in the Chosen feedback field. In the Not chosen feedback field, type in the text You did not select this incorrect option, well done
In the third and incorrect Option, we type in the text It is understandable that you selected this option. However, the blackcurrant berry actually has another color than black in the Chosen feedback field. In the Not chosen feedback field, type in the text You did not select this incorrect option, well done
Under Available options, you should now have something like this: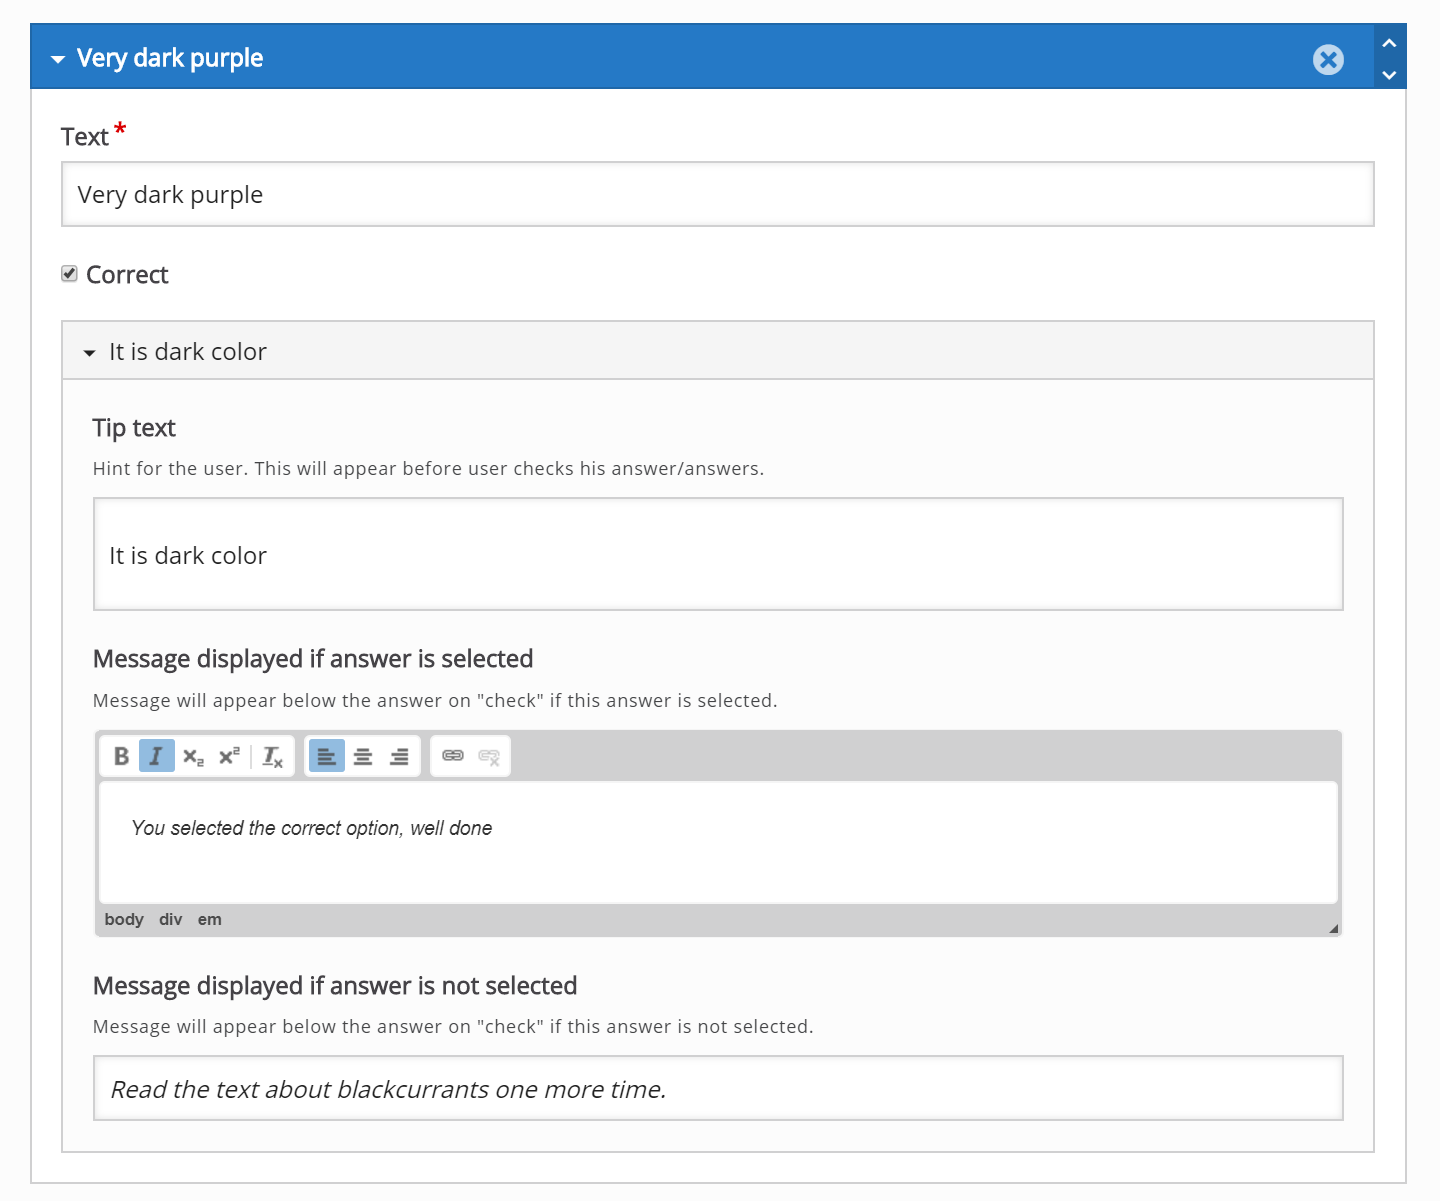


Use the
button to collapse an Option for a better overview when editing.
Step 9: Finishing up
At the bottom of the editor, you'll find the Enable try again button option. Leave this checked, as we want the learner to be able to try to solve the Multiple Choice questions multiple times.
Save the node/article to view your finished Multiple Choice question.
You should now have the same result as the example at the top of the page.
Feel free to leave any comments or suggestions on how to improve this tutorial.
Comments
juliameyer
Wed, 11/27/2019 - 17:16
Permalink
Ability to customize the look/feel of multiple choice questions
Is there any way to customize the look and feel of multiple choice questions? I am looking to remove the star icon, use custom fonts to match our style guide, change the "Check" button language to read "Submit", and/or use a different color palette for the buttons to mirror our brand standards. Please keep me posted what is possible. Thank you for your help!
BV52
Wed, 11/27/2019 - 19:47
Permalink
Hi juliameyer,The easiest way
Hi juliameyer,
The easiest way is to use a PHP hook, to add your own CSS-file to the content type. Please visit the Visual Changes page for more details.
-BV
juliameyer
Wed, 11/27/2019 - 20:46
Permalink
Thank you for your help, BV!
Thank you for your help, BV!
iwebu
Thu, 03/12/2020 - 10:37
Permalink
How to display multichoice on the video ?
How can i display the multichoice question on the video ?!
Actually multichoice display is displayed under the video...
Thanks
BV52
Thu, 03/12/2020 - 17:44
Permalink
Hi iwebu,You can add a
Hi iwebu,
You can add a Multiple Chouce Question in a video by using Interactive Video.
-BV
jan bliek
Wed, 03/18/2020 - 21:18
Permalink
(Quiz) Question set
I'd like to have half a page of text and underneath a set of, say, 10 MC questions. I thought I should use (Quiz) question set, but I´m not sure if there's space for a text that remains visible while users answer the questions. Today is a bad day any way, because of the covid-19 and I can´t get it to work. But perhaps I'm in the wrong Content Type. Is there perhaps another one more suitable to this taks?
Thanks
Jan
BV52
Thu, 03/19/2020 - 17:14
Permalink
Hi Jan,Column should be a
Hi Jan,
Column should be a good fit for the activity that you would like to create.
-BV
jan bliek
Fri, 03/20/2020 - 17:10
Permalink
(Quiz) Question set
Thanks BV52. I created a quick bogus one and it looks perfect!
BV52
Fri, 03/20/2020 - 17:40
Permalink
Hi Jan,I'm glad to hear that
Hi Jan,
I'm glad to hear that and if you have further questions feel free to post in the forums.
-BV
jan bliek
Sat, 03/21/2020 - 08:57
Permalink
Finalize activity
Thanks BV. I'll try to find time and read the manuals, but perhaps you have a quick solution. I have the text with the 10 MC questions and I was expecting an option to finalize the exercise, so that students can see how many answers are correct (say, your score is 7/10), and then go over the whole exercise again and see all the comments I typed for each option (both for when they had clicked on that option, or when they hadn't). They can do this perfectly one by one, but not as a whole exercise. Am I missing an option at the end? Bye for now
Jan
BV52
Mon, 03/23/2020 - 17:57
Permalink
Hi Jan,If I'm not mistaken
Hi Jan,
If I'm not mistaken you are pertaining to the 'Message displayed if answer is selected'. If so you are correct there isn't some sort of a summary that shows everything. Although it may be a good feature to have. You can suggest/request this in the Feature request forum. In order for your feature request to attract as much interest as possible make sure it follows the below guidelines:
It is clear from every perspective how the feature will work. We recommend describing the feature with one or more user stories, for instance “As an author, I want it to be possible to pick between different effects for the check answer animation so that the learner will see a variety of effects and also I can adapt the effects to my target audience(I’ll be using pink unicorns which works really well for both my target audience which are 4 year old girls and venture capitalists)”
If the feature can be illustrated with images or videos it always helps
Make it clear what content types this is relevant for, and or if this is a new content type
Make sure you post the feature in the Feature Request forum.
-BV
Nija Jayanarayanan
Mon, 06/01/2020 - 02:57
Permalink
How to add more questions?
How to add more questions?
BV52
Mon, 06/01/2020 - 20:27
Permalink
Hi Nija Jayanarayanan,You can
Hi Nija Jayanarayanan,
You can use Quiz (Question Set) to add more questions.
-BV
Evelyn Calahorrano
Tue, 06/23/2020 - 05:39
Permalink
Consulta sobre número de preguntas que se pueden ingresar
Buenas noches. Quiero preguntar si puedo ingresar información para varias preguntas a resolver, porque solo me da la opción de hacer una sola pregunta, es decir, un solo ejercicio, cuando lo que necesito es ingresar 10 preguntas.
Muchas gracias.
BV52
Tue, 06/23/2020 - 18:51
Permalink
Hi Evelyn,You can use Quiz
Hi Evelyn,
You can use Quiz (Question Set) to add more Multuiple Choice questions as well as other quiz type activities.
-BV
Evelyn Calahorrano
Tue, 06/23/2020 - 19:20
Permalink
Muchas gracias
Muchas gracias por su gentileza.
Saludos
ABANTI CHATTERJEE
Sat, 08/15/2020 - 10:16
Permalink
MAKING MCQ
HELLO!
well i'm a new user.
i'm having problem in making the next set of questions.
like--i plan to make a set of 20 questions on a particular topic.
after i've made one question i save it and that brings me out of the main page. now how do i make the other questions on that topic?
BV52
Mon, 08/17/2020 - 18:39
Permalink
Hi ABANTI CHATTERJEE,You can
Hi ABANTI CHATTERJEE,
You can use Quiz (Question Set) to add more Multuiple Choice questions as well as other quiz type activities.
-BV
Josep Saura
Tue, 09/15/2020 - 15:41
Permalink
Lower score if not answered correctly the first time
In a course presentation I have several multiple choice questions (one correct answer). I would like the students to get maximum score when they answer correctly at the first try and to get a lower score if they retry. Is this possible?
Thank you!
BV52
Tue, 09/15/2020 - 18:31
Permalink
Hi Josep,This feature is not
Hi Josep,
This feature is not available in H5P and I think it's an LMS that should be handling this part of the process.
-BV
Josep Saura
Fri, 09/18/2020 - 15:55
Permalink
Thank you BV52. What is an
Thank you BV52. What is an LMS?
BV52
Fri, 09/18/2020 - 20:00
Permalink
Hi Joseph,An LMS or Learning
Hi Joseph,
An LMS or Learning Management System is a software application for the administration, documentation, tracking, reporting, automation and delivery of educational courses, training programs, or learning and development programs. The learning management system concept emerged directly from e-Learning (credits to Wikipedia.com).
H5P compliments and LMS with interactive contents. It generates xAPI statements that an LMS interprets to show the score.
-BV
Edwin Piracoca
Sun, 10/25/2020 - 02:37
Permalink
¿Cómo se hace para agregar
¿Cómo se hace para agregar más preguntas?
BV52
Mon, 10/26/2020 - 18:43
Permalink
Hi Edwin,You can use Quiz
Hi Edwin,
You can use Quiz (Question set) to add more questions as well as other content types.
-BV
marc3ll1nux
Fri, 01/22/2021 - 17:12
Permalink
Randomize Questions On Multiple Choice Set
Hi, is possible used the Randomize Question , on Multiple Choice Set?
BV52
Fri, 01/22/2021 - 18:50
Permalink
Hi marc3ll1nux,There is no
Hi marc3ll1nux,
There is no Multiple Choice Set but if you would like to have more than 1 MCQs you can use Quiz (Question Set). This content type also has a feature that lets you have random questions.
-BV
Chaleunsouk
Thu, 04/15/2021 - 03:09
Permalink
How can we add more question?
How can we add more question?
BV52
Thu, 04/15/2021 - 18:12
Permalink
Hi Chaleunsouk,To add more
Hi Chaleunsouk,
To add more questions you can use Quiz (Question Set).
-BV
dlj2we
Sun, 11/14/2021 - 21:39
Permalink
multiple choice quizzes not showing up
Hi I used the shortcode to embed a quiz I created and it shows up on my end. However, once published, I go incognito, and it's not there. What am I doing wrong? My quizzes have disappeared from my published posts in Wordpress.
Thanks.
Lanin2020
Mon, 06/20/2022 - 06:27
Permalink
La verdad no logro que desde
La verdad no logro que desde el botón interactivo se abra el multiple choice ni otra interacción...no hay manera de que esten ensamblados! me leo todo el tutorial pero luego de apretrar el botón "Hecho" nunca queda, ya no se cómo hacer, agradecería una ayuda.
Haitjema
Wed, 10/26/2022 - 05:56
Permalink
feedback box closes on me
when typing in my feedback for a multichoice answer, the box closes when i hit the return key (unintentionally) and i cant get it back up to continue typing - How can I get it back up
suthan
Fri, 05/09/2025 - 10:57
Permalink
Image in the answer (under correct option)
HI
Is there a way to add image/s to the answer section. I want to show the calculations behind getting the correct answer. I teach maths . an image would be a great wat to explain.
BV52
Fri, 05/09/2025 - 21:06
Permalink
Hi suthan,I'm afraid adding
Hi suthan,
I'm afraid adding images to answers is not possible. However you can utilize Course Presentation or Interactive Book to combine different content types.
-BV
LE GOFF Jean-Jacques
Wed, 10/08/2025 - 10:29
Permalink
peut on modifier l'affichage du quiz?
lorsque l'on affiche le quizz l'image de fond d'écran n'apparait que sur les bande des questions et réponse. Peut on mettre l'image de Fond d'écran en plein écran?
Can I change the quiz display?
When I display the quiz, the background image only appears on the question and answer strips. Can I set the background image to full screen?
BV52
Mon, 10/13/2025 - 18:14
Permalink
Hi LE GOFF Jean-Jacques,You
Hi LE GOFF Jean-Jacques,
You cannot change the image to occupy the whole content in Question Set. You can consider using Course Presentation instead. It let's you occupy the whole slide with an image and insert questions similar to the Questions Set.
-BV
LE GOFF Jean-Jacques
Wed, 10/08/2025 - 10:29
Permalink
peut on modifier l'affichage du quiz?
lorsque l'on affiche le quizz l'image de fond d'écran n'apparait que sur les bande des questions et réponse. Peut on mettre l'image de Fond d'écran en plein écran?
LE GOFF Jean-Jacques
Wed, 10/08/2025 - 10:29
Permalink
peut on modifier l'affichage du quiz?
lorsque l'on affiche le quizz l'image de fond d'écran n'apparait que sur les bande des questions et réponse. Peut on mettre l'image de Fond d'écran en plein écran?
Arafatig
Fri, 12/12/2025 - 08:21
Permalink
Attempt
Hi,
I am hoping you able to help.
Is one able to limit the number of attempts on a quiz in H5P?
I only want the quiz to be attempted twice and not more than that.
Thank you
BV52
Mon, 12/15/2025 - 17:49
Permalink
Hi Arafatig,Not within the
Hi Arafatig,
Not within the settings/features of H5P. However, the host platform may have settings that would allow you to control how many attempts the students can make.
-BV
Pages