Course Presentation Tutorial
The Course presentation content type allows you to create a slide-based presentation of your learning material. Elements such as slide titles, links, pictures, audio and video clips, as well as various quiz types can be embedded seamlessly right into the presentation for a richer learning experience.
In this tutorial you will learn:
- When to use Course presentations
- How to create a Course presentation
Click the "Get started" button to explore all of the possible ways to use H5P!
Video tutorial
The following video shows what Course Presentations may be used for and how to make one:
Textual tutorial - example
Here's the Course presentation we'll create in this tutorial:
When to use Course presentations
Course presentation enables you to author and deliver your course material directly in your browser. Course presentations contain slides where you can add various multimedia- and interactive elements to engage the learner.
Course presentations are used when you want to package a piece of learning content in a structured and interactive format. Learners swipe through slides to experience the learning material while solving various quizzes or watching videos along the way.
Try Course presentations as an alternative to presenting your learning content as Powerpoint presentations, PDFs or text-based web pages. Course presentations are very flexible to use, as they are simple to create, publish and edit.
Step 1: Topic
We'll use the Wikipedia article about Cloudberries as background material for our Course presentation. We'll use a couple of pictures from Wikimedia Commons as well.
Let's create three slides, with a test at the end:
- Slide 1: Cloudberries
- Slide 2: Where to find them?
- Slide 3: Uses
- Summary
Step 2: Creating a Course presentation
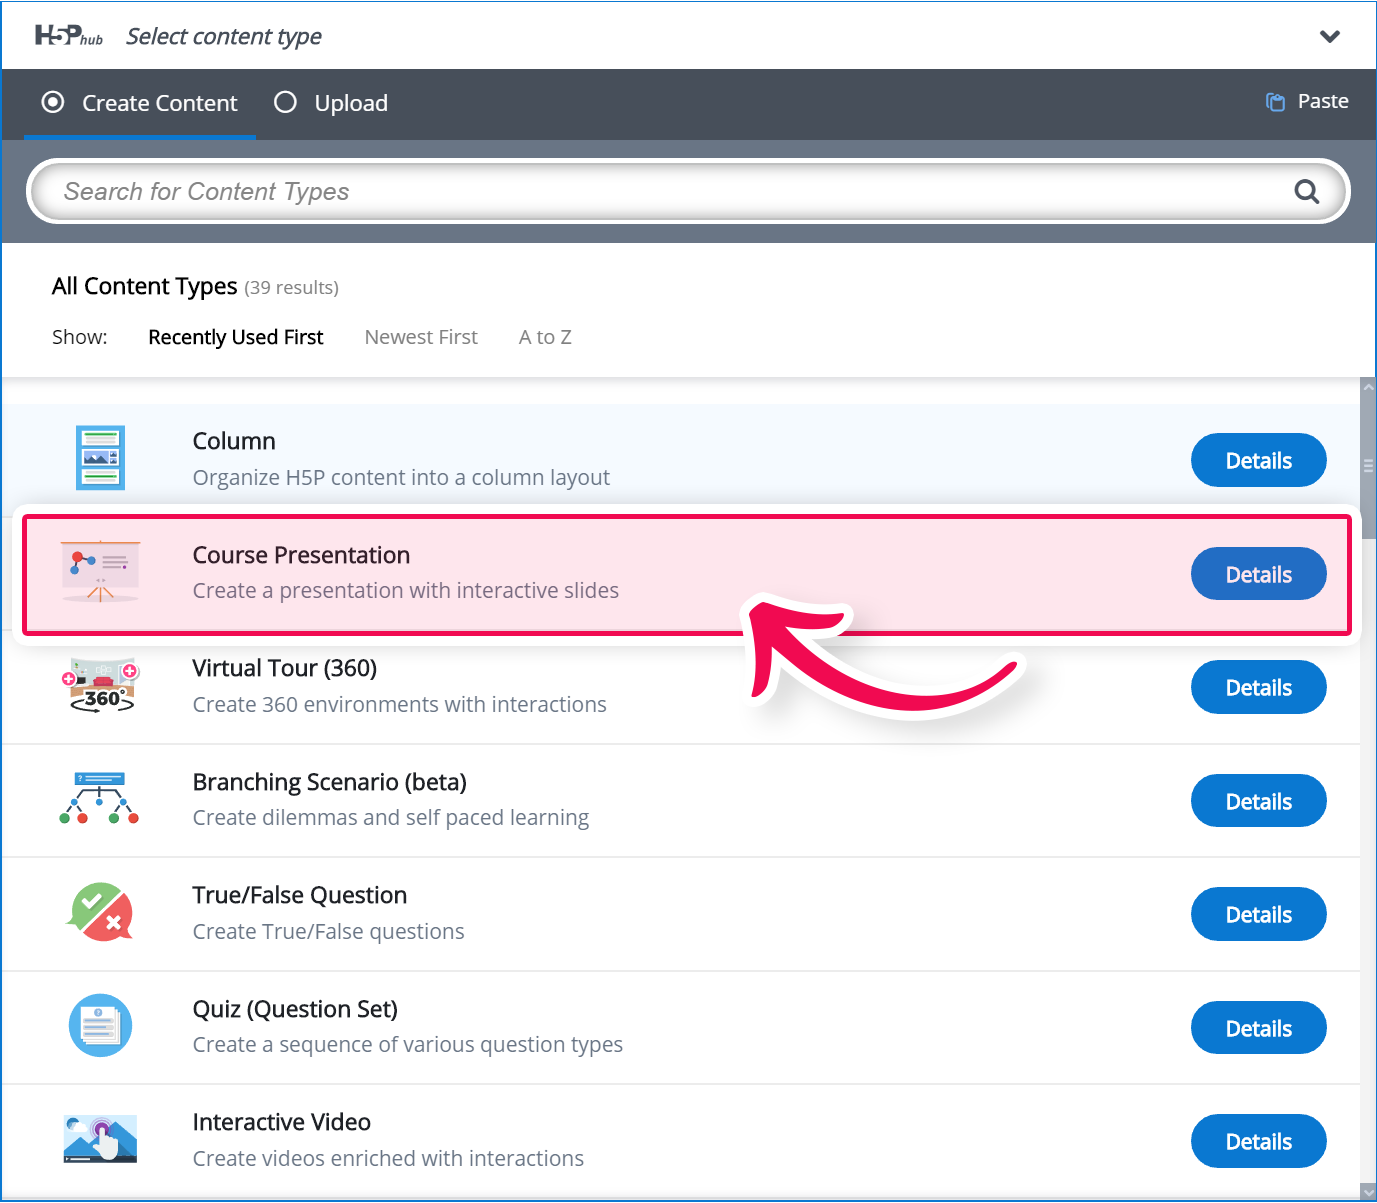
Select the New content option and choose Course presentation from the list of Content types:
Step 3: Course presentation editor
The Course presentation editor should now appear. The top part of the editor looks like this: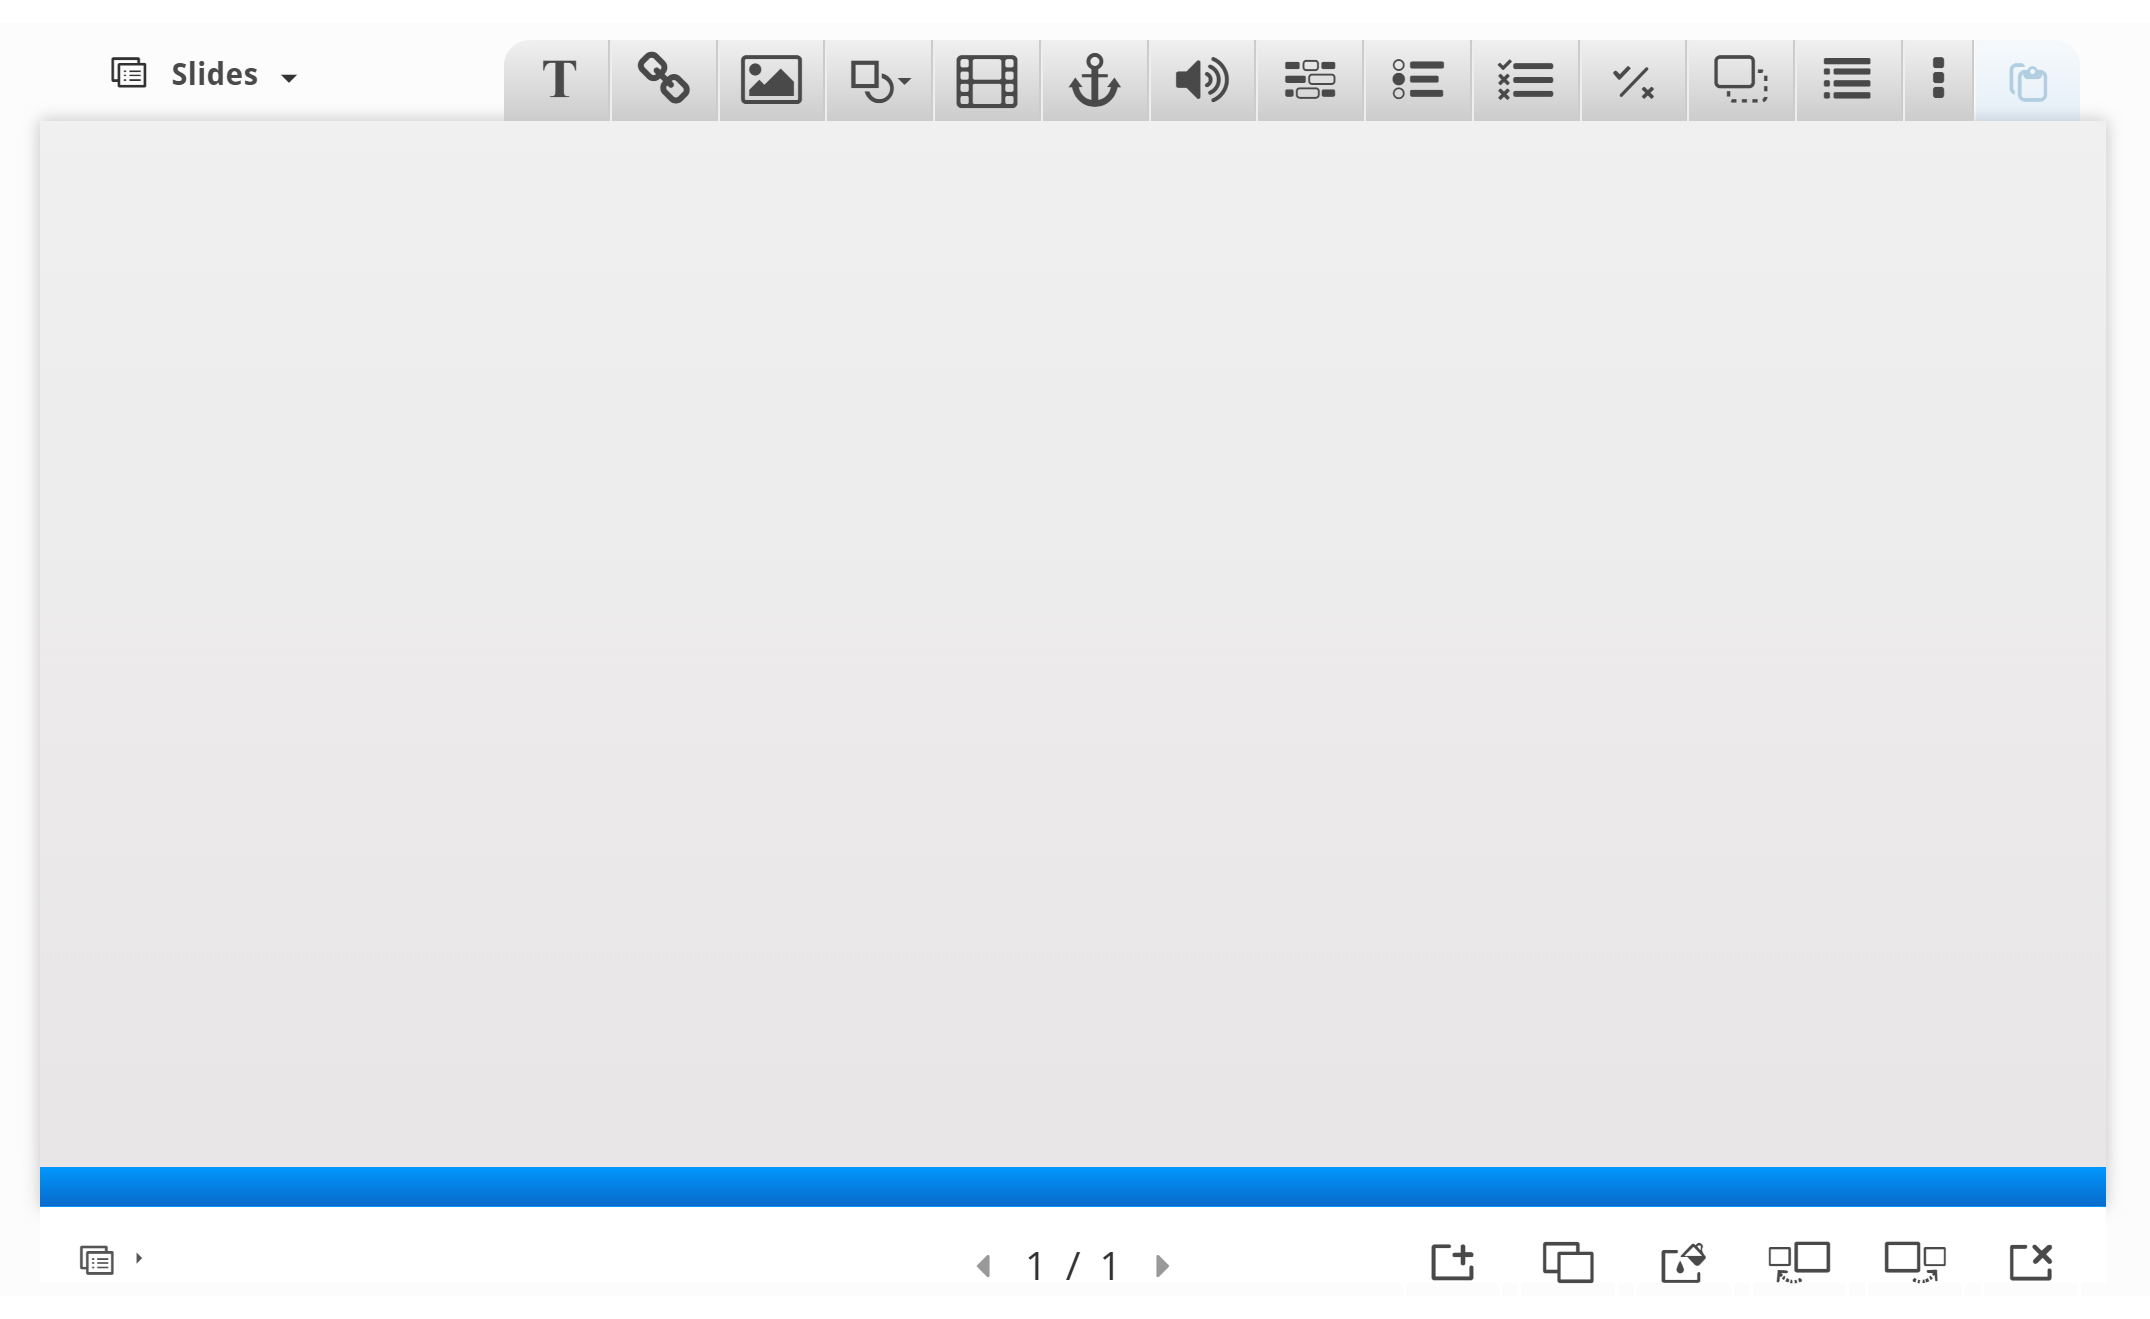
In this tutorial, we'll focus on creating the Course presentation content. The content creation happens in the top part of the editor, so we'll only focus on this for now.
The Course presentation editor is WYSIWYG. The end-user view of the Course presentation will look very similar to the editor's view.
Step 4: Slide 1
We'll start by adding a slide in the slides panel to the left. The slide titles can be used to navigate between the slides.
You can remove the slides panel entirely by pressing the Remove slides button. However, this action cannot be undone.
Press the  button to open the "Slides" menu.
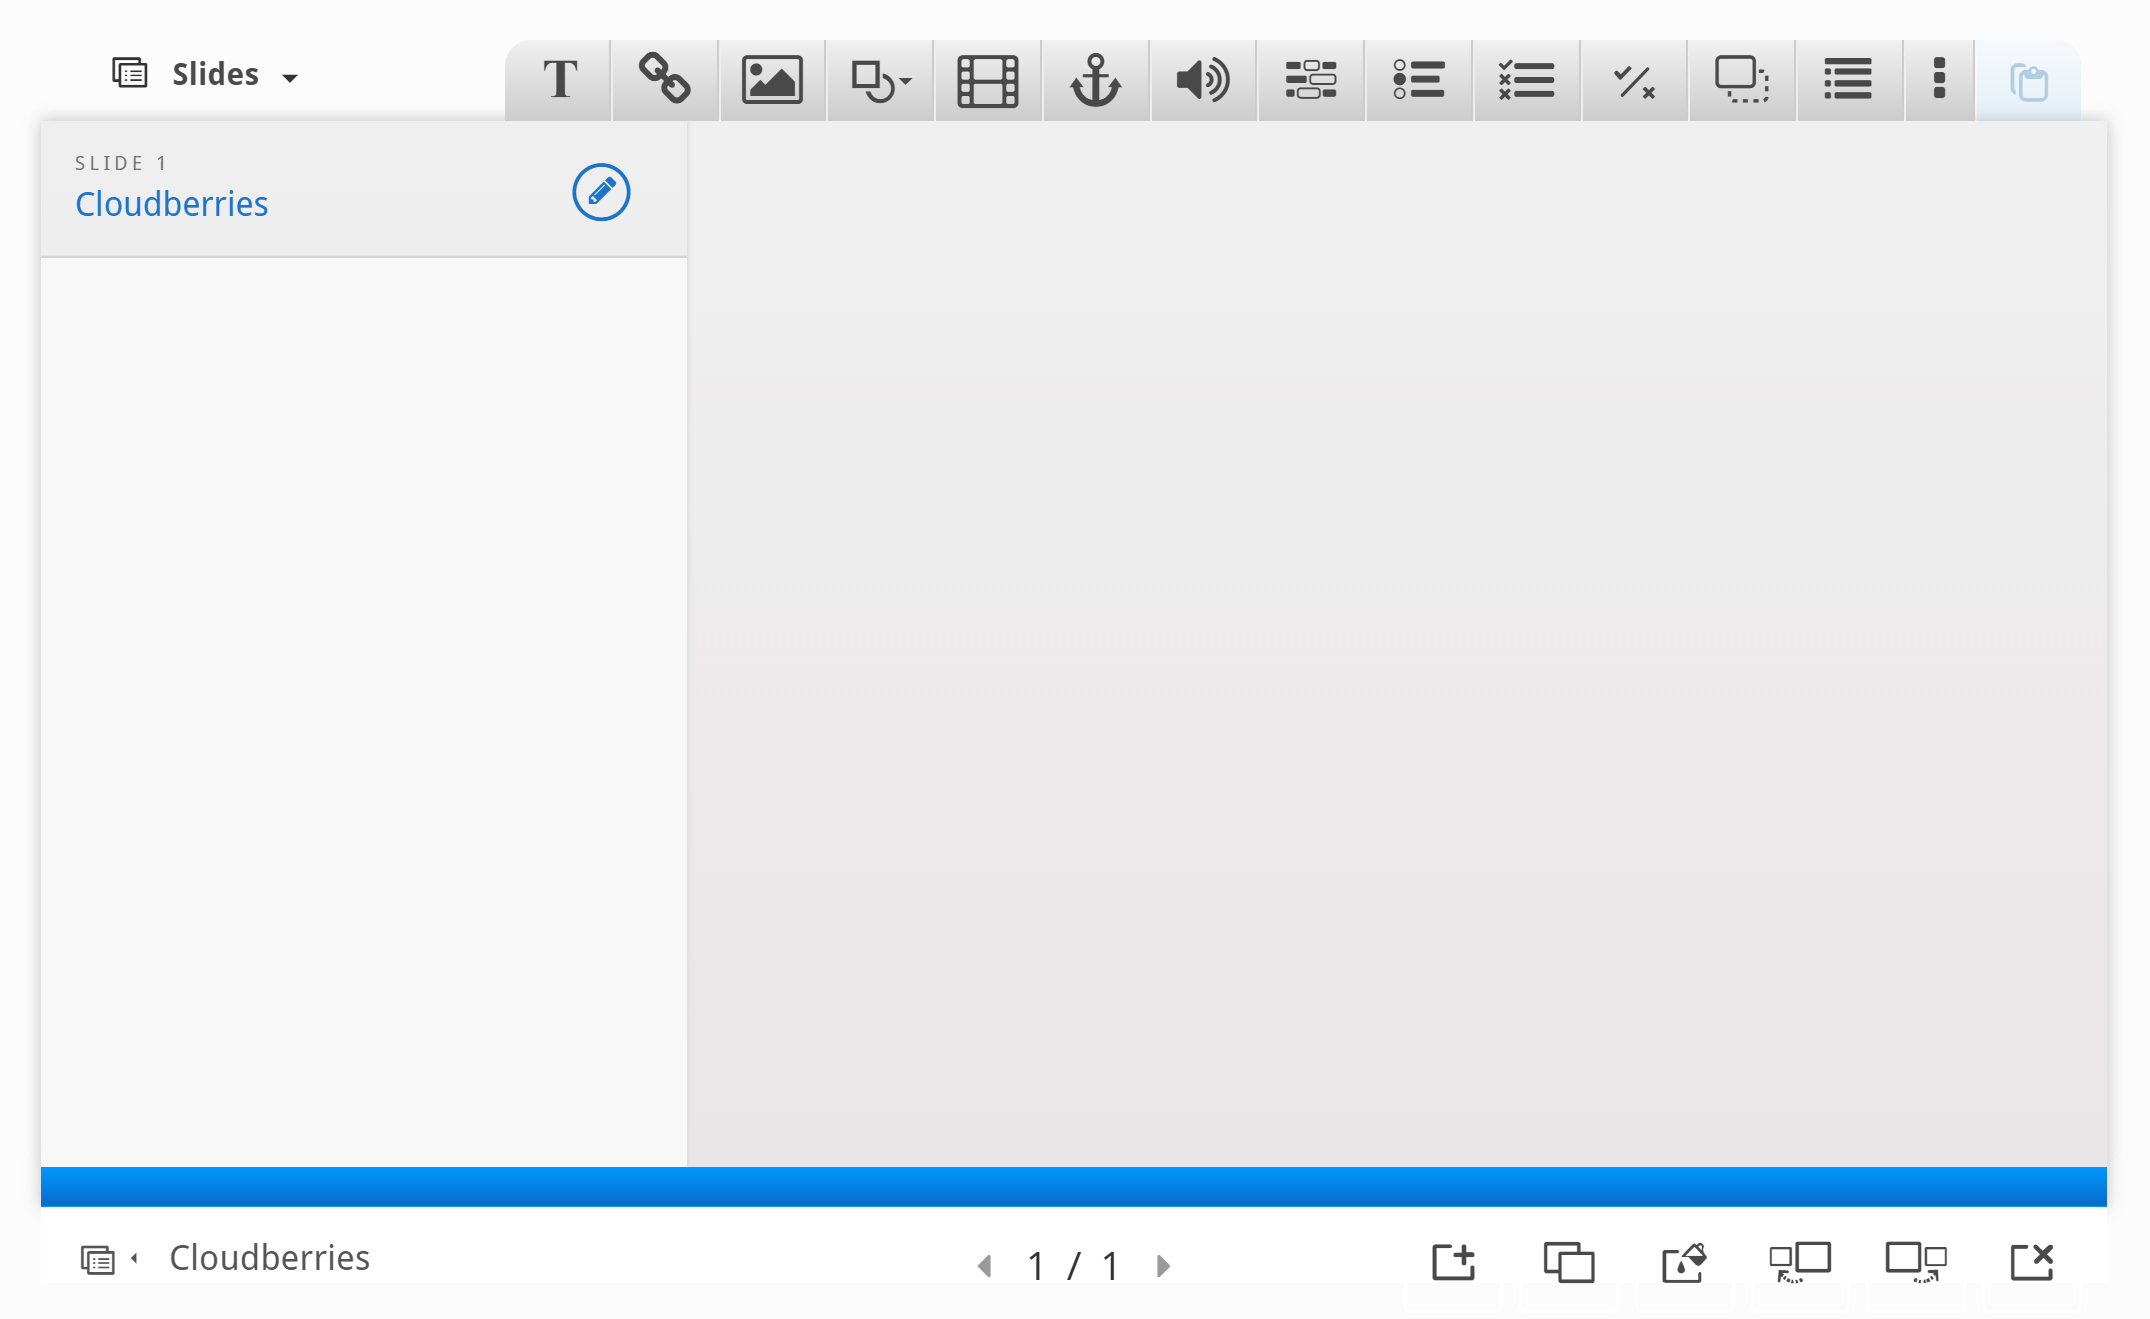
Press the pen next to "No title" ![]() to add a slide title.
to add a slide title.
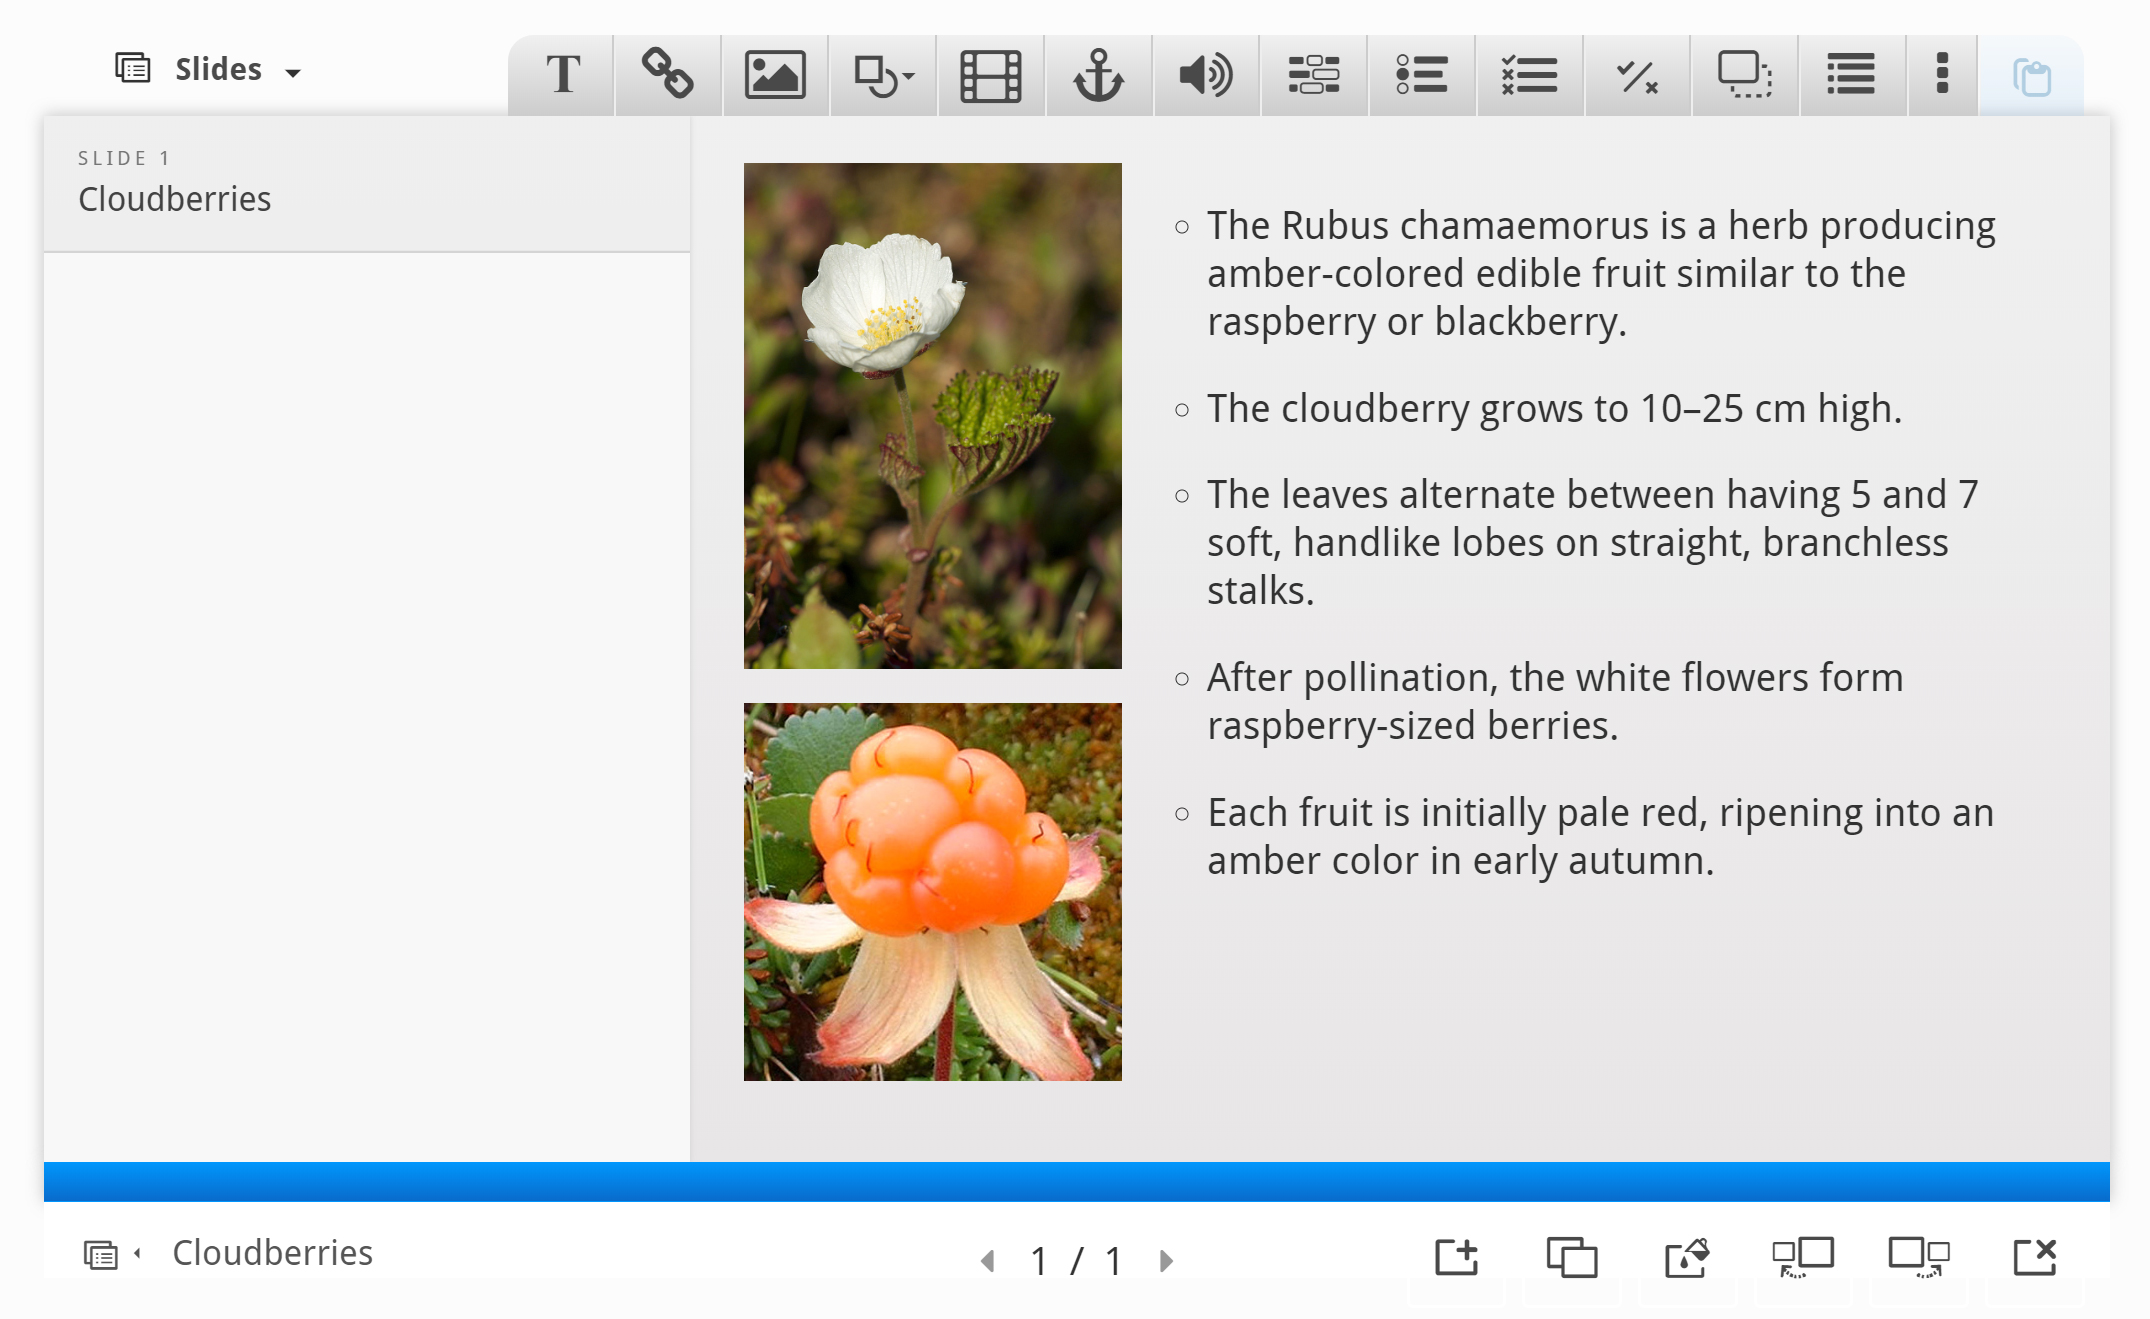
Use Cloudberries as the title. You should now have something like this:
Now we can move on to adding some images.
We'll use these two images from Wikimedia:
Note the license information and URL and save the pictures to a local folder.
We add the pictures by using the ![]() button in the top toolbar. Press this button, drag it to where you want the image to be placed and drop it there. A dialog will automatically open:
button in the top toolbar. Press this button, drag it to where you want the image to be placed and drop it there. A dialog will automatically open:
Press the  button, browse to where you saved the cloudberry flower picture and select it for upload.
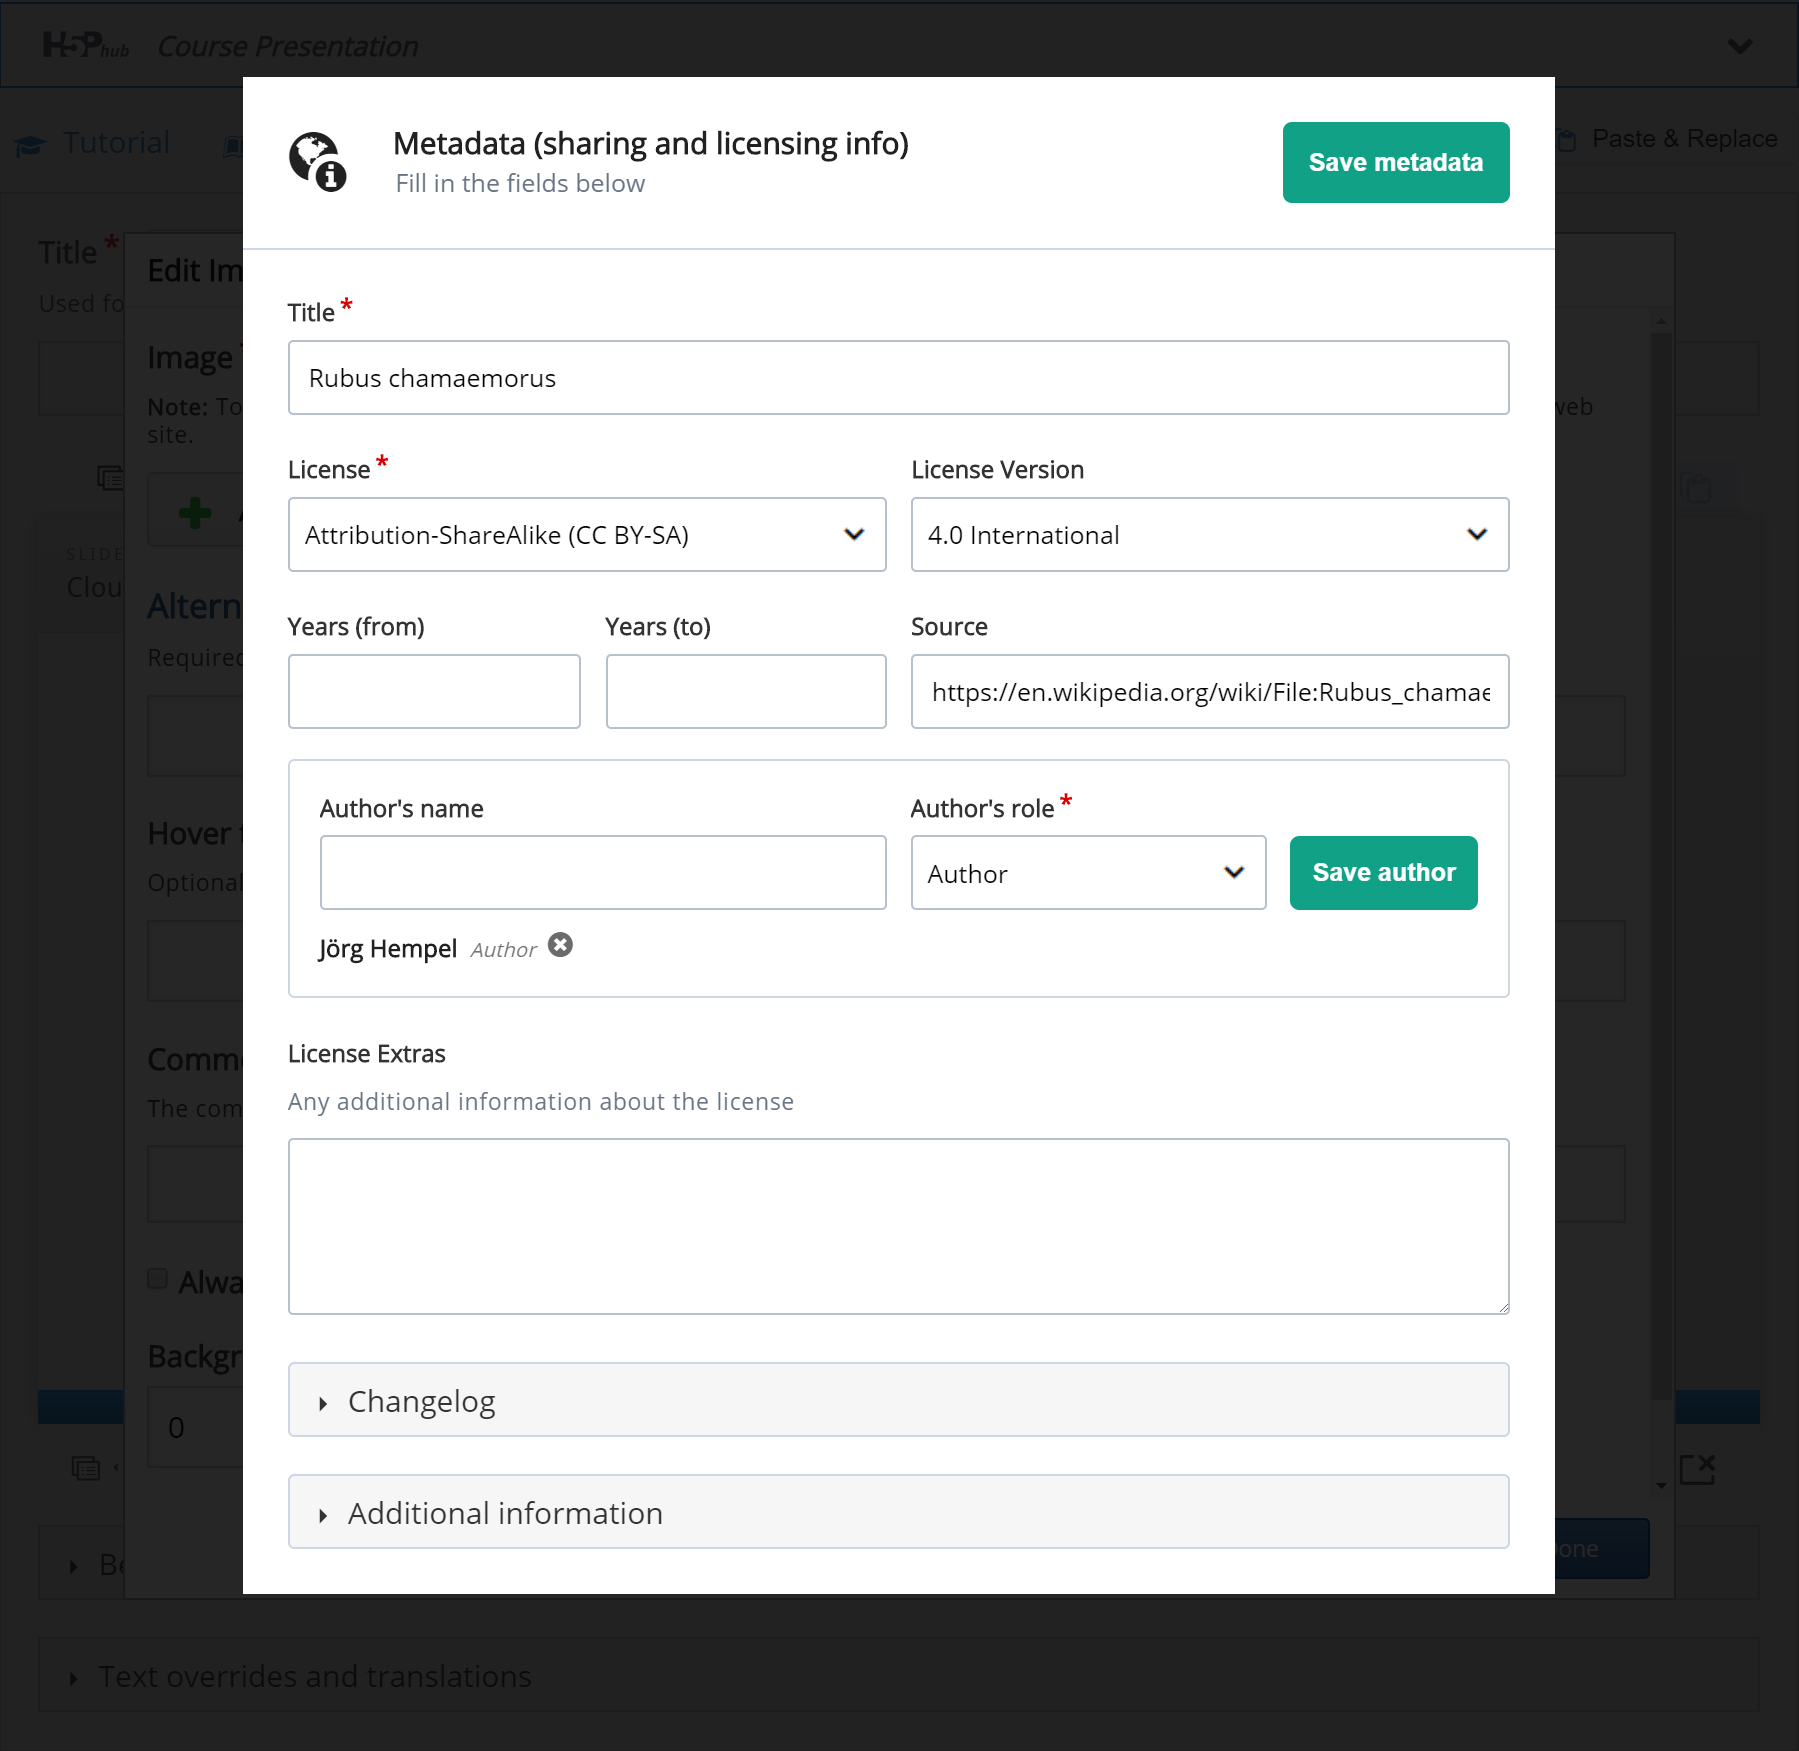
We must also remember to add multimedia license information. Add the following information to the Metadata  dialog:
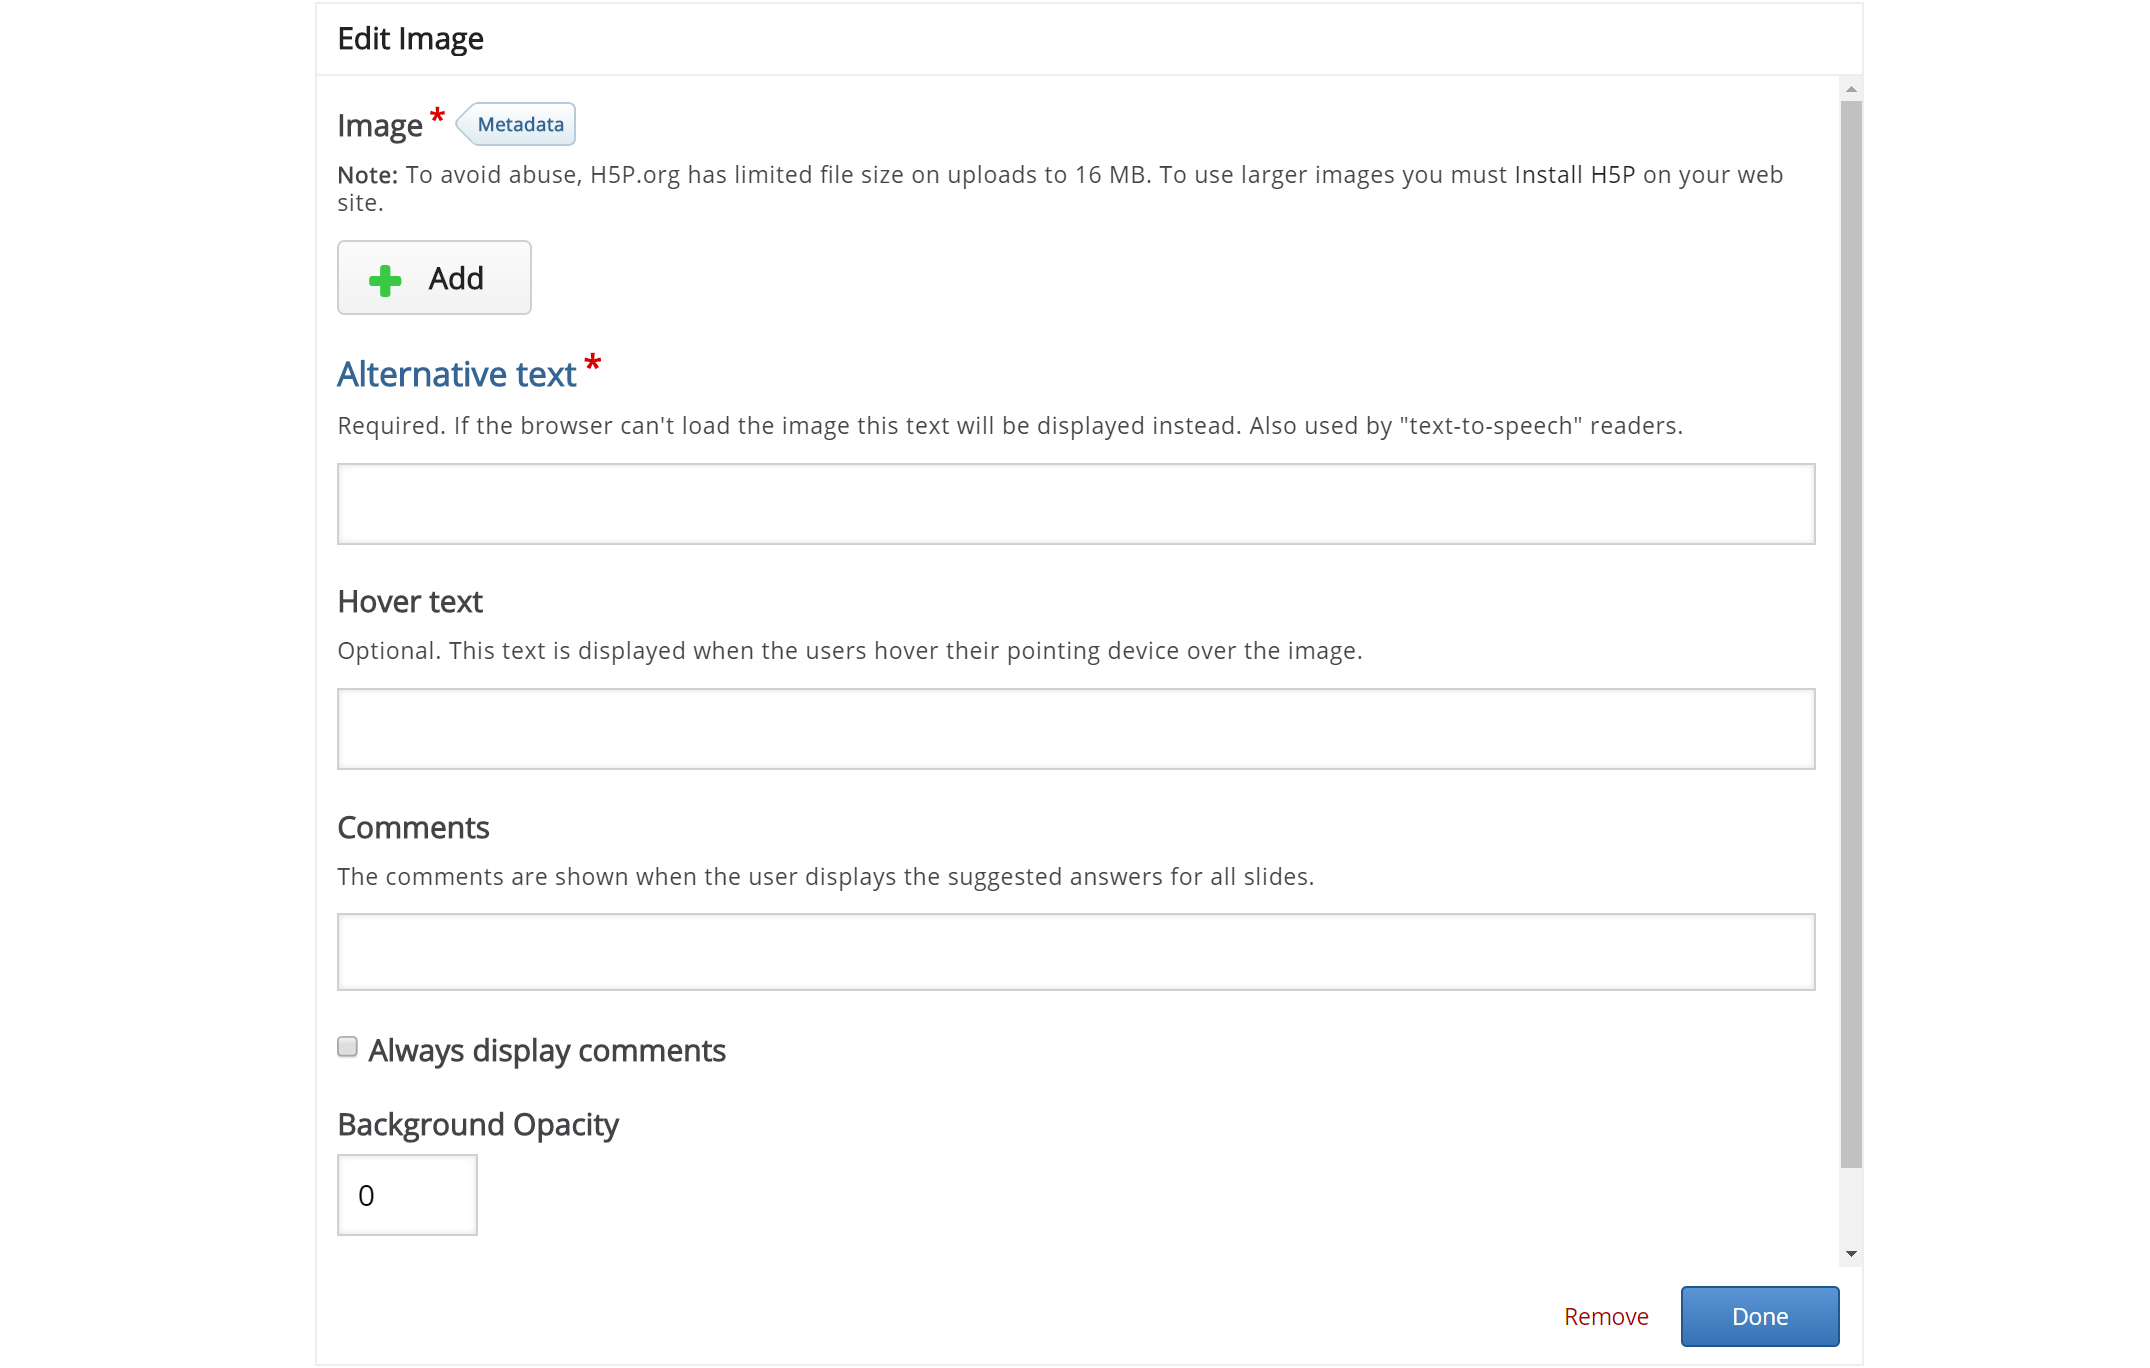
Finally, we have to add an Alternative text and a Hover text. The Alternative text is used to describe the image as an alternative to being displayed. The Hover text will show up on devices using a mouse when the cursor hovers over the image.
Alternative text: Picture of a Cloudberry flower
Hover text: Cloudberry flower
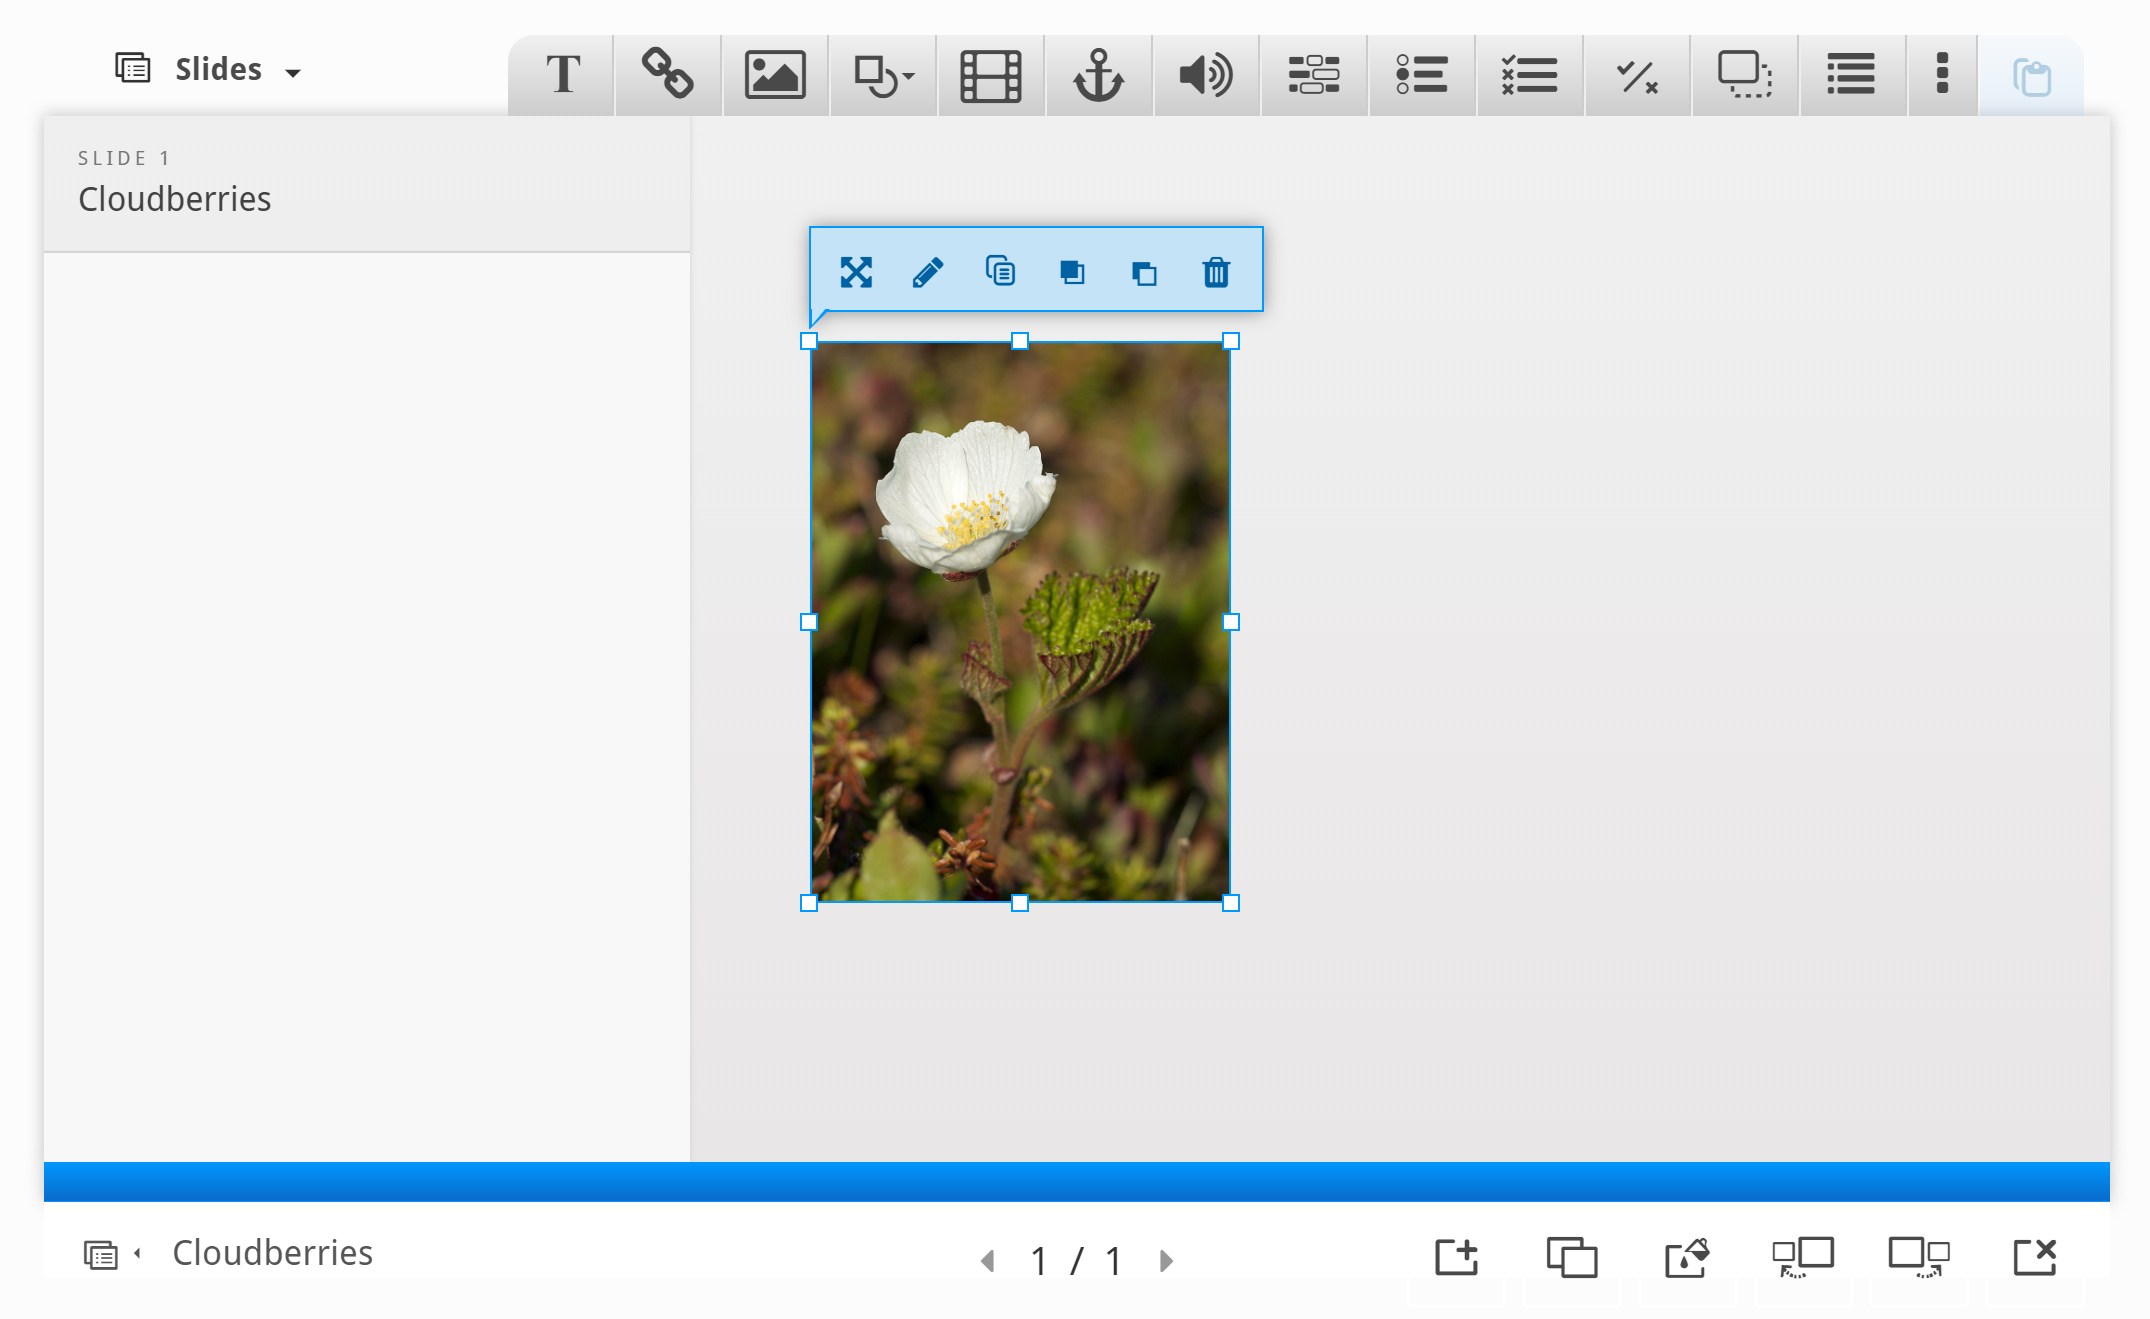
You should now have something like this:
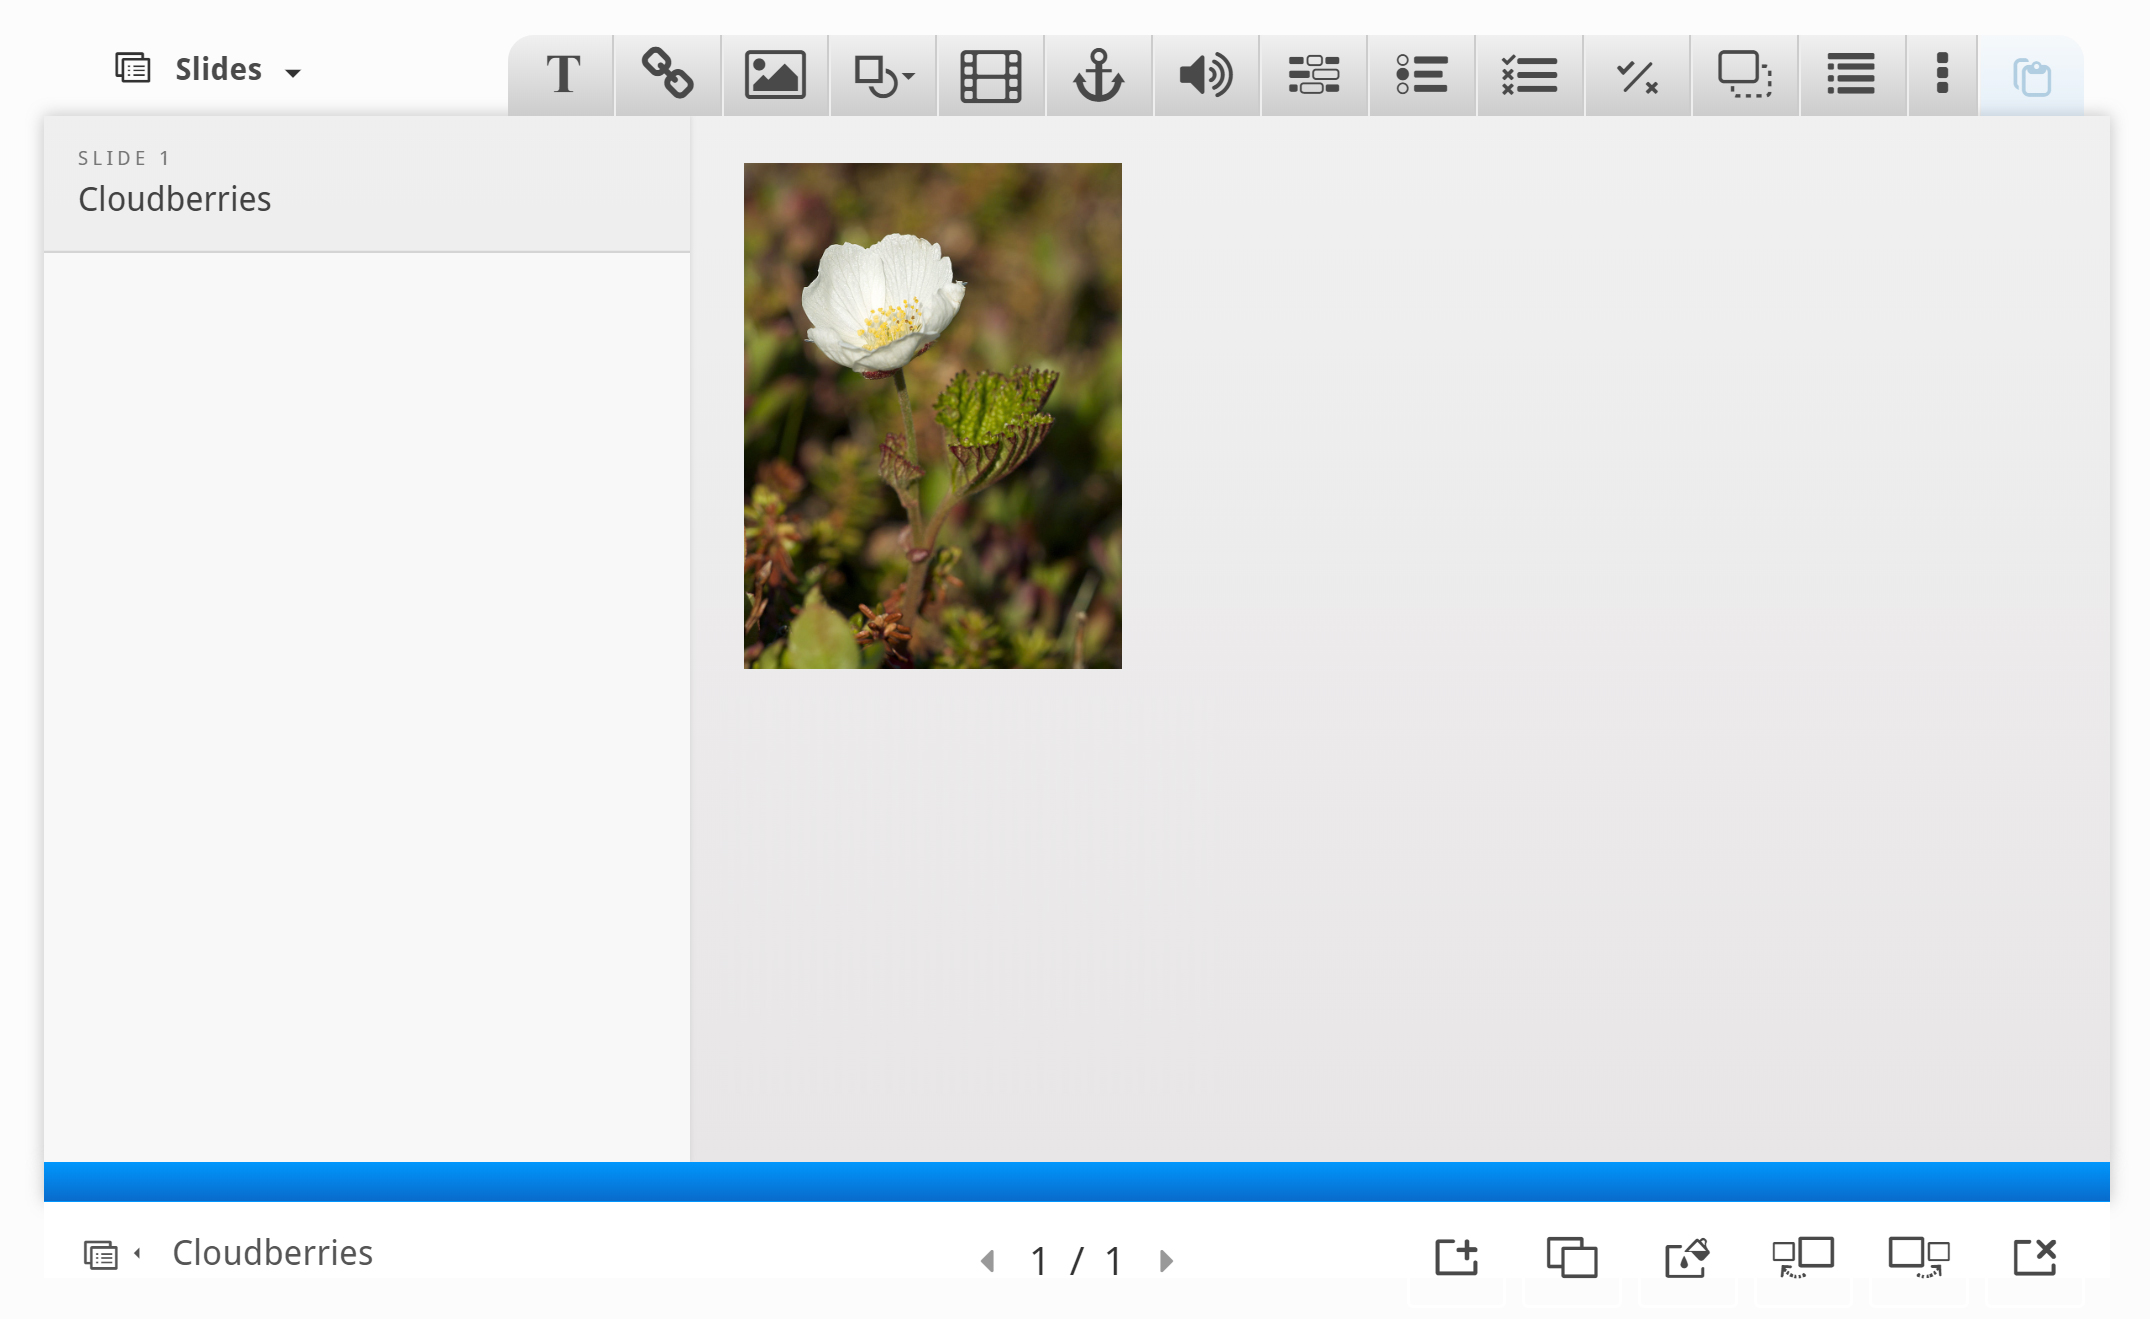
Resize the picture by pulling in the lower right corner of the image. Make the image slightly smaller in size. You can move the picture by using drag and drop. Place it in the top left corner, so you get something like this:
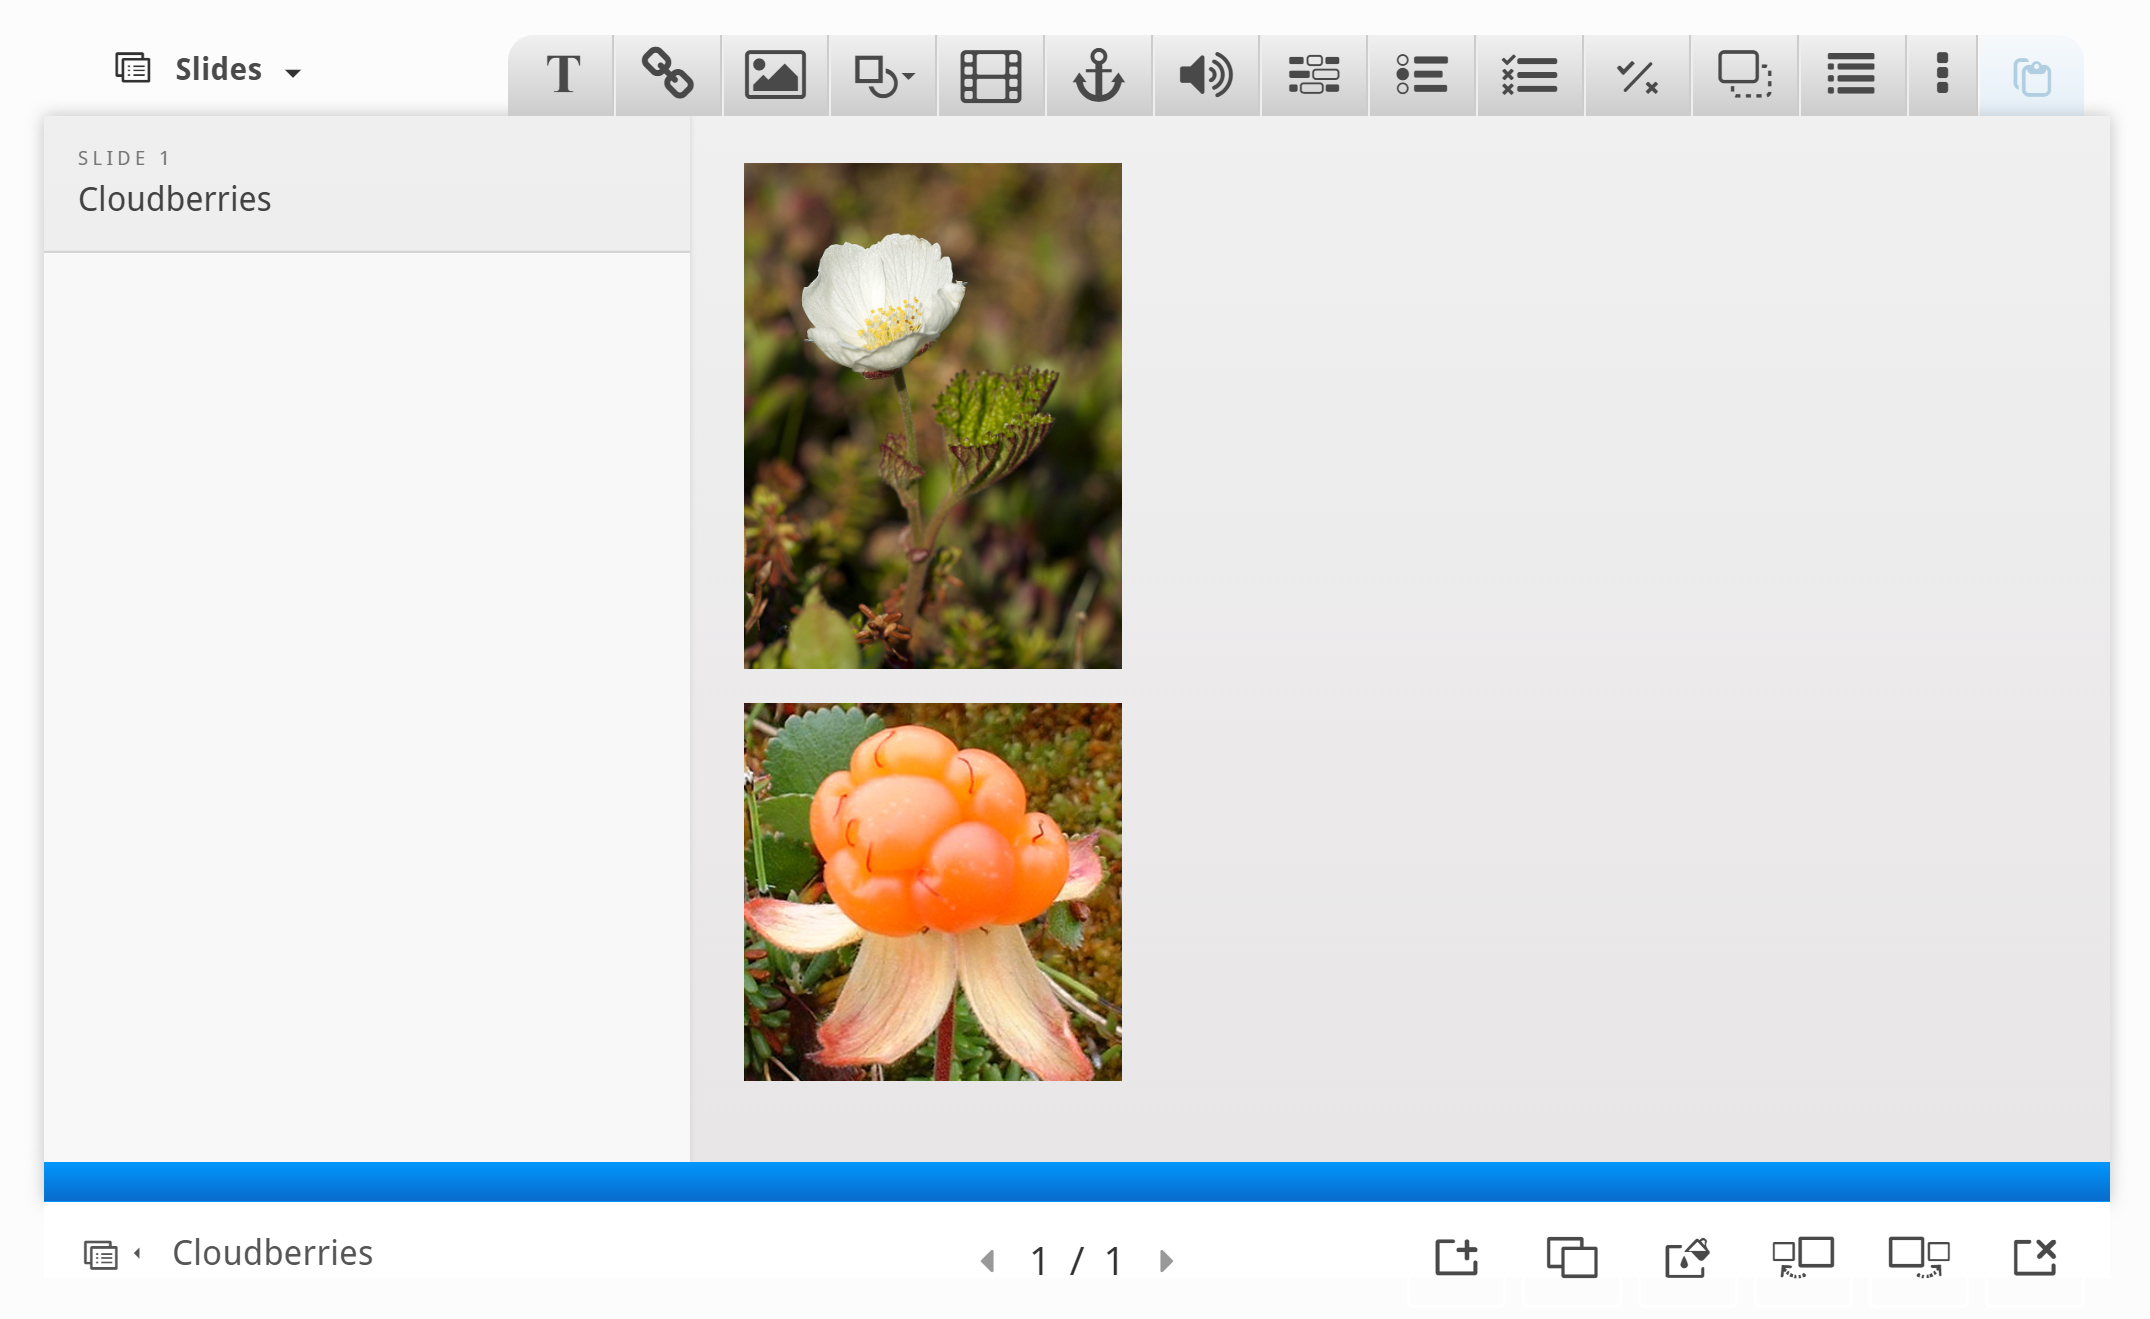
Now, add a second picture. This time, we'll use the cloudberry picture and place it beneath the cloudberry flower picture. Use the same procedure as above.
You should now have something like this:
To finish slide 1, we'll add the following text, which is paraphrased from the Wikipedia article:
- The Rubus chamaemorus is a herb producing amber-colored edible fruit similar to the raspberry or blackberry.
- The cloudberry grows to 10–25 cm high.
- The leaves alternate between having 5 and 7 soft, handlike lobes on straight, branchless stalks.
- After pollination, the white flowers form raspberry-sized berries.
- Each fruit is initially pale red, ripening into an amber color in early autumn.
Use the Text tool ![]() to add a block of text to the slide. Once you have dropped the text box, a dialog will appear. Insert the text above in the Edit text dialog:
to add a block of text to the slide. Once you have dropped the text box, a dialog will appear. Insert the text above in the Edit text dialog:
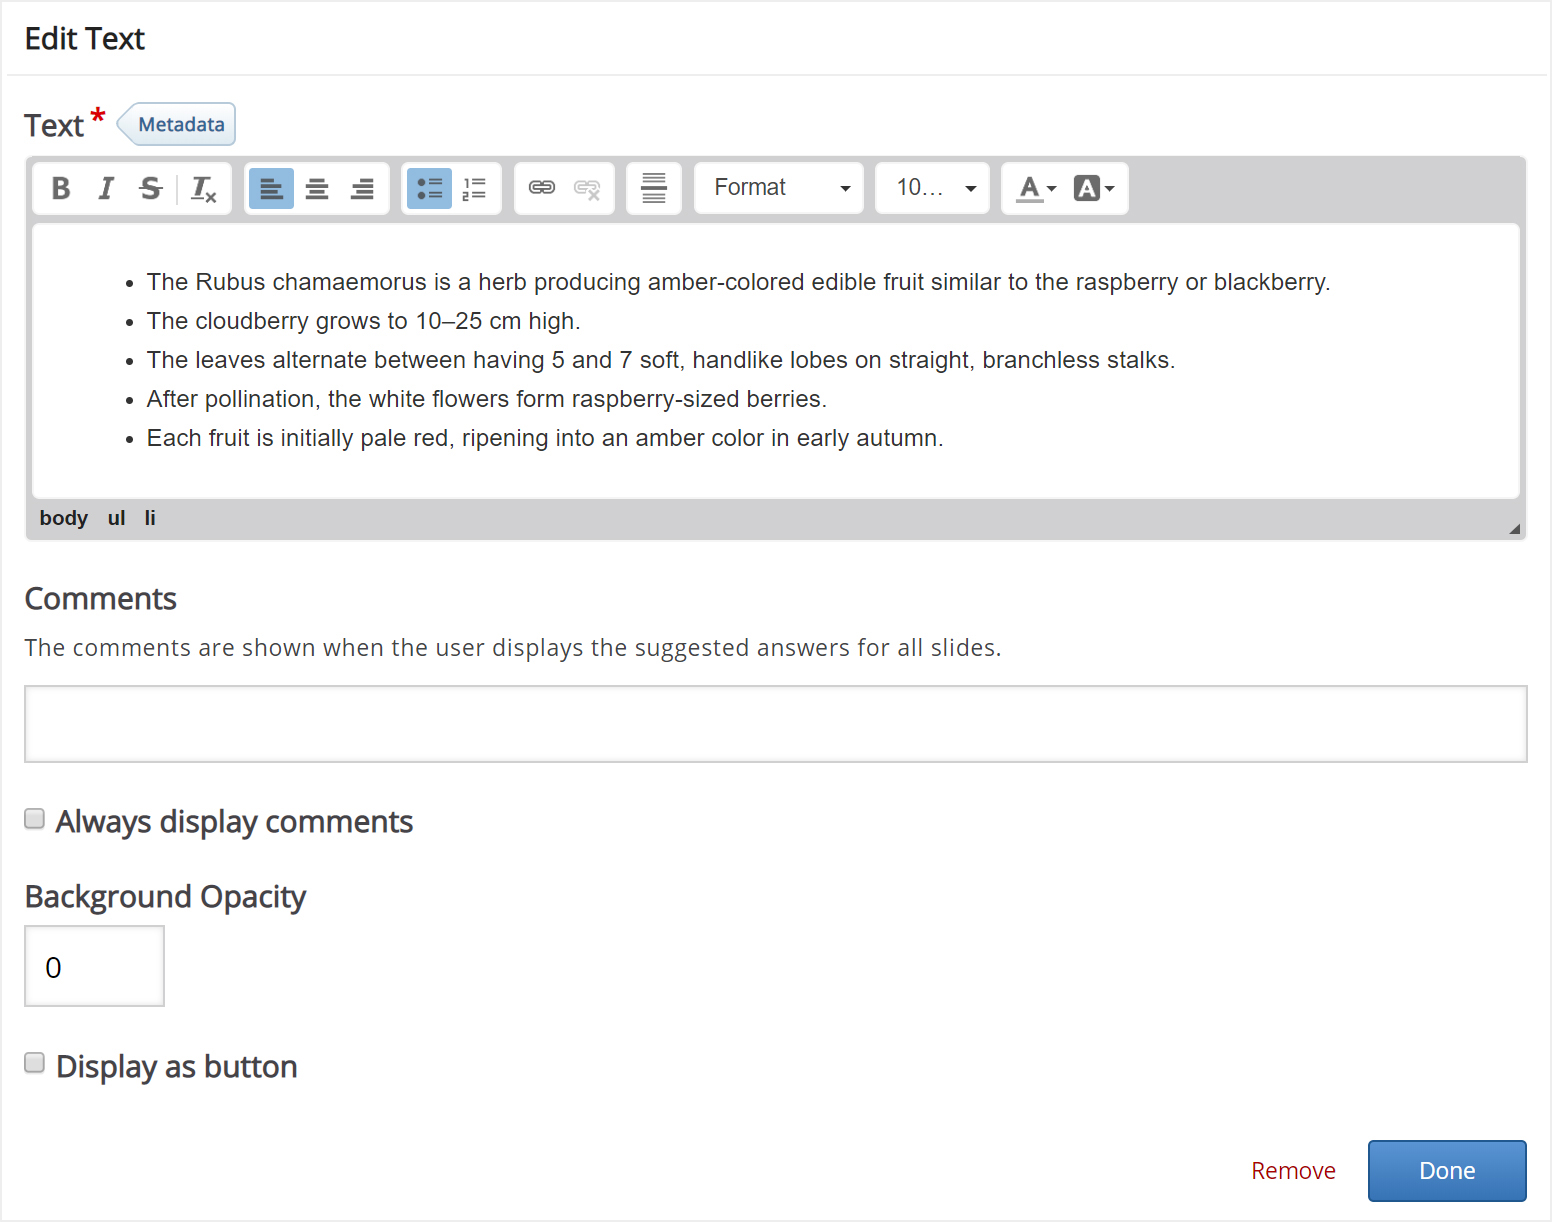
Leave the other fields blank and press Done.
You can place and resize the text block in the same way as images.
Now, position and size the text block so that you end up with something like this:
We have now finished slide 1.
Step 5: Slide 2
Press the  button in the lower right corner of the editor to add another slide.
Slide 2 will contain information about where Cloudberries can be found. Add the slide title Where to find them? in the slides panel.
We'll use the map picture from Wikipedia to show where Cloudberries grow in the wild. We add the picture by using the ![]() button in the top toolbar. Drag the picture onto the slide, upload the picture and add license information. Press Done, then resize the picture so you have something like this:
button in the top toolbar. Drag the picture onto the slide, upload the picture and add license information. Press Done, then resize the picture so you have something like this:
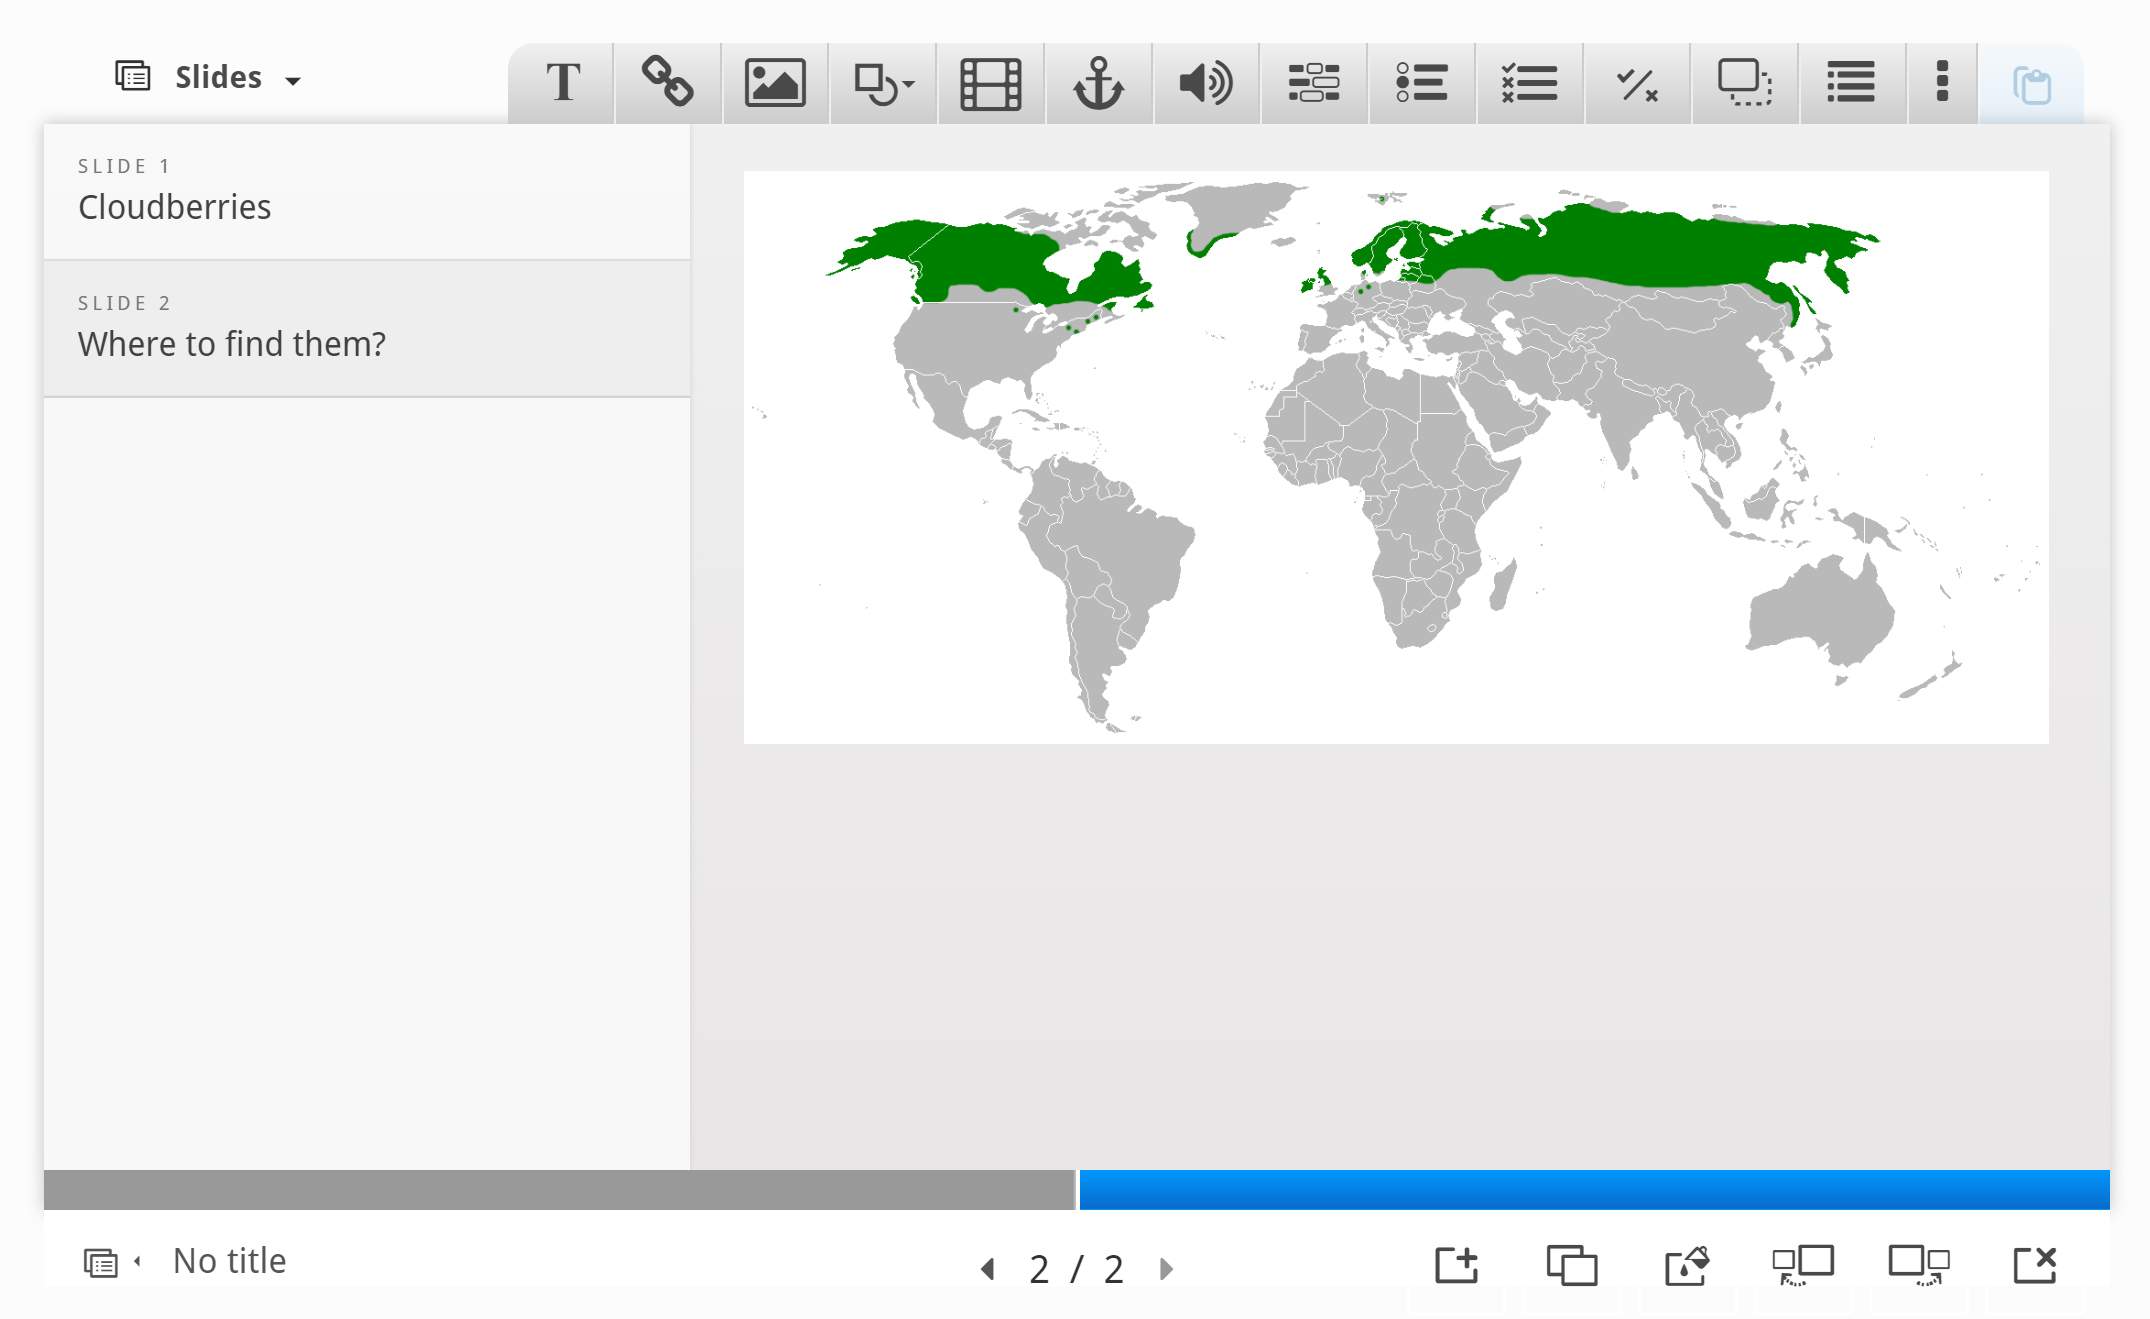
To finish slide 2, we'll add the following text, which is also paraphrased from the Wikipedia article:
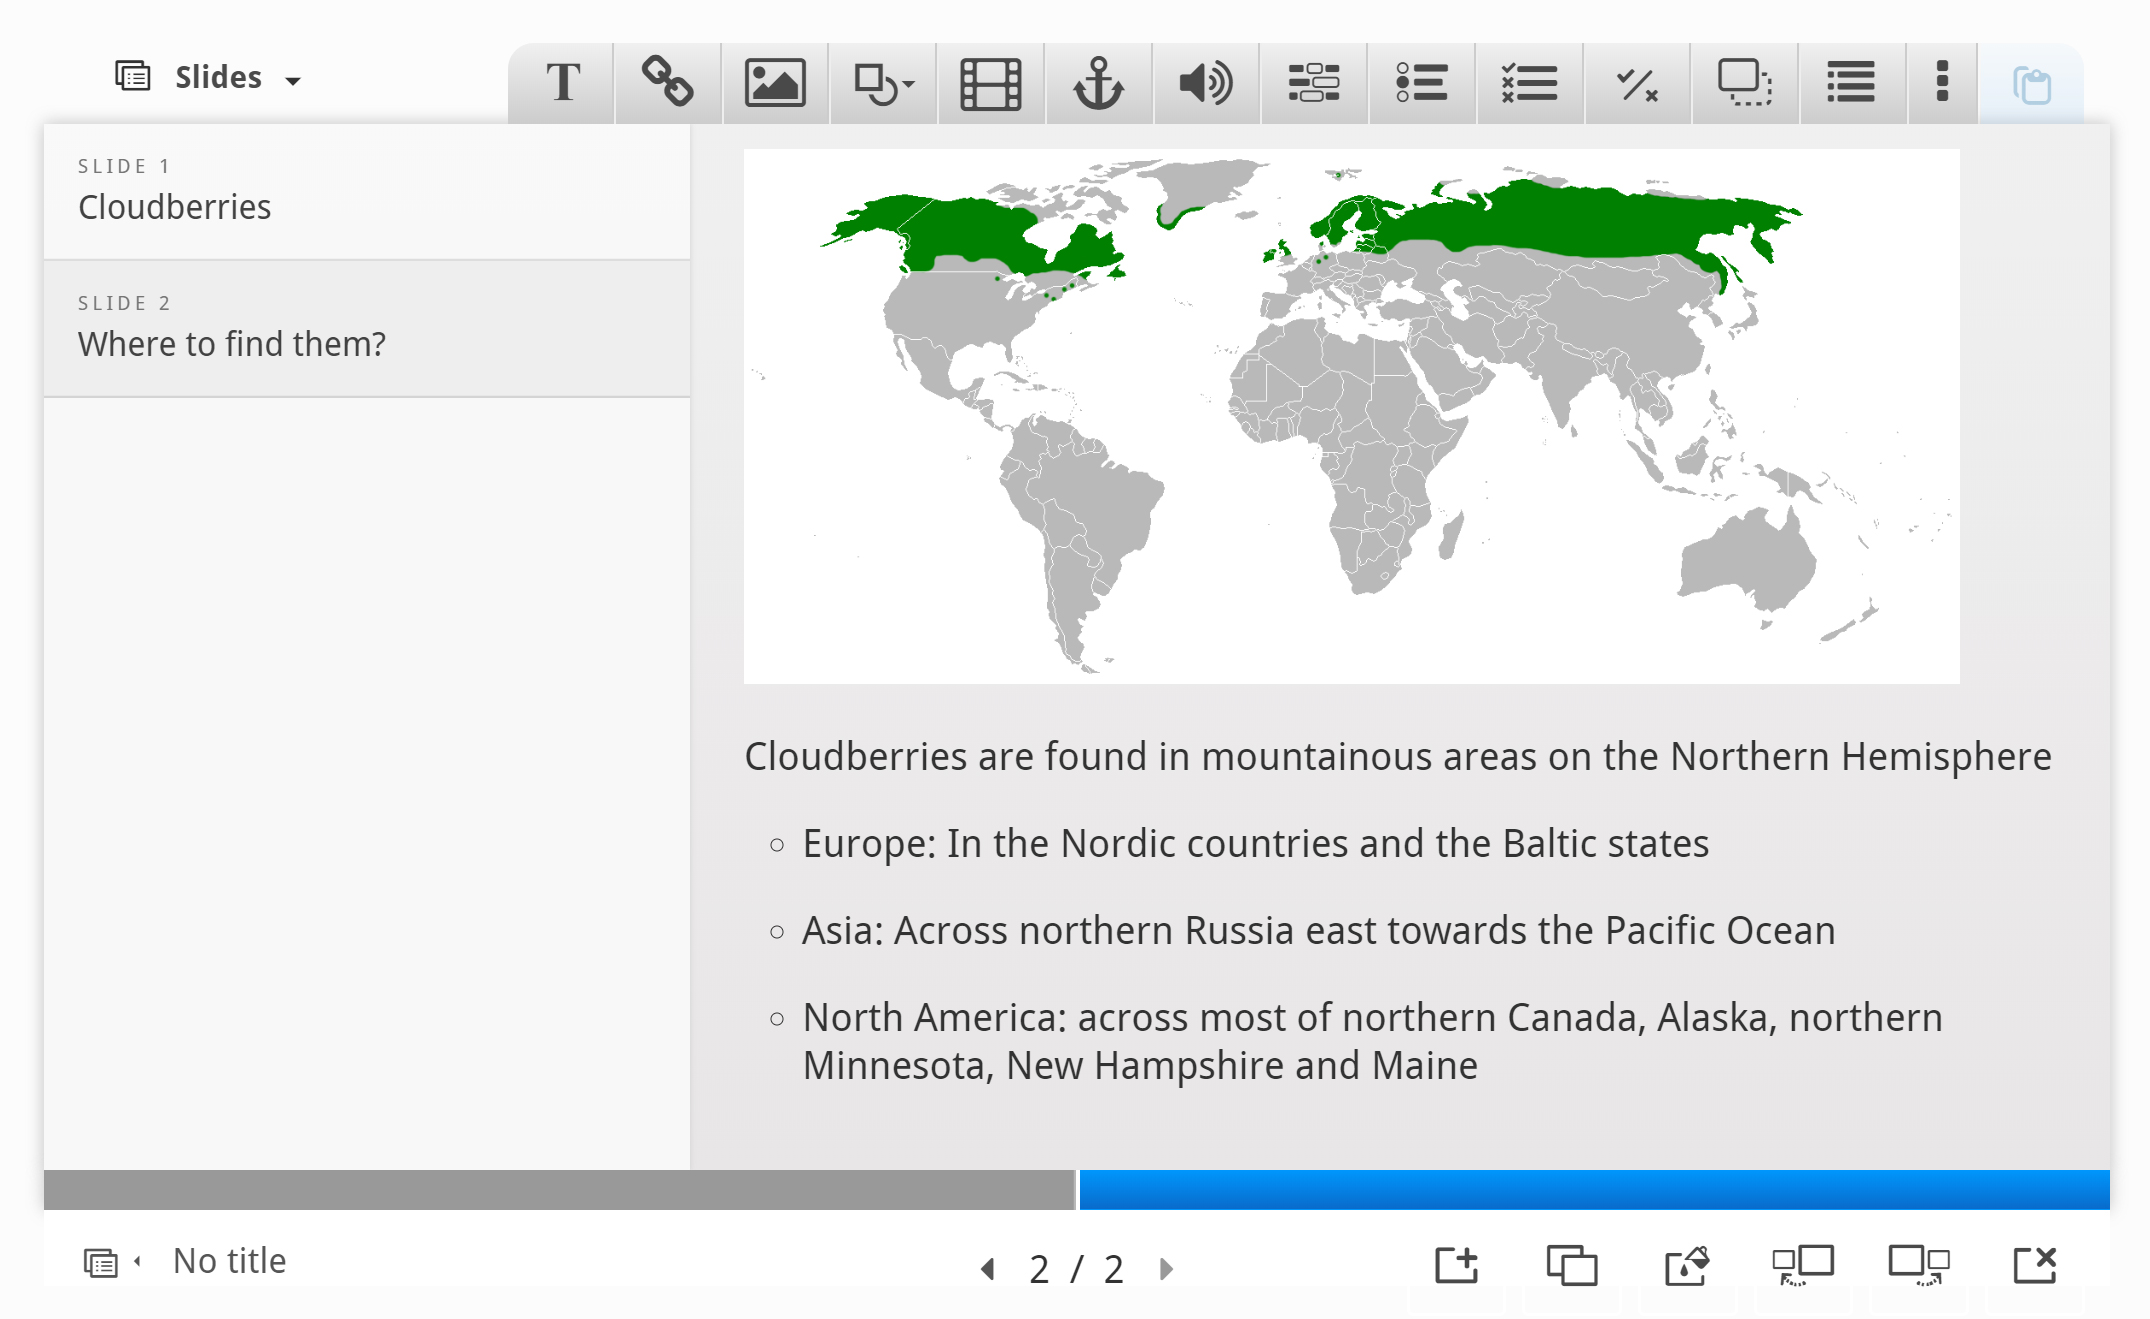
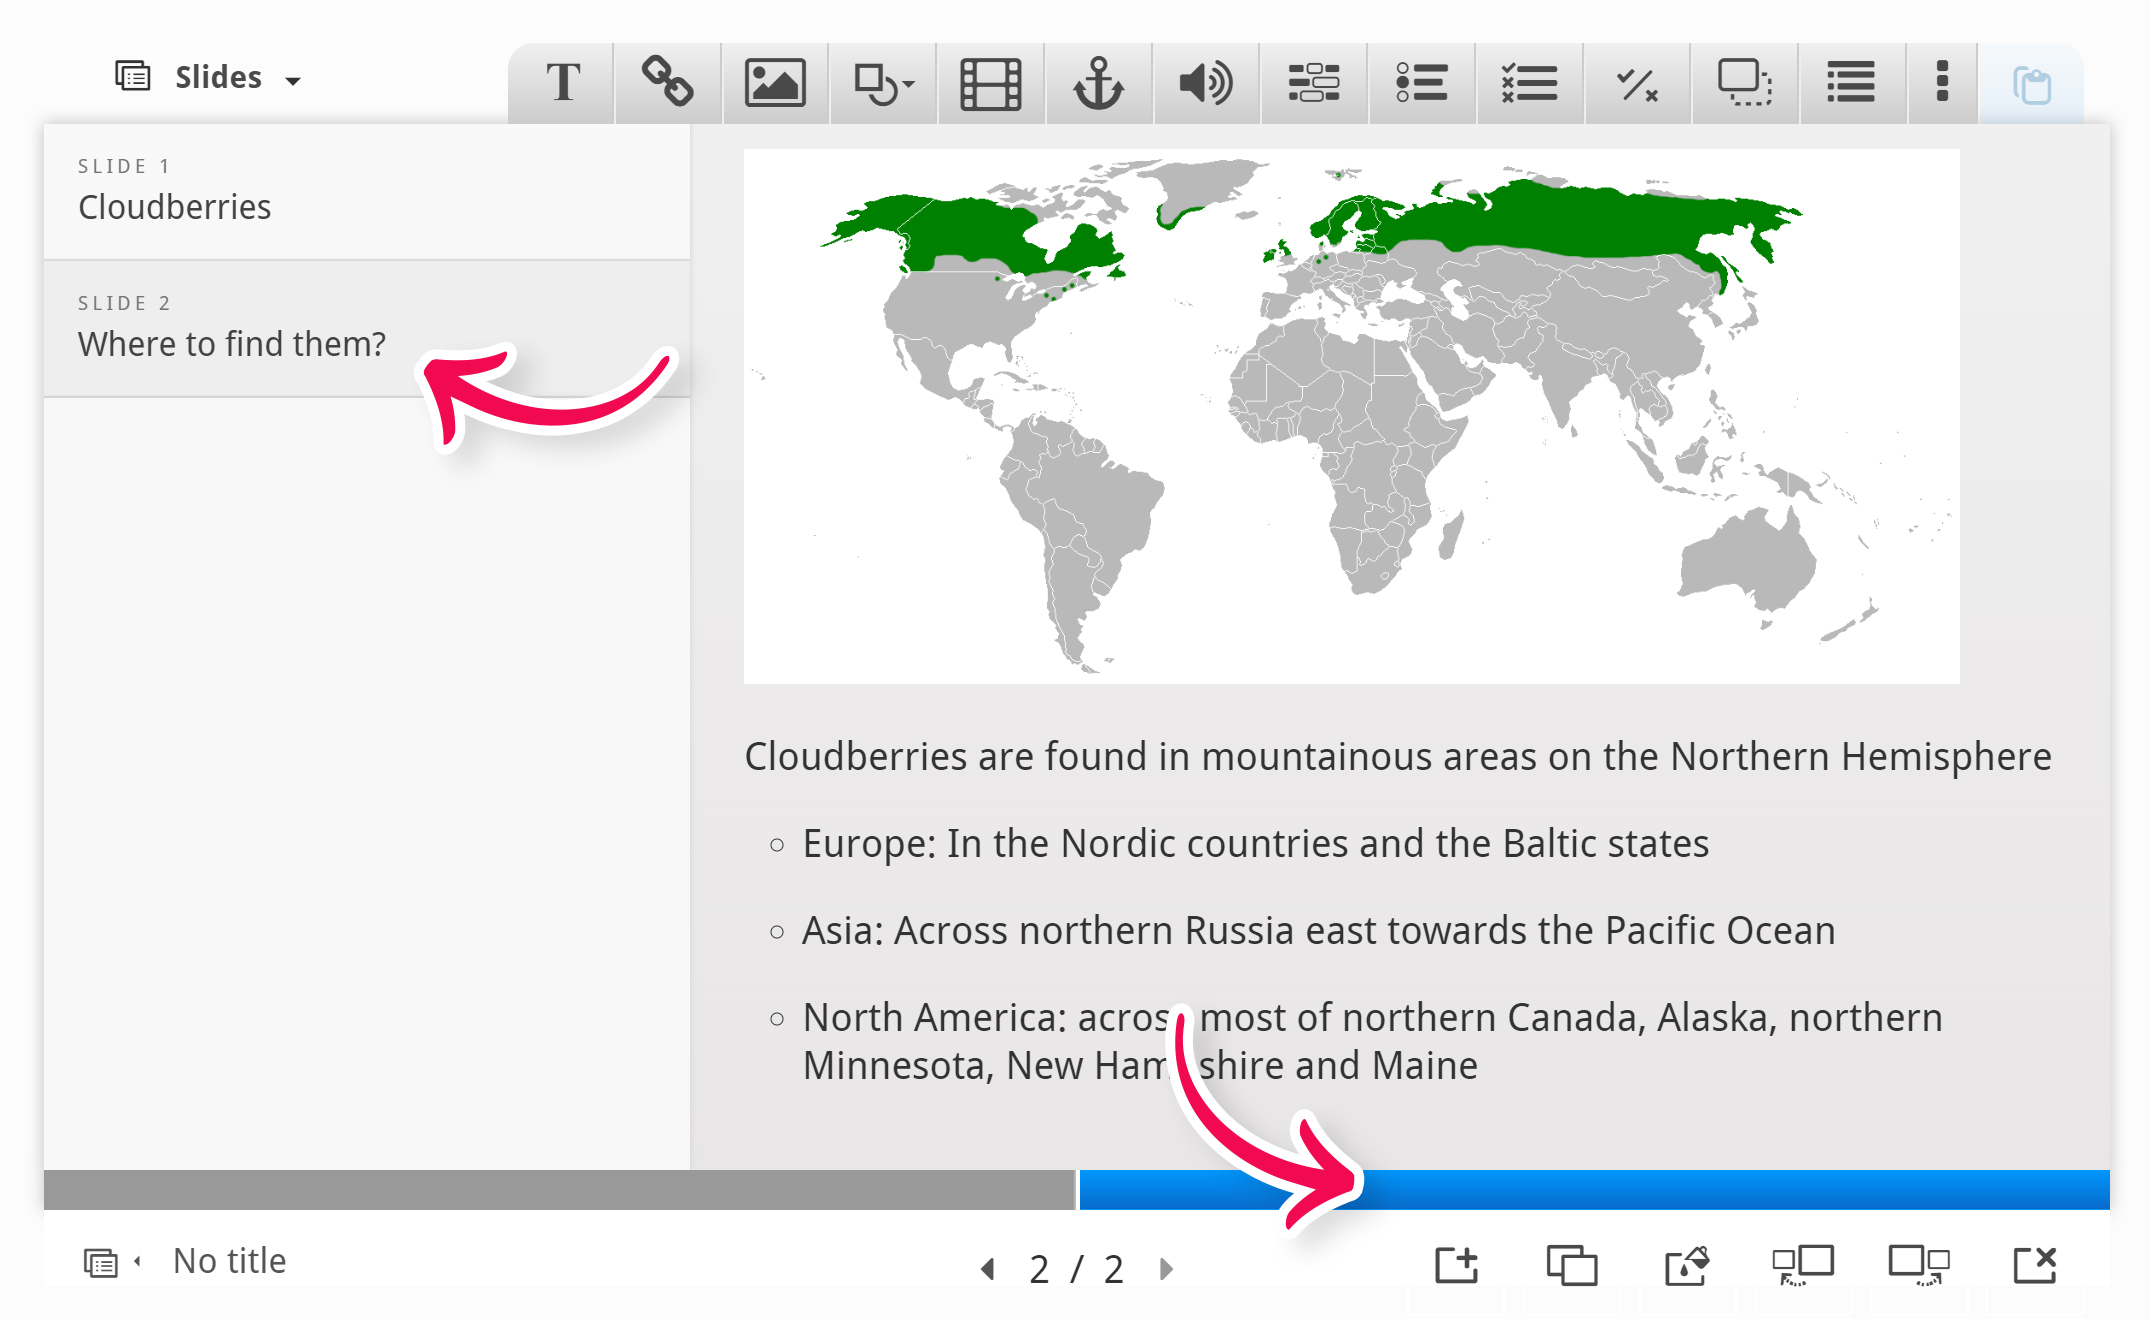
Cloudberries are found in mountainous areas on the Northern Hemisphere
- Europe: In the Nordic countries and the Baltic states
- Asia: Across northern Russia east towards the Pacific Ocean
- North America: across most of northern Canada, Alaska, northern Minnesota, New Hampshire and Maine
As on slide 1, use the Text tool ![]() to add a text box to the slide. Once you have dropped the text box, a dialog will appear. Insert the text above in the Edit text dialog:
to add a text box to the slide. Once you have dropped the text box, a dialog will appear. Insert the text above in the Edit text dialog:
You can navigate between slides by pressing the slide titles in the slides panel or by using the navigation bar.
Step 6: Slide 3
Press the button to add the third slide. Slide 3 will describe various uses of the cloudberry. Add the slide title Uses in the slides panel.
Again, we'll use text and images to deliver our message. In addition, we'll add a link to a website where the learner can find recipes using cloudberries.
Here are the links to the Wikimedia Commons pictures we'll use:
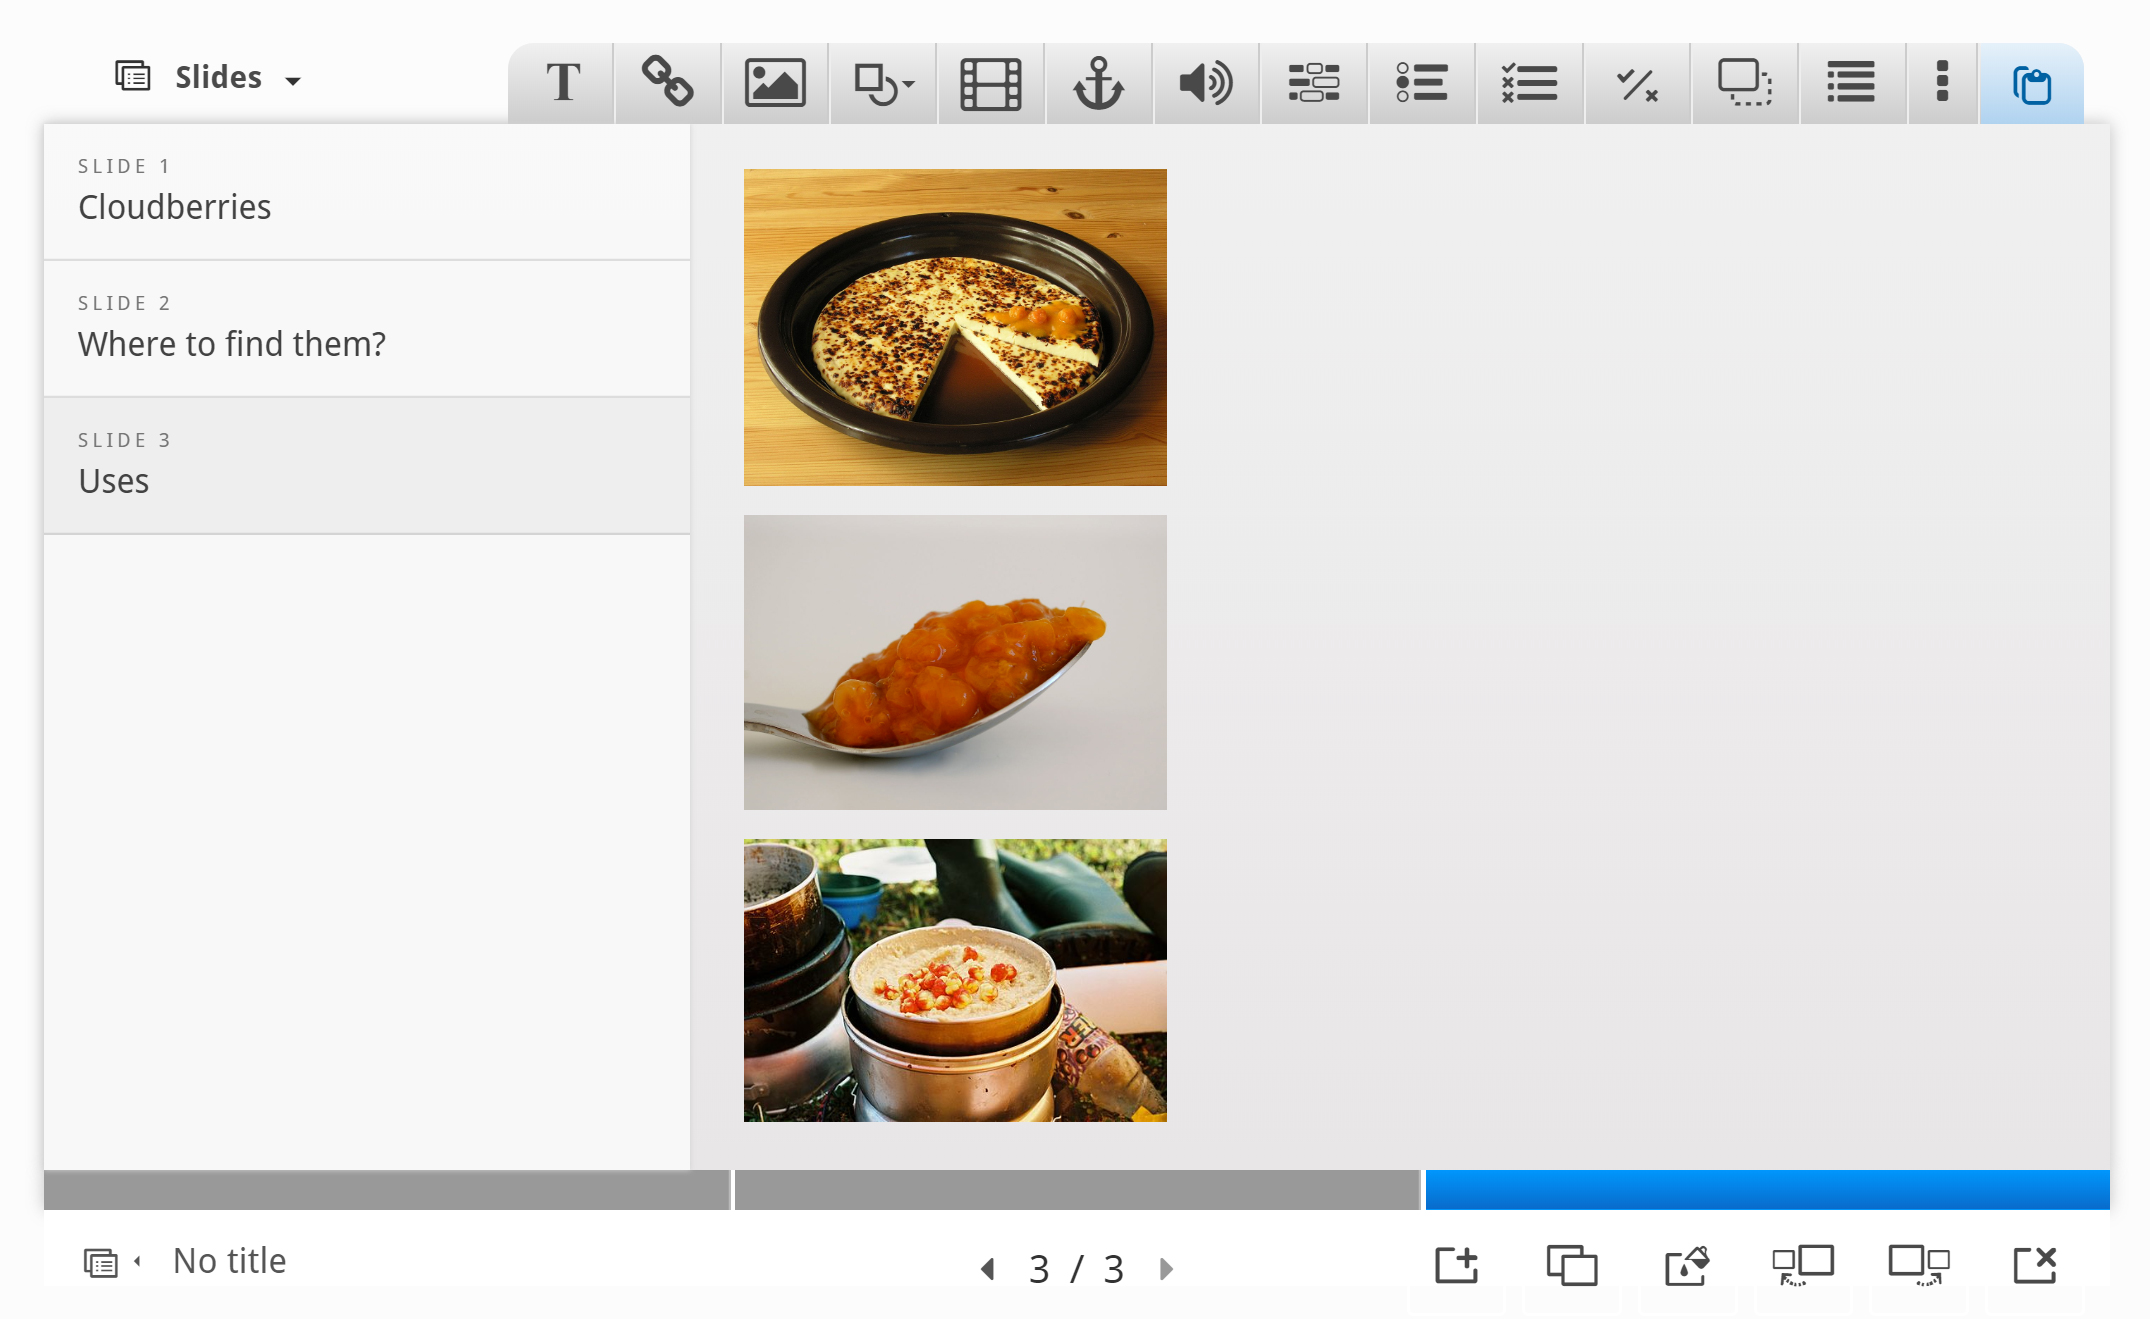
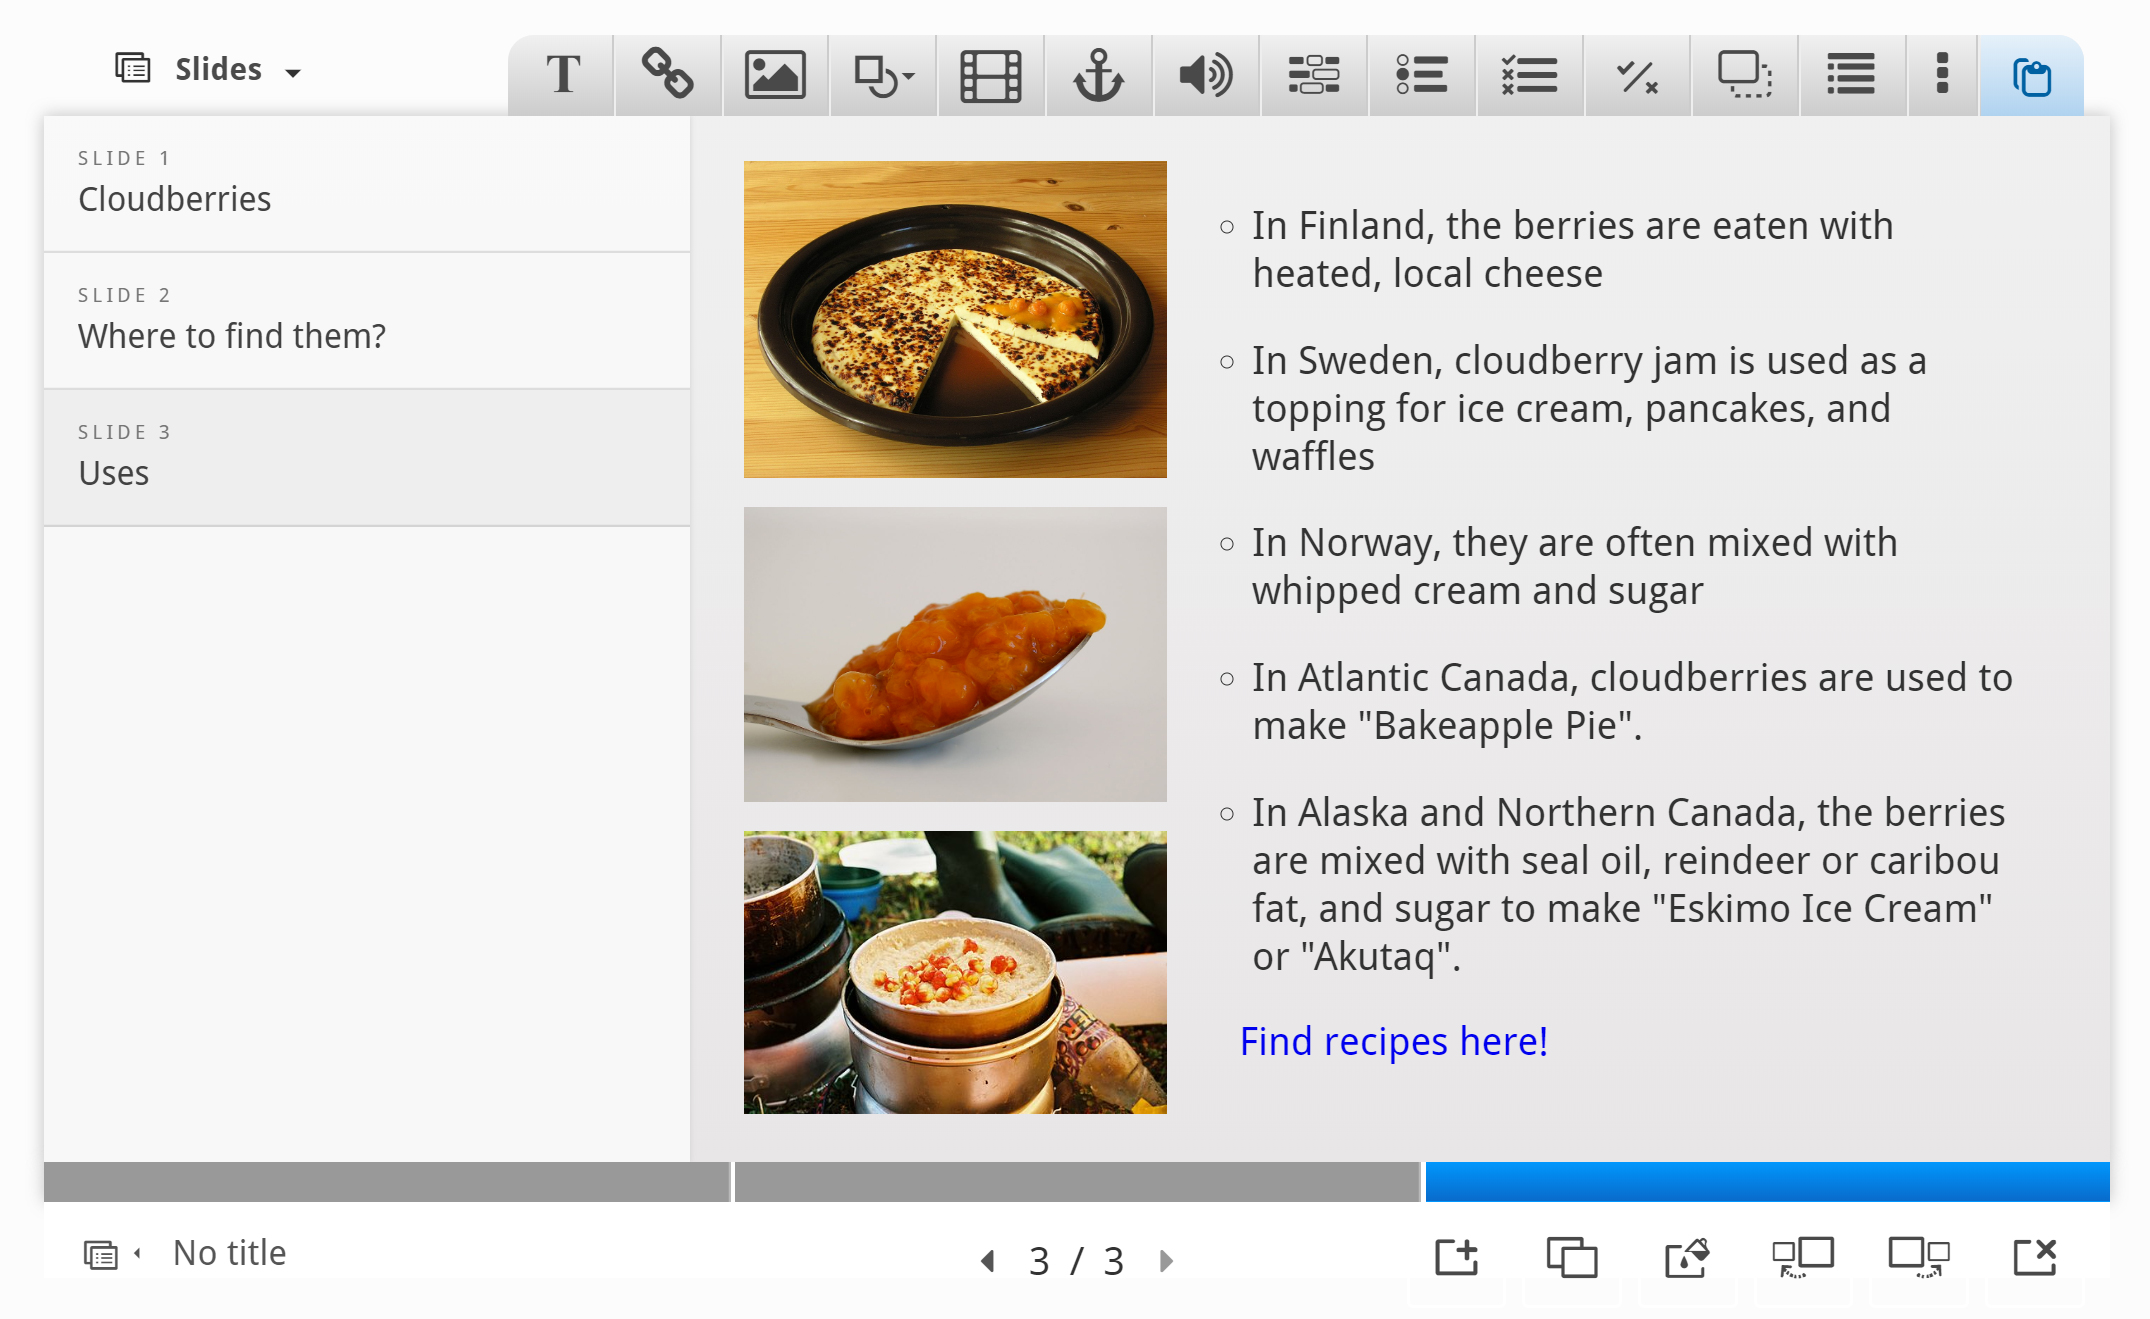
We add the pictures by using the ![]() button in the top toolbar. As on slide 1, we'll place the pictures in a column on the left side of the slide. Insert the three pictures, add the appropriate license information, place and resize them so you have something like this:
button in the top toolbar. As on slide 1, we'll place the pictures in a column on the left side of the slide. Insert the three pictures, add the appropriate license information, place and resize them so you have something like this:
The text we'll use, is again paraphrased from the Wikipedia article:
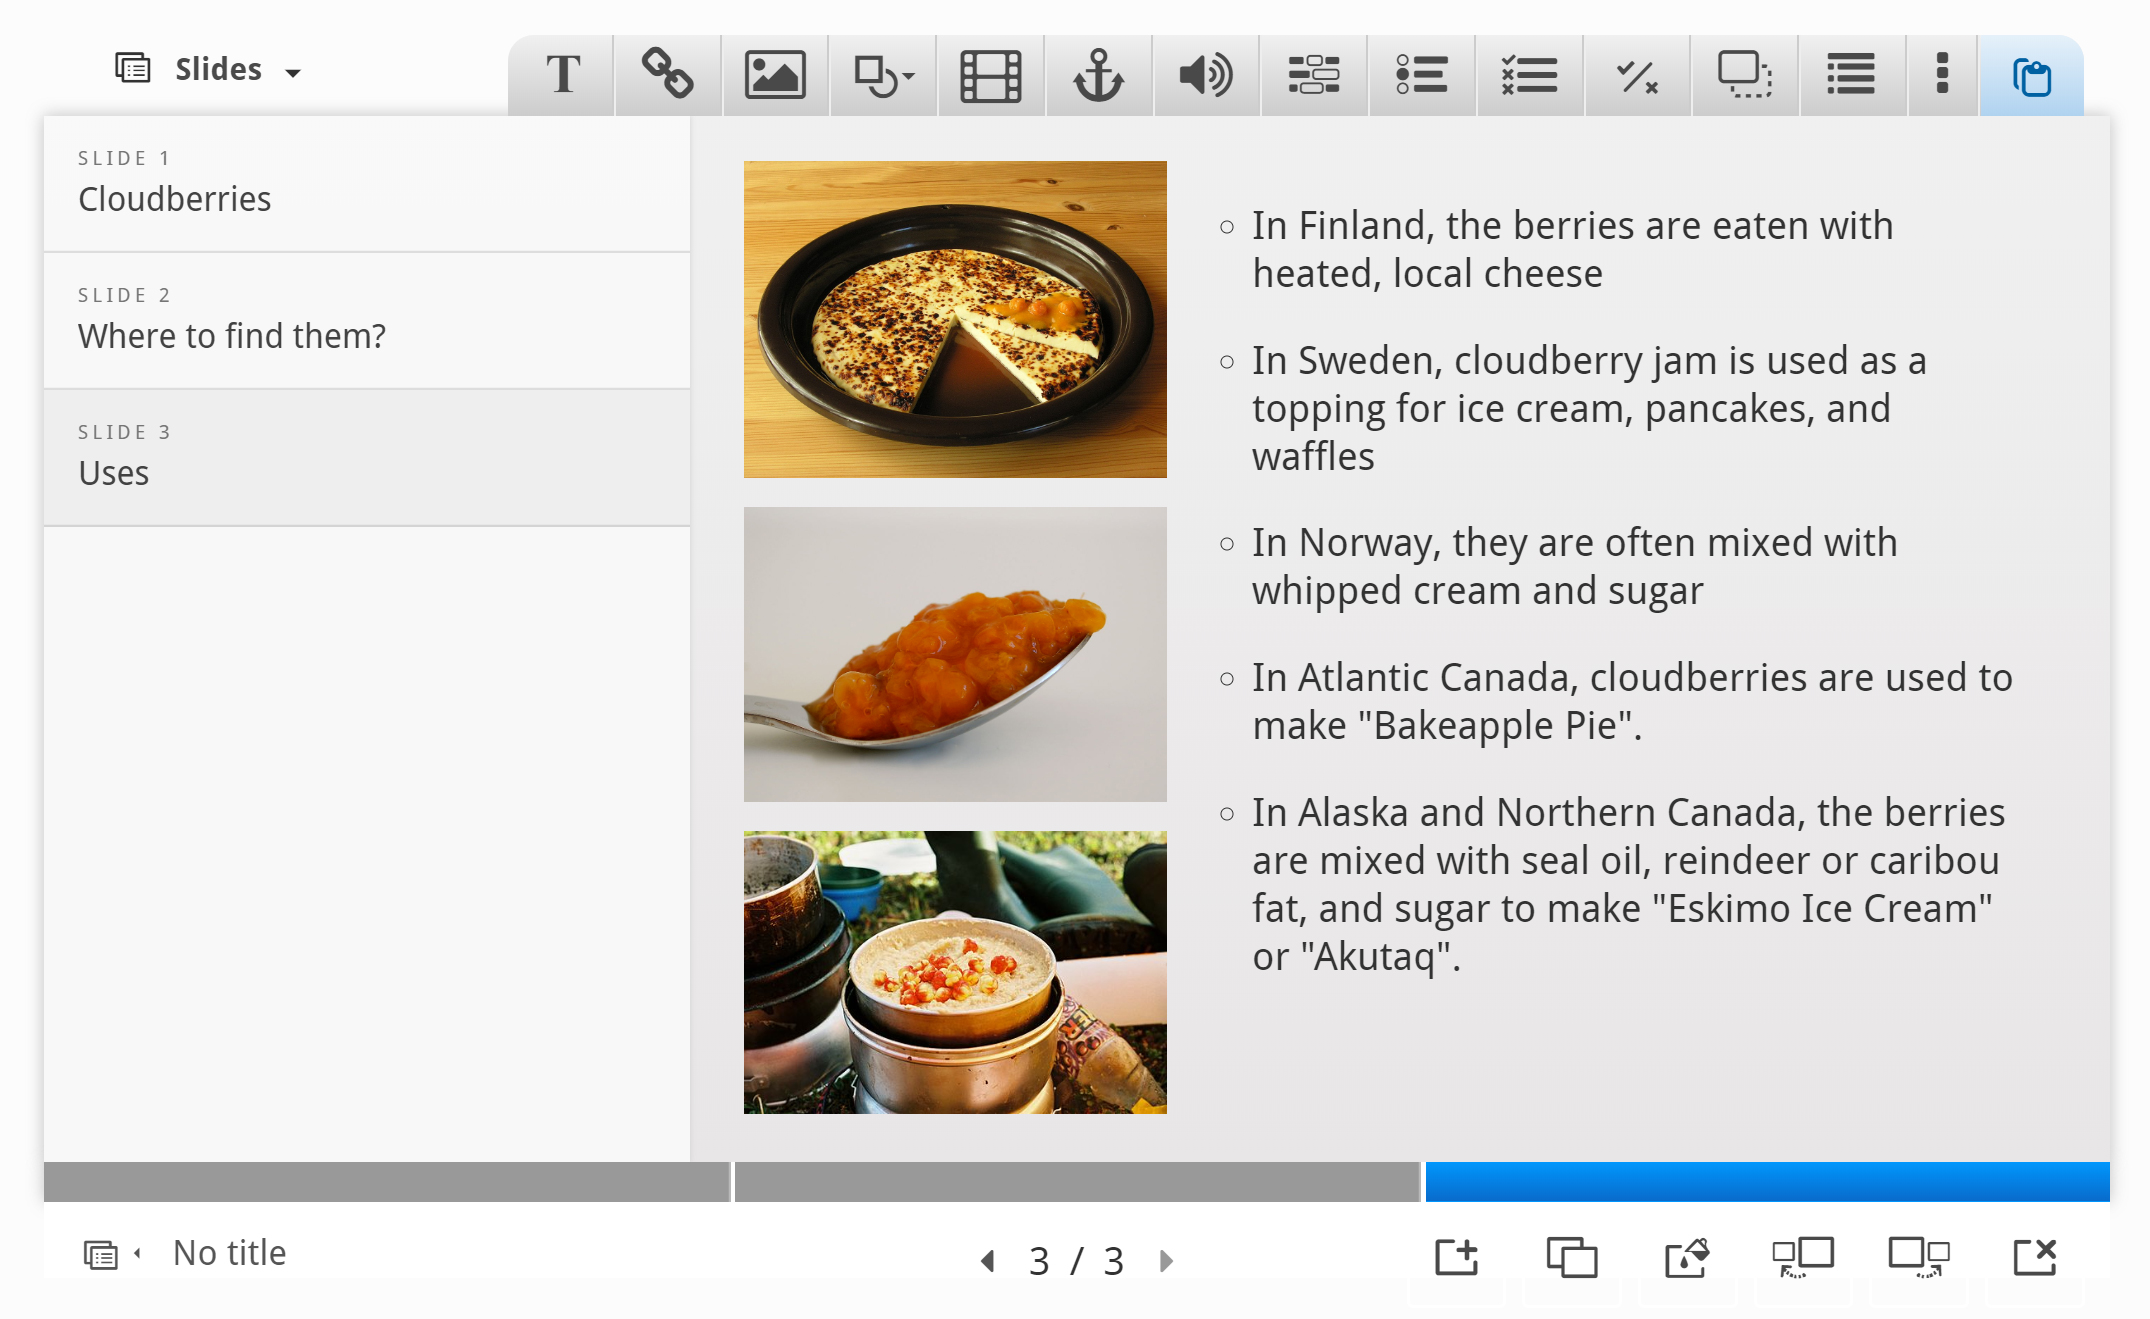
- In Finland, the berries are eaten with heated, local cheese
- In Sweden, cloudberry jam is used as a topping for ice cream, pancakes, and waffles
- In Norway, they are often mixed with whipped cream and sugar
- In Atlantic Canada, cloudberries are used to make "Bakeapple Pie".
- In Alaska and Northern Canada, the berries are mixed with seal oil, reindeer or caribou fat, and sugar to make "Eskimo Ice Cream" or "Akutaq".
Use the Text tool ![]() to add a block of text to the slide. Once you have dropped the text box, a dialog will appear. Insert the text above in the Edit text dialog. Press Done when you're finished. You should now have something like this:
to add a block of text to the slide. Once you have dropped the text box, a dialog will appear. Insert the text above in the Edit text dialog. Press Done when you're finished. You should now have something like this:
Finally, we'll add a link. Use the ![]() button on the toolbar and place the link onto the slide.
button on the toolbar and place the link onto the slide.
We can find a selection of Cloudberry desserts on yummly.com. Here's the URL: http://www.yummly.com/recipes/cloudberry-dessert
Use the link text Cloudberry dessert recipes.
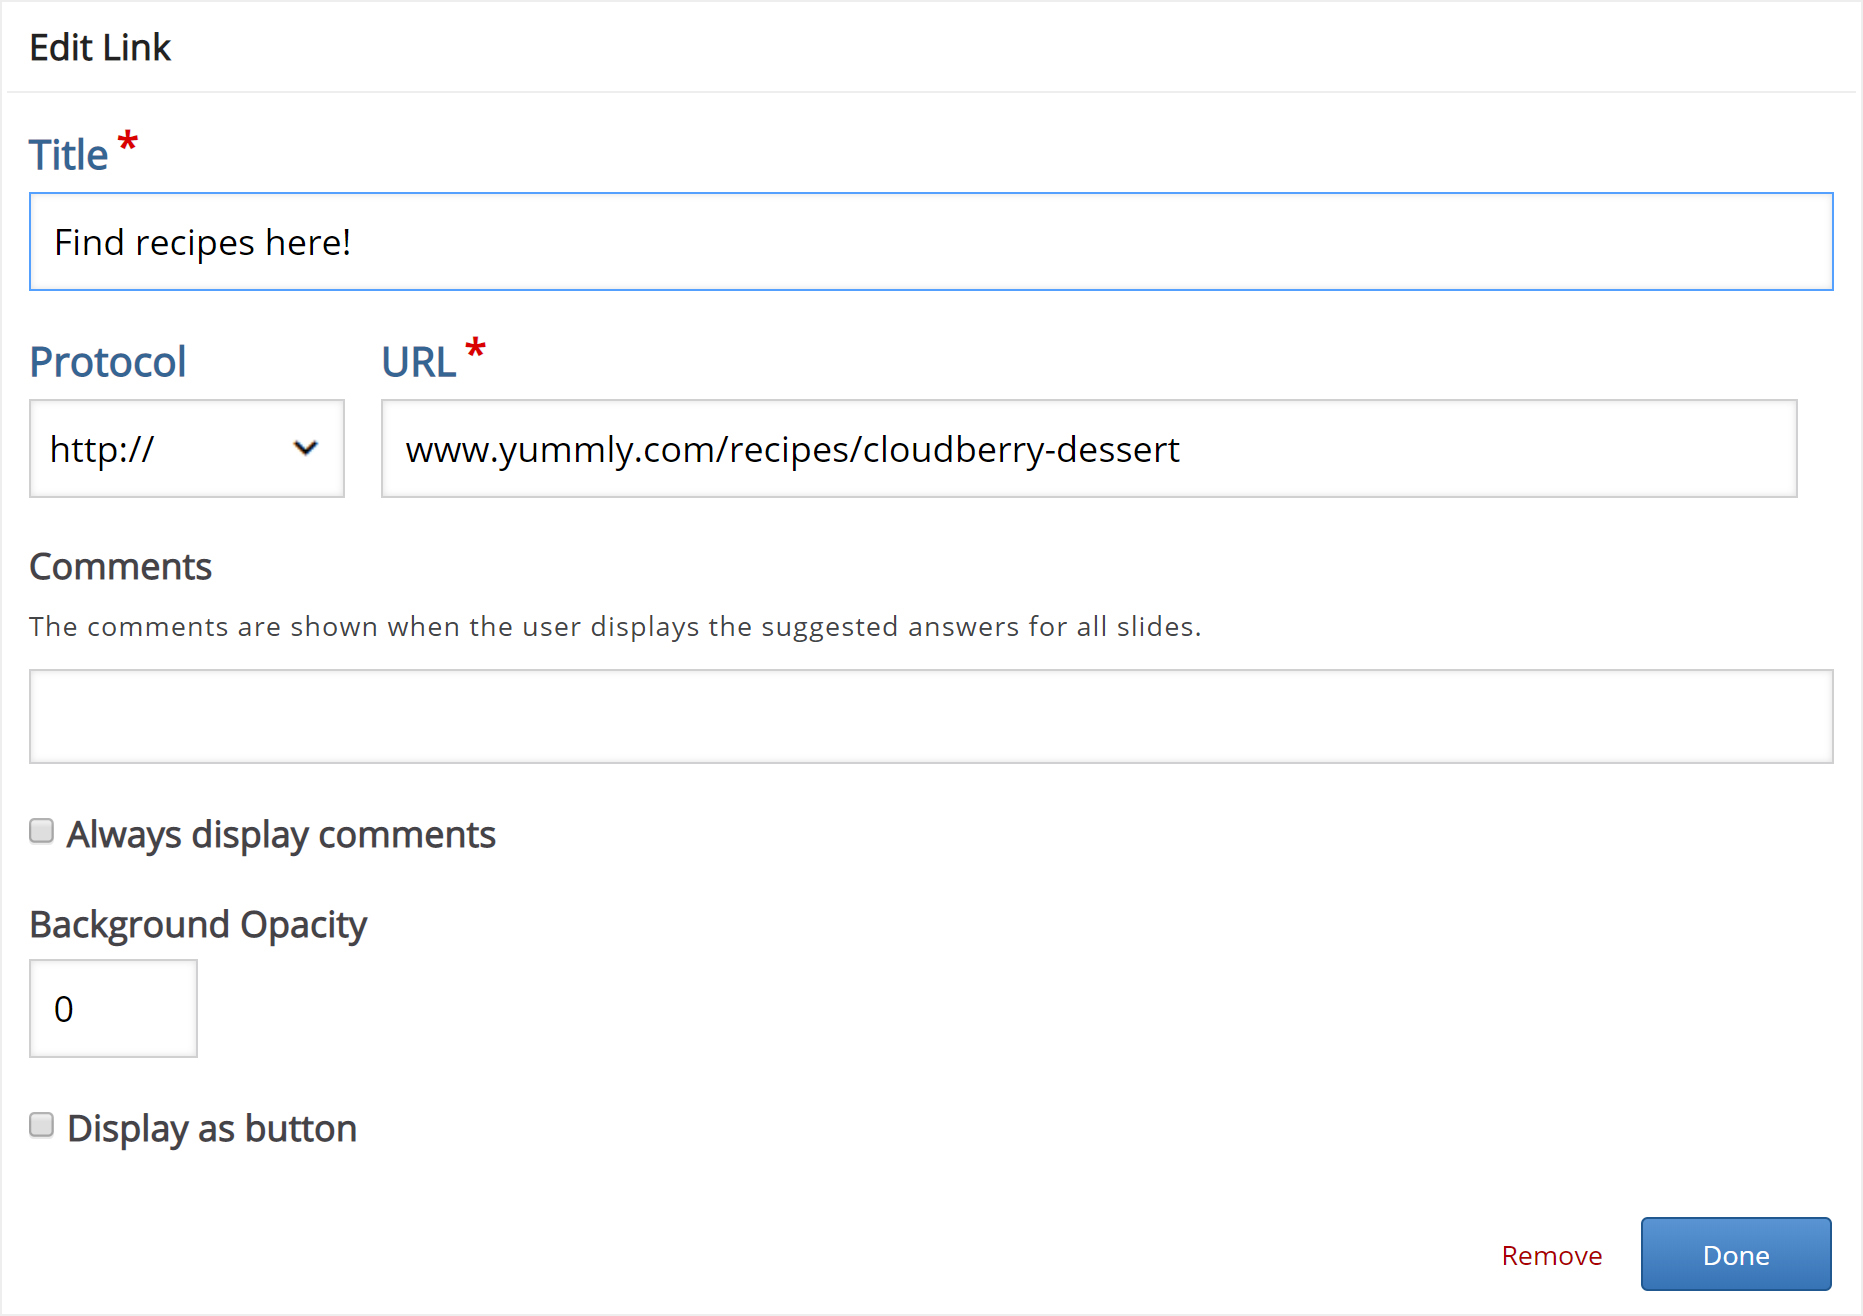
Press Done. then resize and place the link box so you have something like this:
We're now finished with slide 3. Finally, we'll add a Summary to finish the Course presentation.
Step 7: Slide 4
Press the button to add a fourth and final slide. Add the slide title Summary in the slides panel.
The Summary will allow the learner to make an interactive summary of the most important aspects of the previous three slides.
On the toolbar, press the ![]() button and drag a summary onto the slide. Creating a Summary is covered in this tutorial.
button and drag a summary onto the slide. Creating a Summary is covered in this tutorial.
Once you have dropped the Summary, the editor will appear.
Now we'll add statements to the Summary. Press the Add statements button to add two more statement groups.
In the Summary editor, the top statement in a statement group is always the correct one.
Introduction text:
Choose the correct statement about Cloudberries.
Statement group 1:
- Cloudberries are similar in shape and size to raspberries and blackberries.
- Cloudberries are similar in shape and size to blueberries and redcurrants.
- Cloudberries are similar in shape and size to strawberries.
Statement group 2:
- Cloudberries are found in the Northern Hemisphere.
- Cloudberries are found in the Southern Hemisphere.
Statement group 3:
- In Atlantic Canada, cloudberries are often used to make "Bakeapple pie".
- In Atlantic Canada, cloudberries are mainly eaten with a heated local cheese.
- In Atlantic Canada, cloudberries are mainly eaten with a heated local cheese.
Press Done when you have added the statements. Then position and resize the Summary so you'll have something like this:

Step 8: Finishing up
At the bottom of the editor, you'll find the Enable show solution buttons option. In this context, the option does not have any effect.
Save the node/article to view your finished Course presentation.
You should now have the same result as the example on top of the page.
Feel free to leave any comments or suggestions on how to improve this tutorial.
Comments
deniscyriac
Fri, 11/21/2014 - 12:02
Permalink
Great Job Guys
Hello... Really awesome tool. Appericate your great effort.
I noticed few more features would make this tool unbeatable.
1. Interlink between slides - by adding a button and give slide numbers to go
2. Screen size settings
3. To add few js effects like slidein, fade etc. for text and graphics in the presentation
4. Add content type like Image hotspot, timeline, iframe embedder, picture slider etc. to presentation
Thanks....
Luisa ximena Barrera
Sat, 07/20/2024 - 23:18
Permalink
Luisa
Es una herramienta que permite desarrollar didacticas interactivas donde los estudiantes pueden tener infinitas posibilidades de conectar con el aprendizaje. Es importante sabercomo entrar a la plataforma desde un usuario diferente al moodle de la universidad.
falcon
Mon, 11/24/2014 - 15:32
Permalink
Thanks you for the feedback!
Thanks you for the feedback!
#1 is coming up. The other three are noted. I can atleast promise that there will be some new content types soon. I don't know about #2 and #3, but they are good ideas!
TAGMOUTI
Mon, 06/24/2019 - 16:07
Permalink
Répondre à des QCM sur le même slide
Bonjour, Svp, comment faire pour mettre des QCM à y répondre sur le même slide, comme montre l'exemple, cloudberries task 1
BV52
Tue, 06/25/2019 - 06:35
Permalink
Hi TAGMOUTI,What was used
Hi TAGMOUTI,
What was used there was a Single Choice Set. There is no option to add multiple MCQs.
-BV52
H
Sun, 02/22/2015 - 01:12
Permalink
How about importing PPT presentations?
Hi,
Just wondering if you can import existing powerpoint presentations in this module?
HG
falcon
Mon, 02/23/2015 - 09:17
Permalink
That currently isn't possible
eyes of power i...
Sat, 01/21/2017 - 13:13
Permalink
PPT
It would be very helpful if this could be added to your road map since many of us already have -elearning courses in ppt and would love to use the tools to enhance rather re-create the entire course from stratch.
larstuff
Tue, 03/14/2017 - 17:52
Permalink
H5P - PPT content in presentation
Hi. I think You have a very good idea here. There is an option to export slides as pictures in powerpoint.
This can be done in a variety of ways.
I tried Out the 2J Slideshow, and H5P presentation. A Wordpress page can be composed, where the powerpoint slideshow (made into images in a folder on my PC, and imported to the slideshow in WordPress, and they all turn up in order. There is just some adjustments in the components to do, and then You can copy the shortcode and insert it directly into a new WP page.
Now below this slideshow I added the H5P presentation content (also via shortcode). The excercises reside in this component, as H5P content. So the students can now view the slideshow on top of the page, and do excercises in the H5P presentation below. They can view the slideshow at their own individual pace, and also go back and study more if they need while they are doing exercises in the H5P component. Very nice.
Have a nice day, and thanks for an eccellent idea.
Lars Tuff
thomasmars
Wed, 03/15/2017 - 09:01
Permalink
Thanks Lars for the detailed
Thanks Lars for the detailed descrition on how you can accomplish this with PowerPoint, I'm sure this is useful for a lot of people! Perhaps we should dedicate a tutorial to this process so that it is easier for people to find out how to do this. Let me know if you or someone else would be interested in creating some documentation or a tutorial for this :)
eyes of power i...
Sat, 01/21/2017 - 13:15
Permalink
Blessing
How awesome would that be. I currently have a full -e-learning course in ppt and I just would like to enhance it with H5P tools instead of having to re-create the entire course from stratch.
This is really a struggle for me
falcon
Mon, 01/23/2017 - 10:04
Permalink
Thank you for the feedback.
Thank you for the feedback. Will keep track of technologies compatible with H5P's vision that is able to handle PowerPoint files, and also urge people in the community that is interested in this to work together to find a solution.
Thanks again.
dainn
Fri, 06/08/2018 - 22:23
Permalink
It works, BUT ...
You then have accessibility issues, especially if your slides contain text. The Alt text field could be used to counter this as long as the character limit is not exceeded by the text length.
A means to import a slide from PPT woudl be ideal (or even better having H5P as a valid export format for PPT). Without one of these options, you really would best be looking at rebuilding the content, unfortunately.
kazakanan
Mon, 07/23/2018 - 22:36
Permalink
Accessibility
Both accessibility and the ability to import existing PowerPoint slide decks are essential to US public/state funded schools. Converting slides to images is such a step back in terms of accessibility, and so many programs do import slides that it seems like it should be doable.
BV52
Tue, 07/24/2018 - 05:27
Permalink
Hi kazakanan,Thank you for
Hi kazakanan,
Thank you for the feedback. I suggest that you post this in the Feature Request forum. In order for your feature request to attract as much interest as possible make sure it follows the below guidelines:
It is clear from every perspective how the feature will work. We recommend describing the feature with one or more user stories, for instance “As an author I want it to be possible to pick between different effects for the check answer animation so that the learners will see a variety of effects and also I can adapt the effects to my target audience(I’ll be using pink unicorns which works really well for both my target audience which are 4 year old girls and venture capitalists)”
If the feature can be illustrated with images or videos it always helps
Make it clear what content types this is relevant for, and or if this is a new content type
Make sure you post the feature in the Feature Request forum.
-BV52
rahul331
Thu, 10/11/2018 - 10:23
Permalink
it would be great if we can
it would be great if we can upload powerpoint into the course presentation
Rahul
BV52
Fri, 10/12/2018 - 03:18
Permalink
Hi Rahul,There have been some
Hi Rahul,
There have been some requests related to this. Although I think no one has taken on the project. What is being done by some community members is to take a screenshot of the slide and upload it in Course Presentation.
-BV52
Lemming
Wed, 10/20/2021 - 16:07
Permalink
There is a tool for this
I've written a small tool (for windows) which can convert pptx files to h5p (by taking screenshots): https://github.com/MM-Lehmann/pptx2h5p/releases
hosais
Tue, 02/24/2015 - 20:09
Permalink
the depth of objects, undo, copy and paste
Supper cool resentation!
A quick question: to edit, can I change the depth of objects (which showed on the top of another object). Currently, the one who created first is in the back. Is possible to undo (just one action would be helpful)? How about copy and paste (objects)?
falcon
Wed, 02/25/2015 - 09:10
Permalink
Thanks! I agree with all your
debbernard
Mon, 03/09/2015 - 23:32
Permalink
Backgrounds
Hi, This might be a daft question but I cant seem to find an answer elsewhere... How do you change the background colour in a course presentation?
falcon
Tue, 03/10/2015 - 17:59
Permalink
Currently you'll have to do
Currently you'll have to do it with css. In Drupal you may use hook_h5p_styles_alter to add a css file to coursepresentations.
sumeshy54
Tue, 03/31/2015 - 15:43
Permalink
Font Color
How can I change the font color?
Also, my other queries are:
1. Copyediting - how would that happen within H5P. Can we highlight and comment on any part of the content as part of review.
2. Review - would 2 versions be present if post editing / review? Also can you please let us know about versioning management if we used H5P
Await your early response.
falcon
Tue, 04/07/2015 - 11:03
Permalink
I'm sorry for the late reply.
I'm sorry for the late reply. It's due to the eastern holidays.
It currently isn't possible to change font color. It will be in a future version.
1. H5P doesn't support this. It is probably possible to add a plugin to your website that makes this possible.
2. H5P supports versioning if the publishing platform supports it. In Drupal for instance you may create several version of an H5P and see the old versions and roll back to older versions.
yipeedog
Fri, 05/01/2015 - 22:21
Permalink
Embedding Video in Course Presentation
Does this have to be an upload? Standard embedding (e.g. from YouTube) does not seem to work.
I can't find this addressed anywhere. I looked through the tutorial, and all I find in the forum hints that it was to be implemented 2015.
I am not trying to do interactive videos. Just a simple embed of the video on a page.
Thank you!
falcon
Tue, 05/05/2015 - 18:28
Permalink
We support youtube embeds and
nbsdigital
Wed, 08/19/2015 - 07:47
Permalink
iframe in Presentation and Summary Slide
Thank you,
Paul
falcon
Tue, 08/25/2015 - 10:14
Permalink
I'm sorry you didn't get a
I'm sorry you didn't get a faster answer here. I've been away some days and only the forum was monitored while I was away.
duqtape
Mon, 10/12/2015 - 20:49
Permalink
Were you able to get the iframe for a particular slide working?
Hello.
I'm also interested in using an iframe on a particular slide and was wondering if you could help by sharing your method.
nbsdigital
Mon, 10/12/2015 - 23:28
Permalink
Reviewing iframe requirement
We are still reviewing this requirement for our project. If it is included and we impliment the feature, we will update this thread with our solution.
falcon
Tue, 10/13/2015 - 10:35
Permalink
By using Drupal's APIs you
elikin
Tue, 08/25/2015 - 18:00
Permalink
Editor
Is it possible to integerate WYSIWYG editor with H5P?
fnoks
Wed, 08/26/2015 - 07:51
Permalink
Are you thinking that is
Are you thinking that is should be possible to insert H5P inside a wysiwyg text? This is allready the way it is done on WordPress - which CMS are you using?
timothyjr
Thu, 10/22/2015 - 22:31
Permalink
Stack order of images
I'm not sure where to put this sort of help request, but I can't find a way to change the stack order of images. I'd like to add a background image after I've already added text. Is there a way to do this once I've already added text? In other slide editors, this is done by holding Ctrl and using the arrow keys, but that doesn't seem to be coded in here yet. Is there a way to do this?
Thanks!
falcon
Tue, 10/27/2015 - 19:54
Permalink
In the next release there
timothyjr
Fri, 10/30/2015 - 16:42
Permalink
Thanks!
Ok, thanks. I'll try the work-around. I still think this thing is pretty sweet!
falcon
Sat, 10/31/2015 - 00:54
Permalink
:)
Richard_elearns
Wed, 10/28/2015 - 15:25
Permalink
Optimum image dimensions if no key words list
What would your recommend as the optimum image size for 'Course Presentation' without a key words list?
Tracy Marshall
Fri, 01/08/2016 - 15:53
Permalink
How can I get an image to expand across an entire slide?
I'm working in a Course Presentation and and having difficulty finding how I can make my image span the entire slide, as yours does in your example on your website. Can you please direct me to where I can find that information? Thank you!
P.S. Just starting using H5P and love it so far!
Richard_elearns
Fri, 01/08/2016 - 17:04
Permalink
@Tracy
Hi Tracy
The only way is to size the image to fill the slide when you build it. The aspect ration is 1,9753:1 You need to bring the image in with the correct aspect ratio and after that you can drag it slightly bigger if you need to within the H5P with edit turned on..
H5P will automatically resize it for whatever device after that once it is published.
Does that help?
wgrasse
Thu, 01/21/2016 - 15:33
Permalink
Import Existing H5P Content into Presentation
Is there a way to import existing H5P content/exercises, etc., into a new Course Presentation? I worked on a couple of drag and drop exercises and an interactive video, but I don't want to have to re-create all the material when I develop a presentation. Is there a way of adding pre-existing content into the presentation?
falcon
Thu, 01/21/2016 - 19:38
Permalink
It will be possible to reuse
sandrad114
Mon, 03/27/2017 - 20:38
Permalink
Reusing slides
Hi. have you added a feature that lets you reuse content yet?
tomaj
Tue, 03/28/2017 - 07:54
Permalink
Can't reuse slides
Hi,
No that feature is not in place yet.
- Tom
Nuria
Wed, 07/18/2018 - 15:15
Permalink
Copying and pasting elements
Hi Falcon,
I'm trying to copy some content from one slide into another (within same course presentation) using Comand + C / Command + V (in a Mac) but it is not working.
I select the content and use the short keys but nothing comes up :/ Any ideas as to why this could be?
Thanks!
icc
Wed, 07/18/2018 - 16:43
Permalink
Did you try to use the Ctrl
Did you try to use the Ctrl key instead of Cmd?
Nuria
Wed, 07/18/2018 - 16:59
Permalink
Ah yes! it's working now!
Ah yes! it's working now! Thanks for the quick response! :-)
Richard_elearns
Mon, 02/22/2016 - 14:14
Permalink
Audio icon in single choice set within course presentation
Is it possible to remove the grey audio icon from a single choice question set within a course presentation? If so, how?
fnoks
Mon, 02/22/2016 - 15:55
Permalink
Single Choice Set has a
Single Choice Set has a checkbox named Enable sound effects. If you uncheck this, no sound will be played and the audio icon won't be displayed. Is this what you want?
Richard_elearns
Mon, 02/22/2016 - 17:57
Permalink
thanks
Thank you fnoks, very helpful. I was viewing that as a sound file rather than a sound effect. ;-)
Pages